
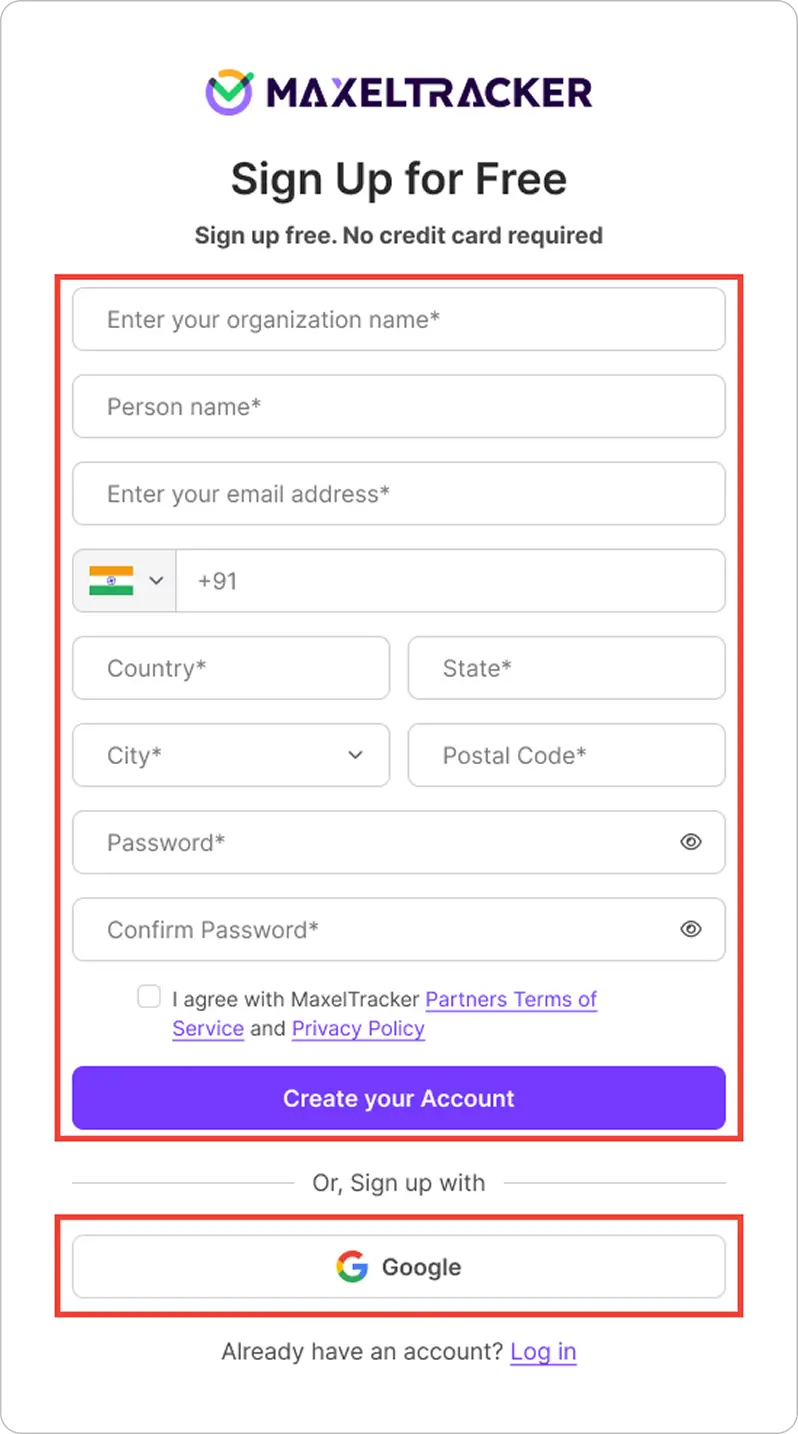
Once the account is successfully created, you will get the following notification to verify registered email.
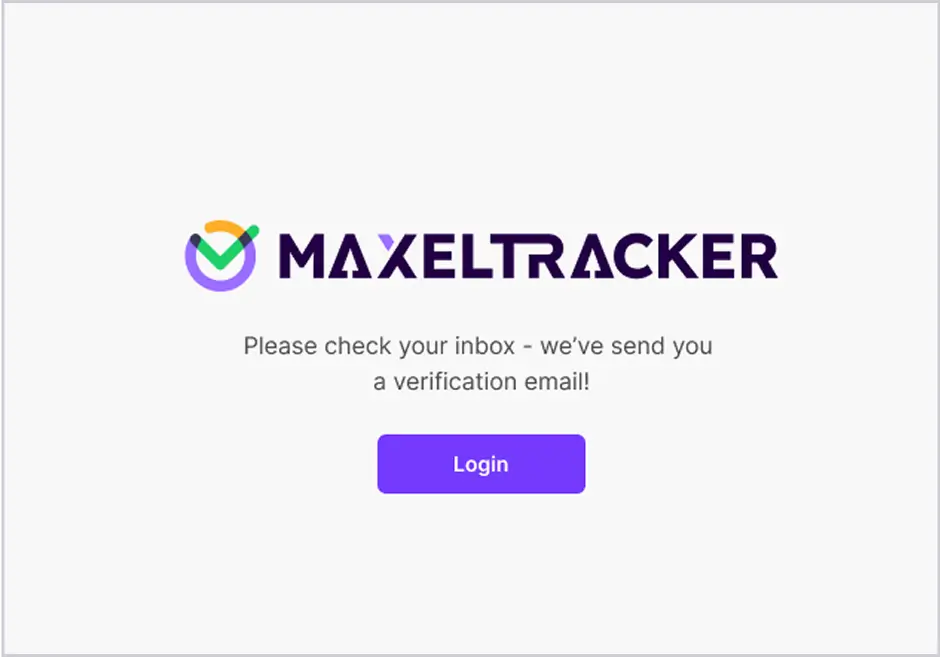
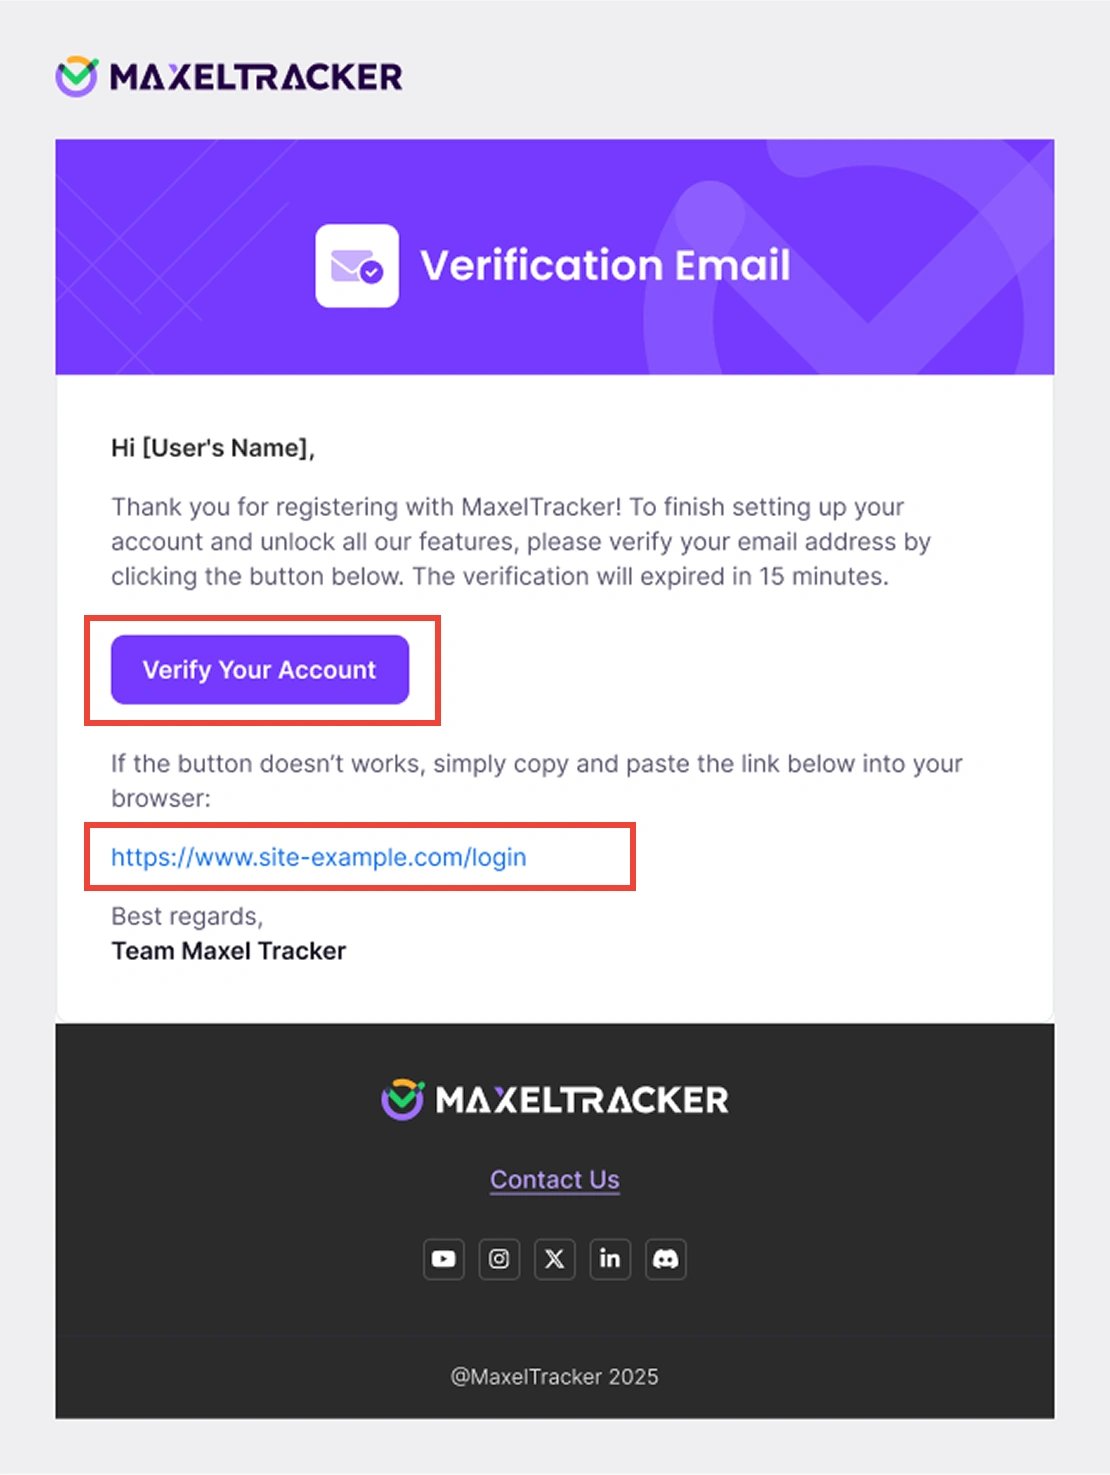
Check your email inbox for a verification link from MaxelTracker. Click the link to verify and activate your account.
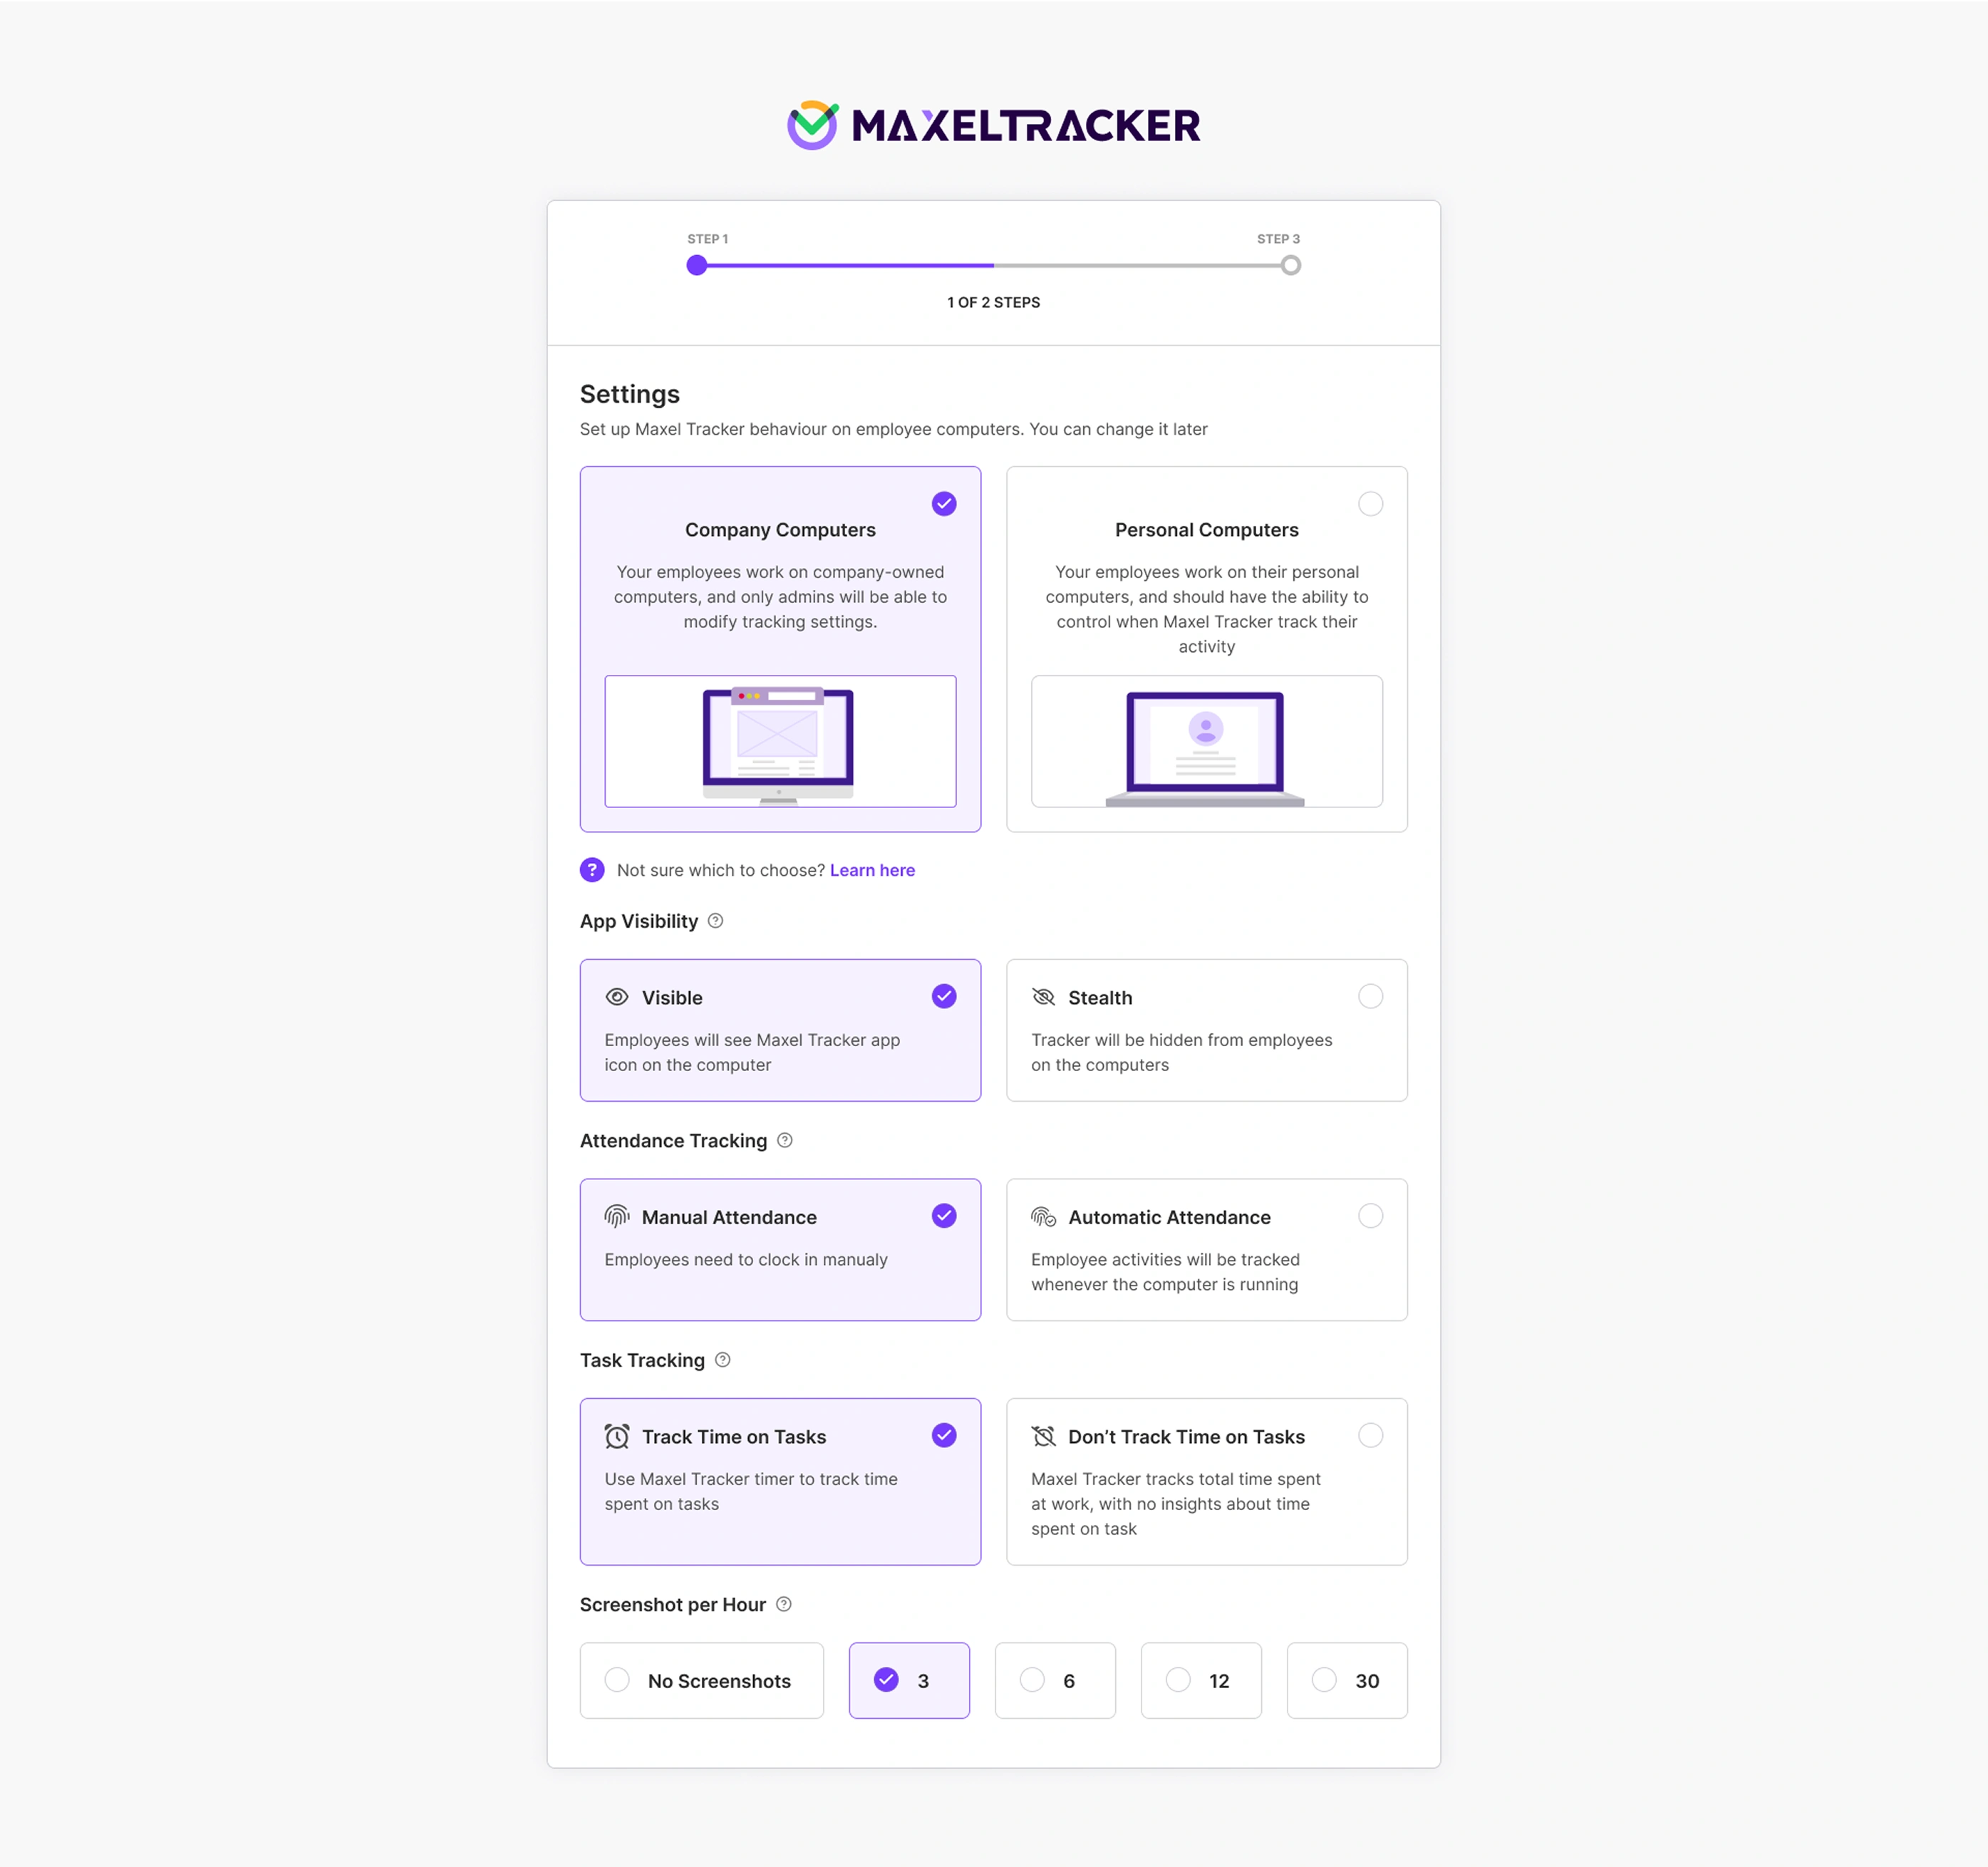
Once you are done with the settings click “Next”
If you want to add employees simply click “Add Employees” and proceed.
Note: You can skip this step as you can add employees from the dashboard as well.
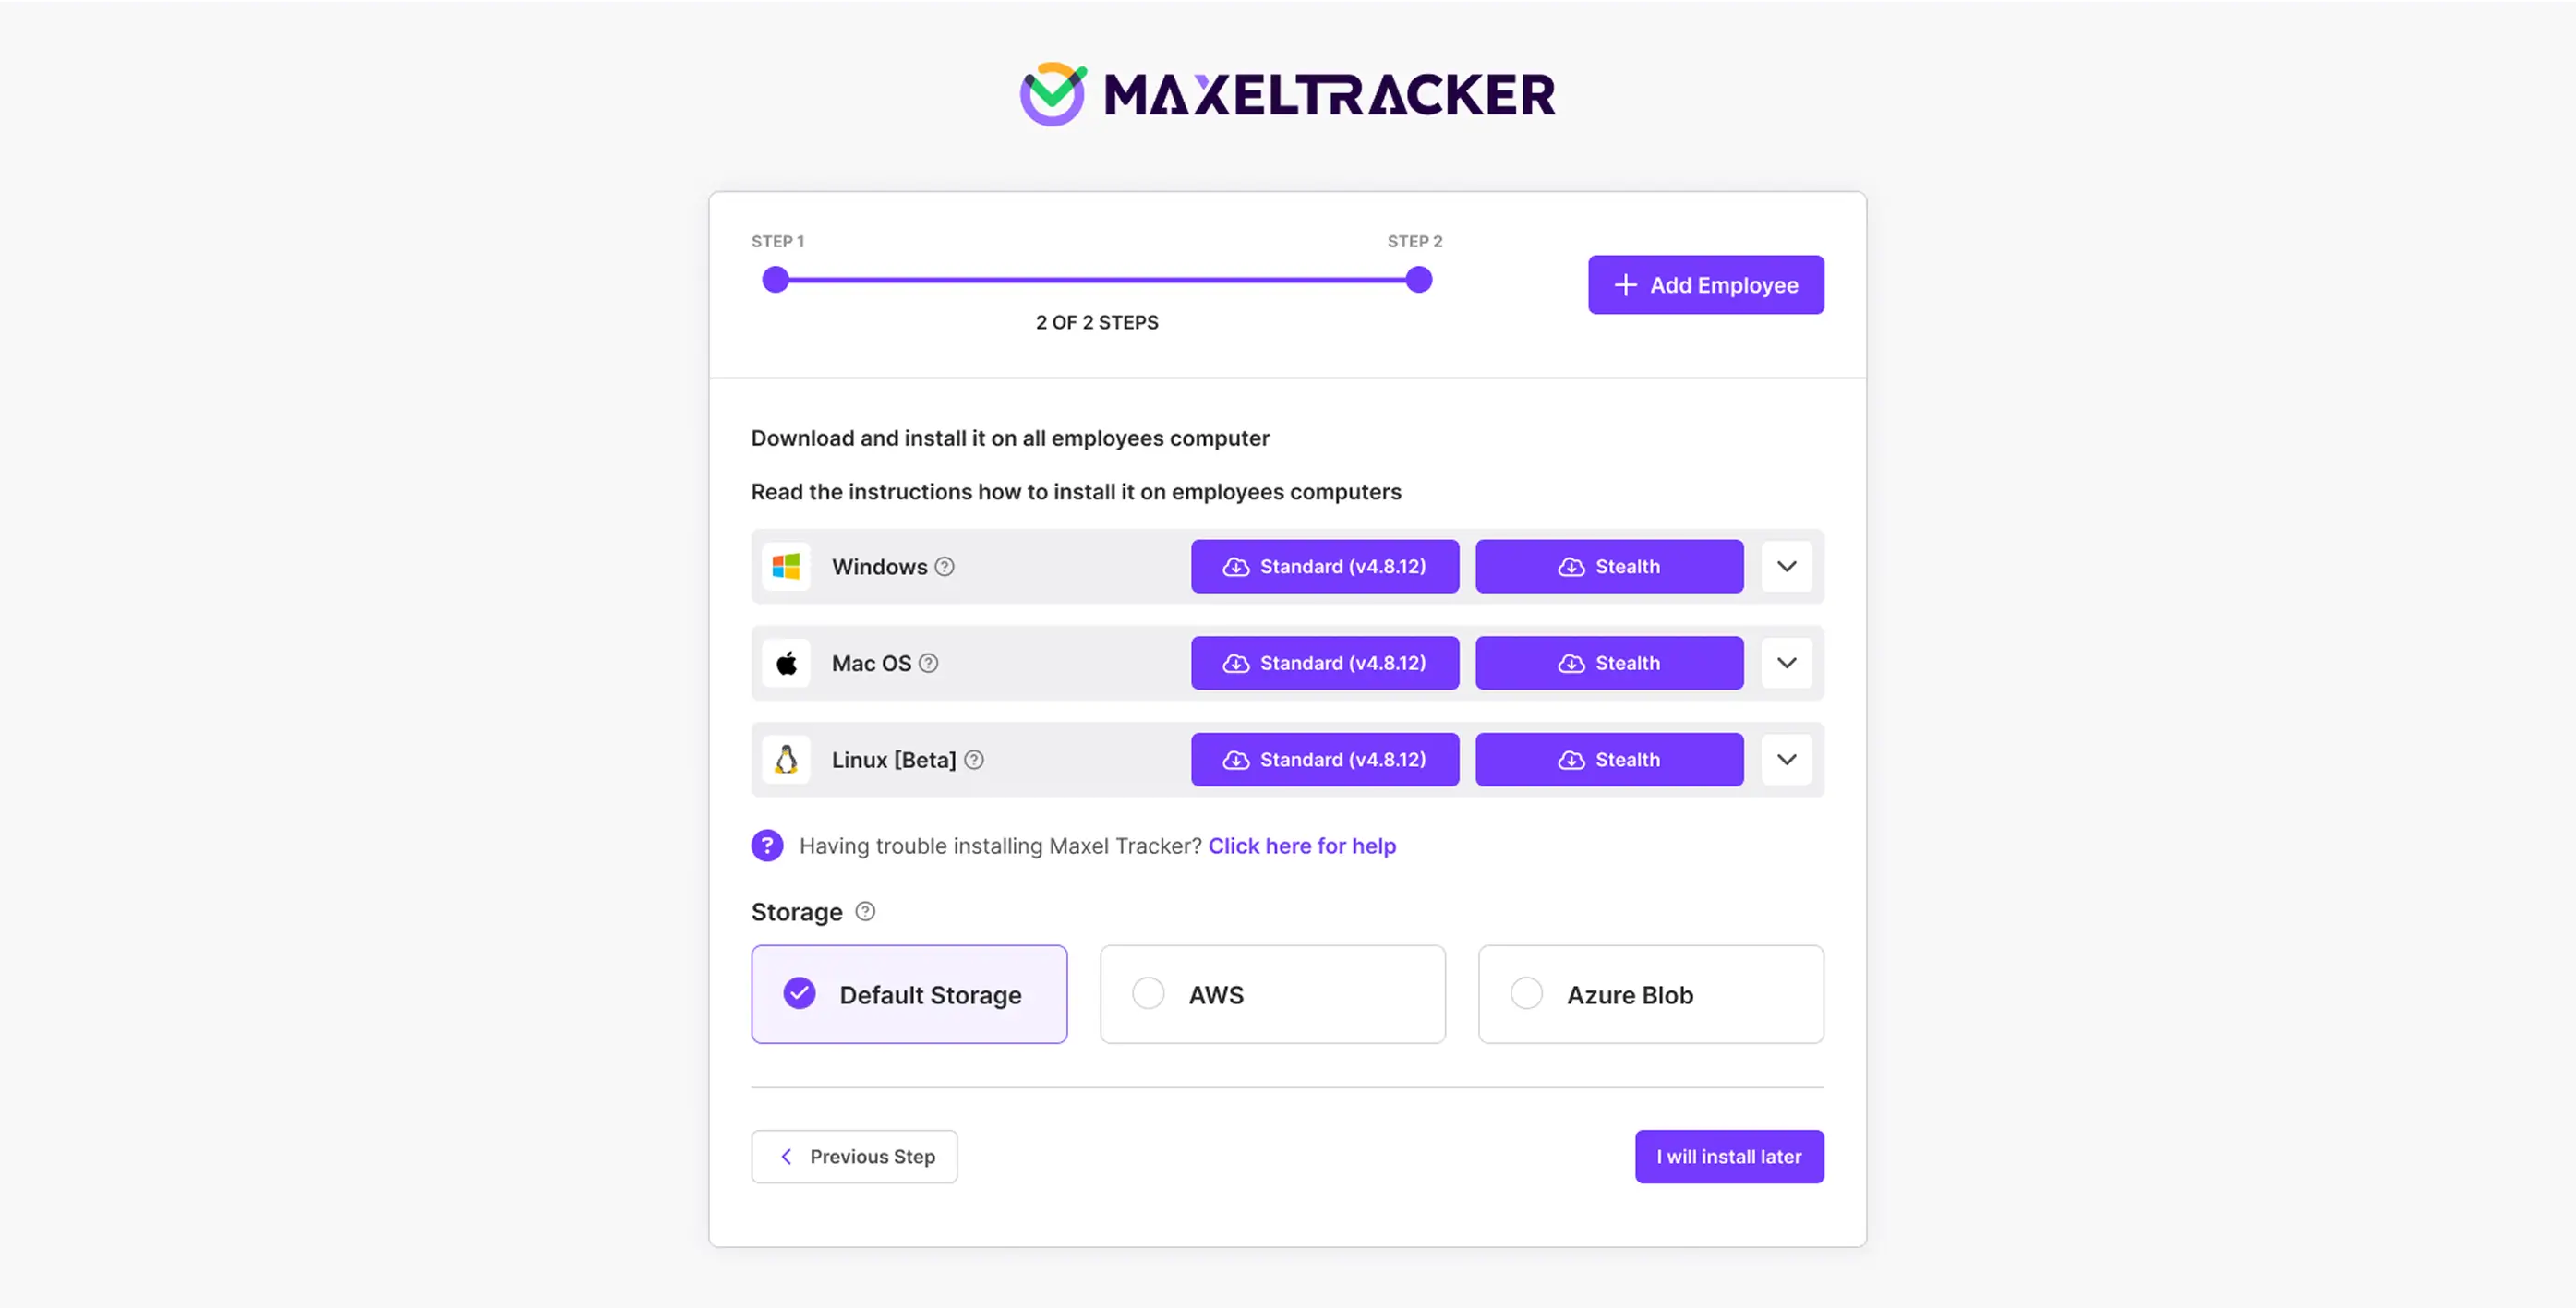
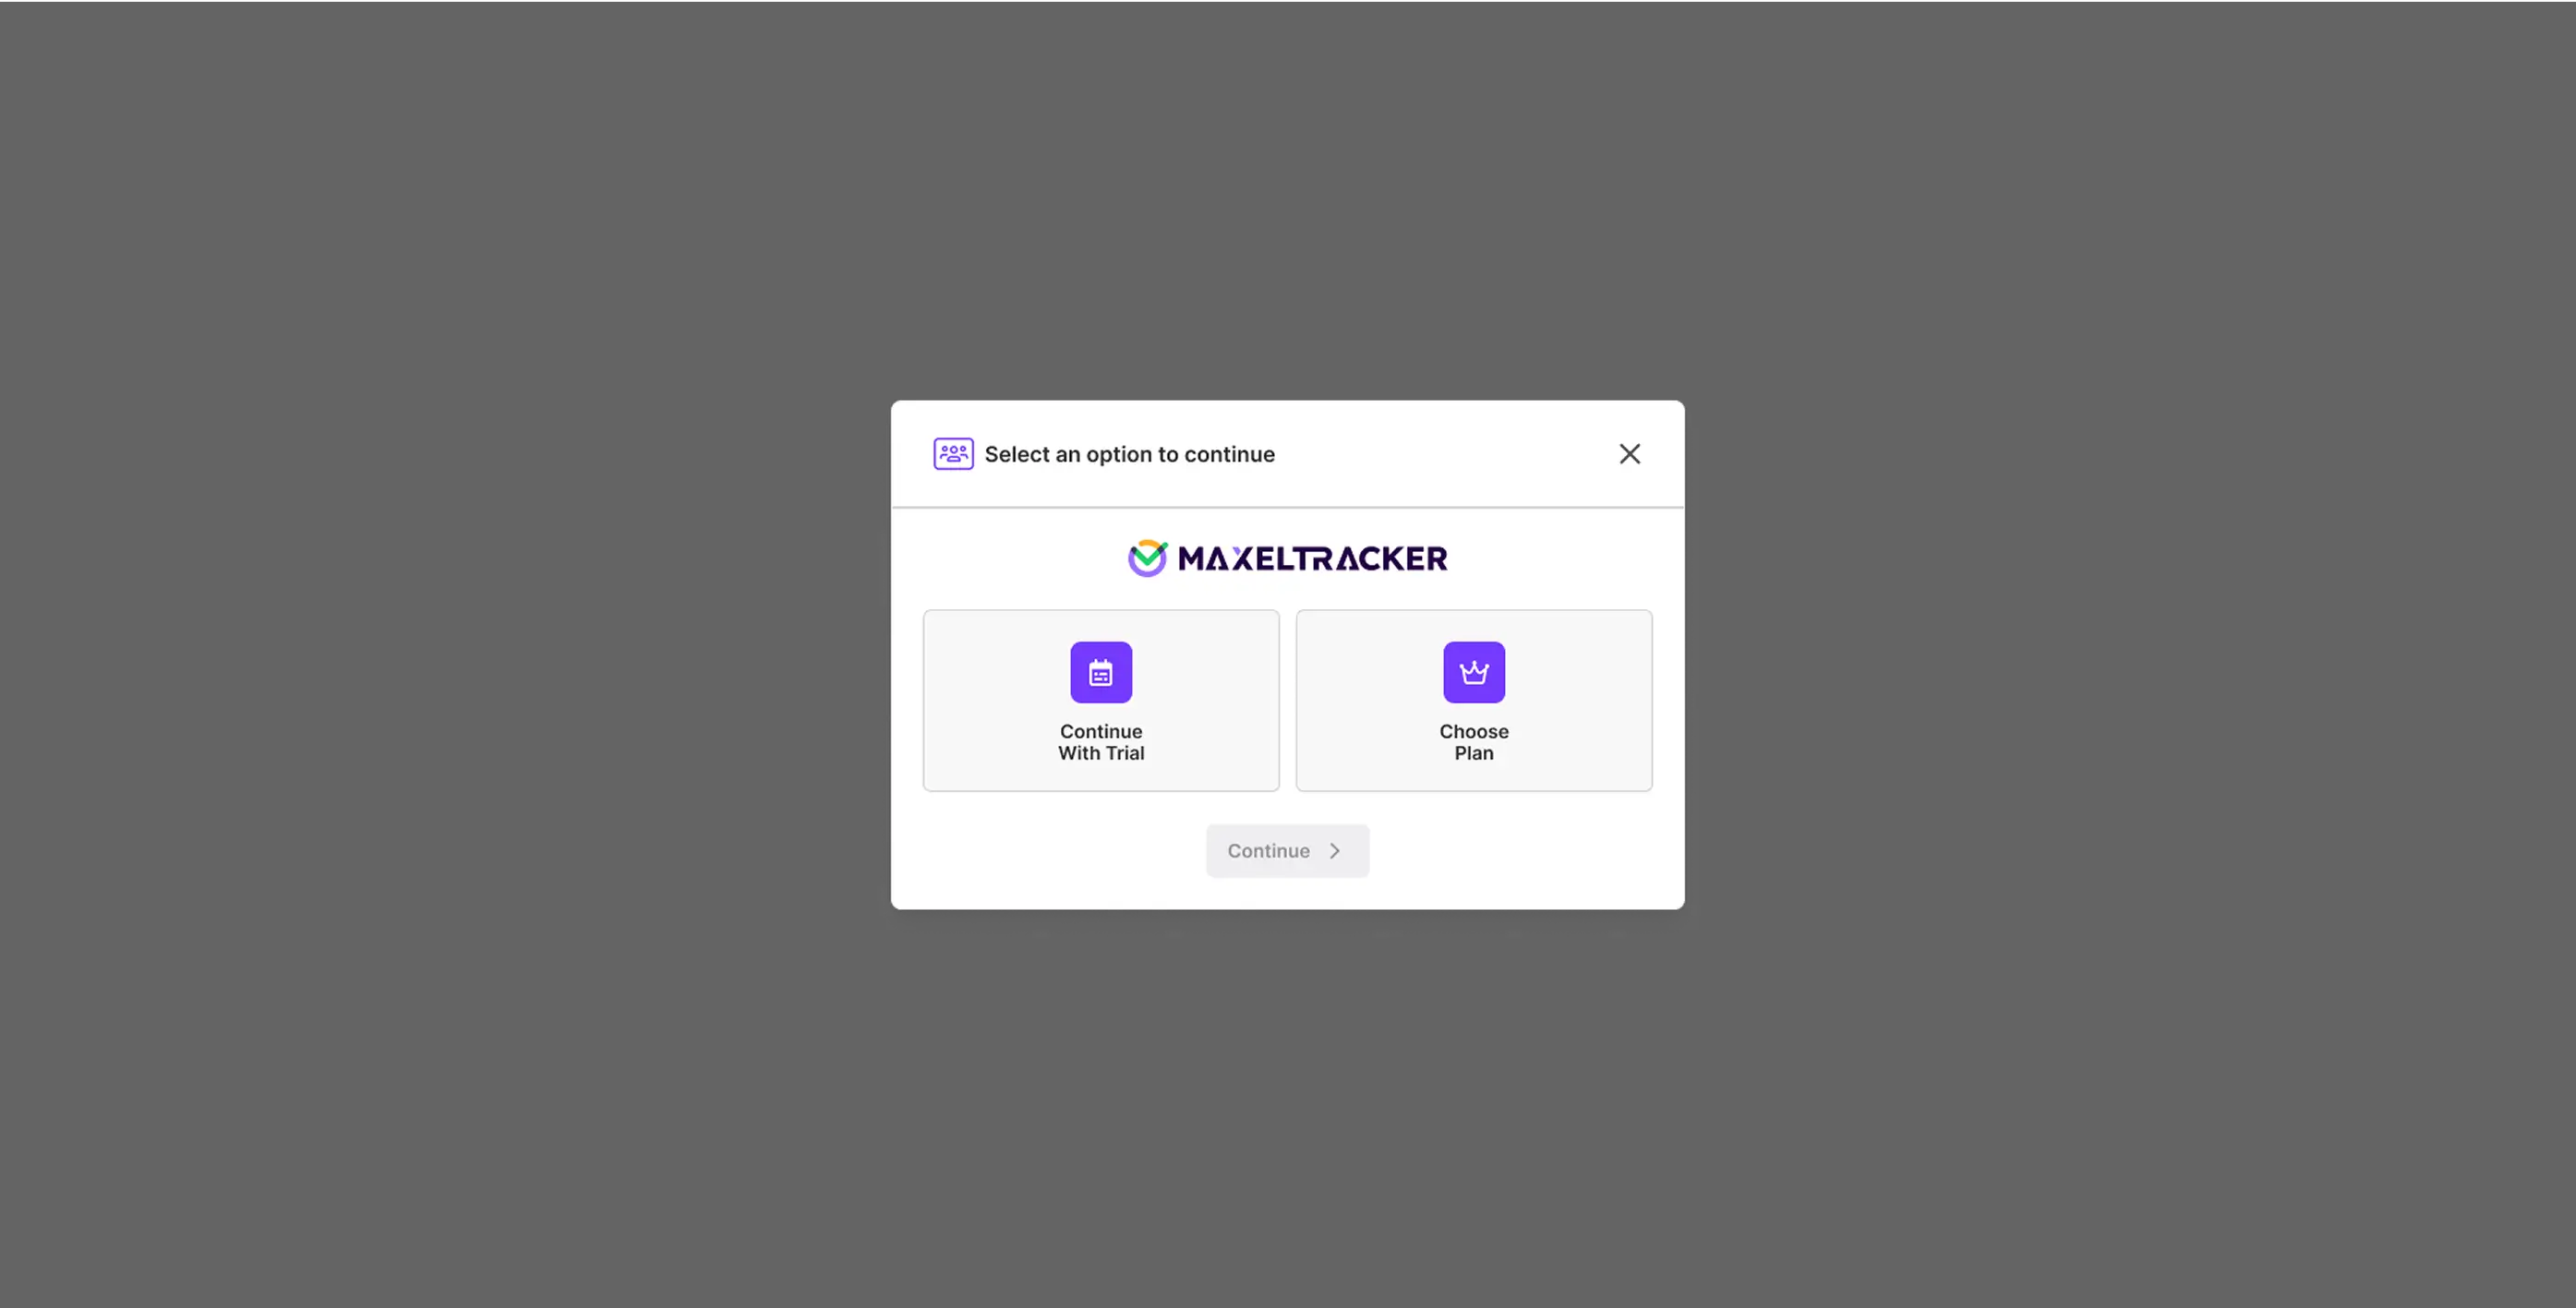
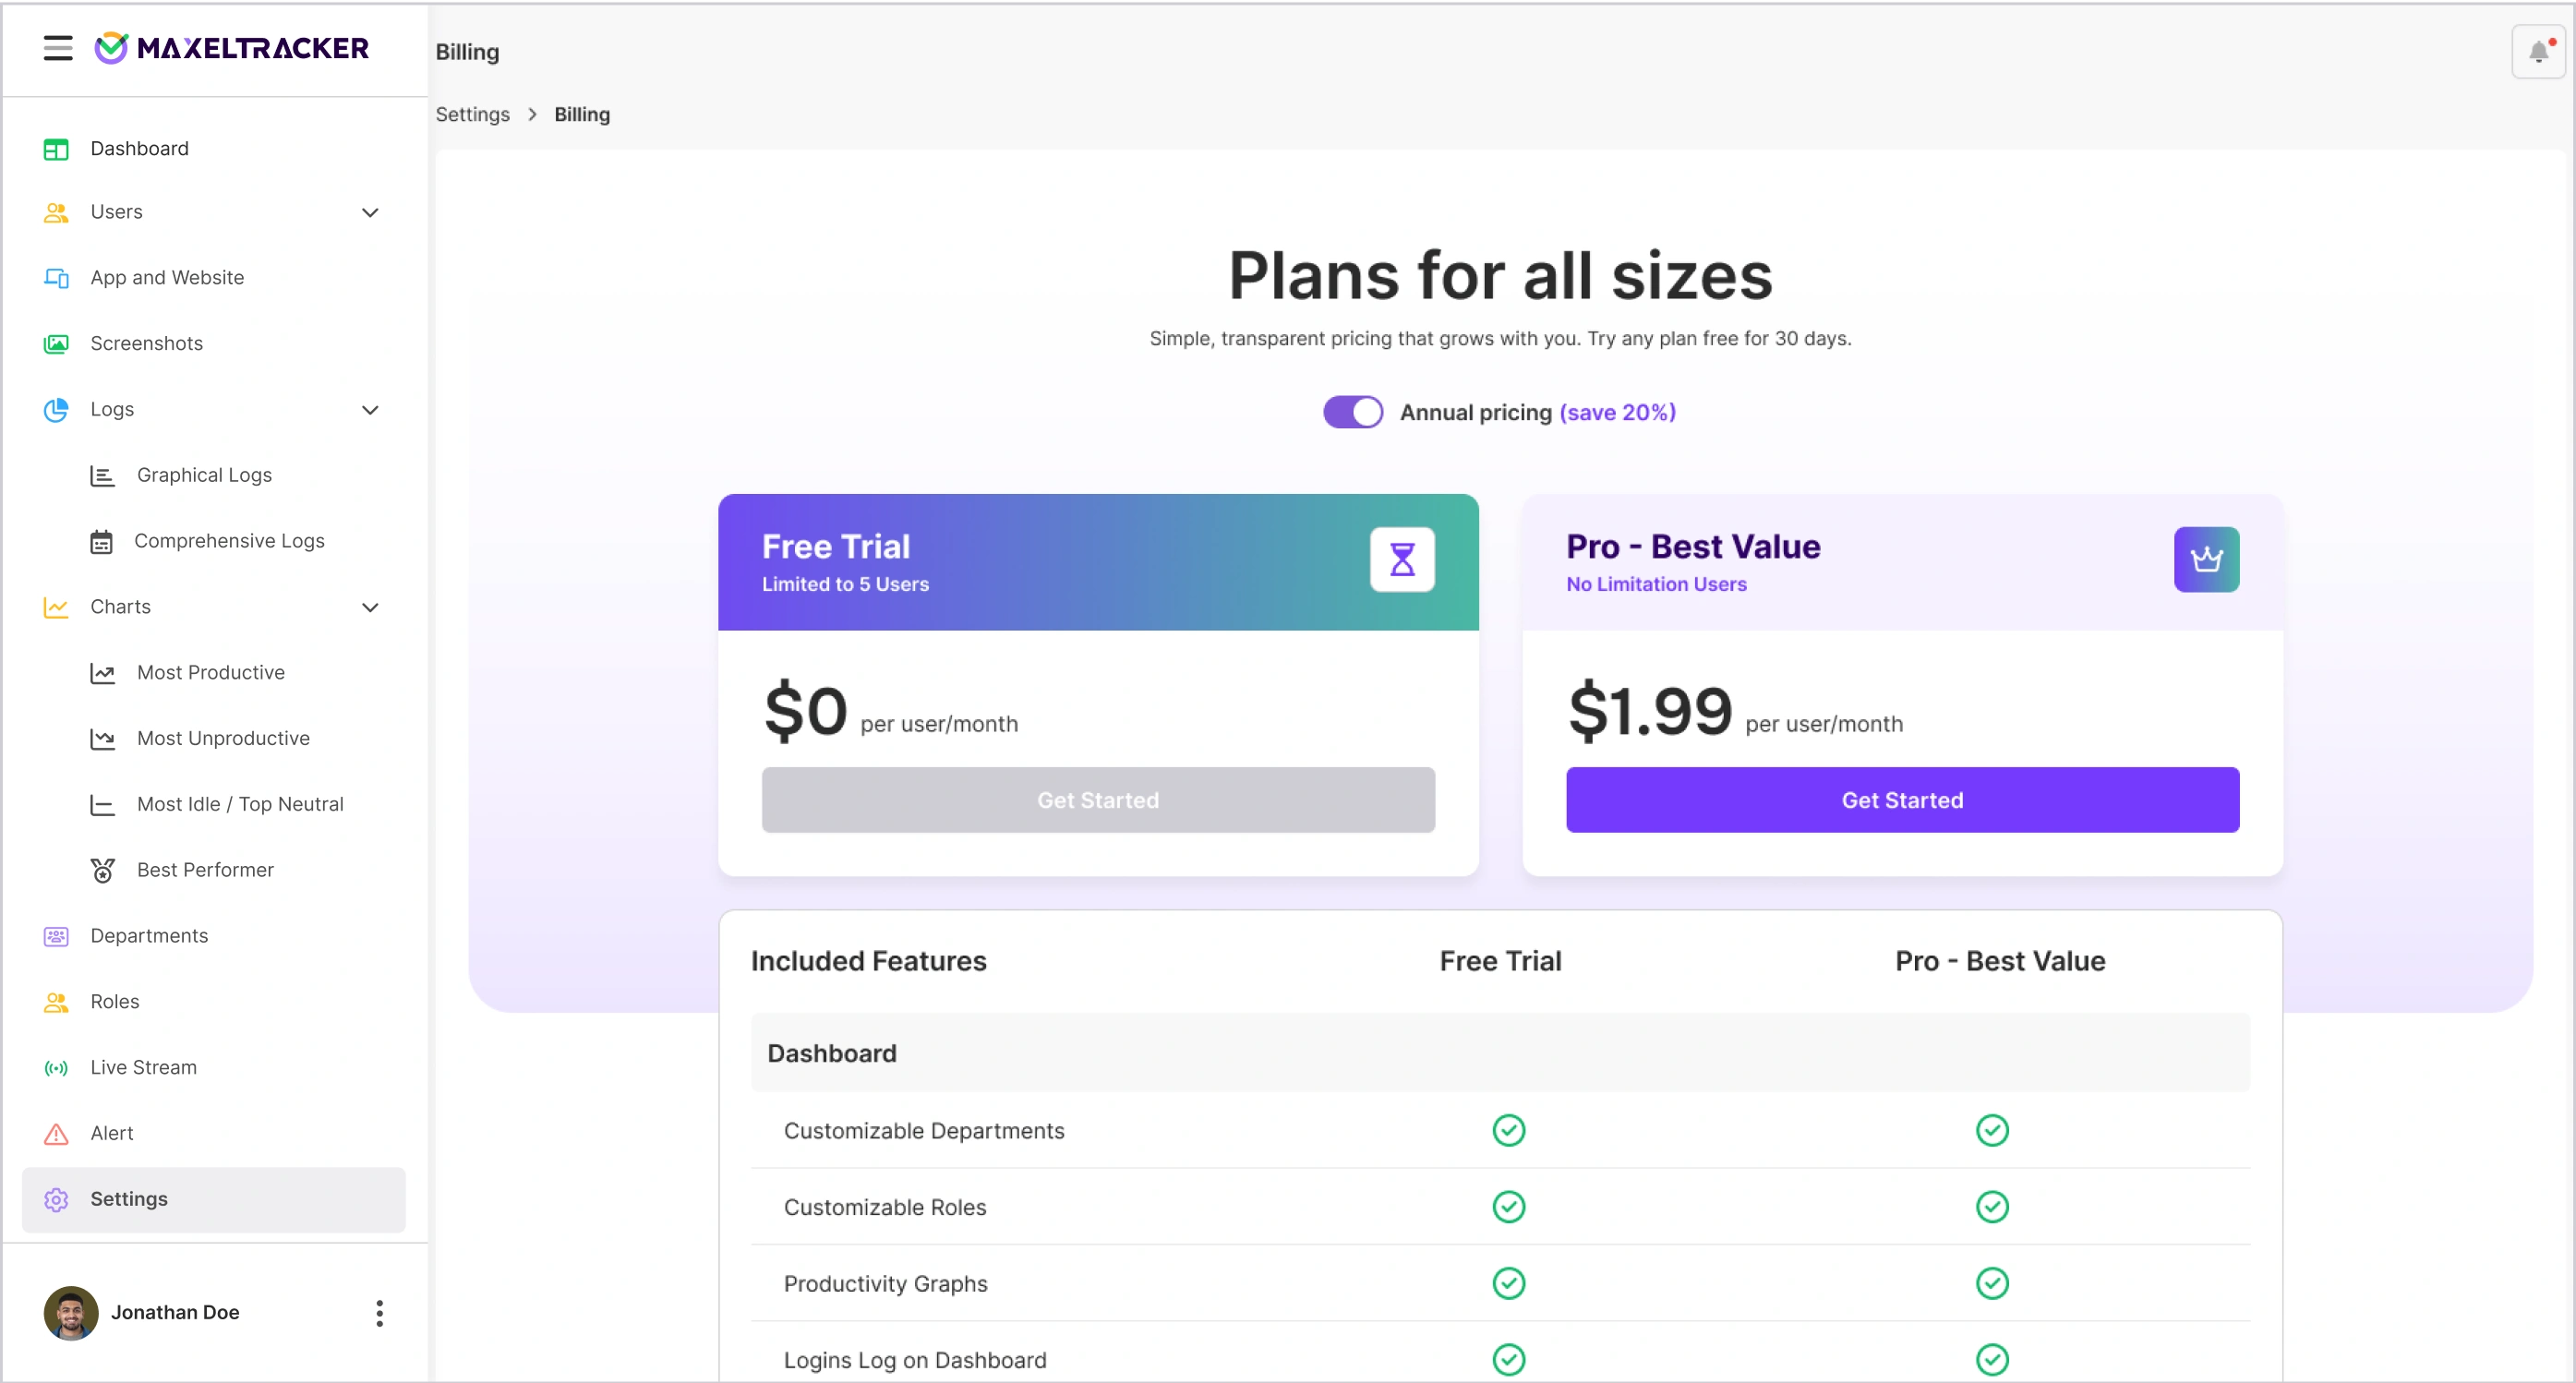
Click “I will Install Later” and select the plan to proceed.
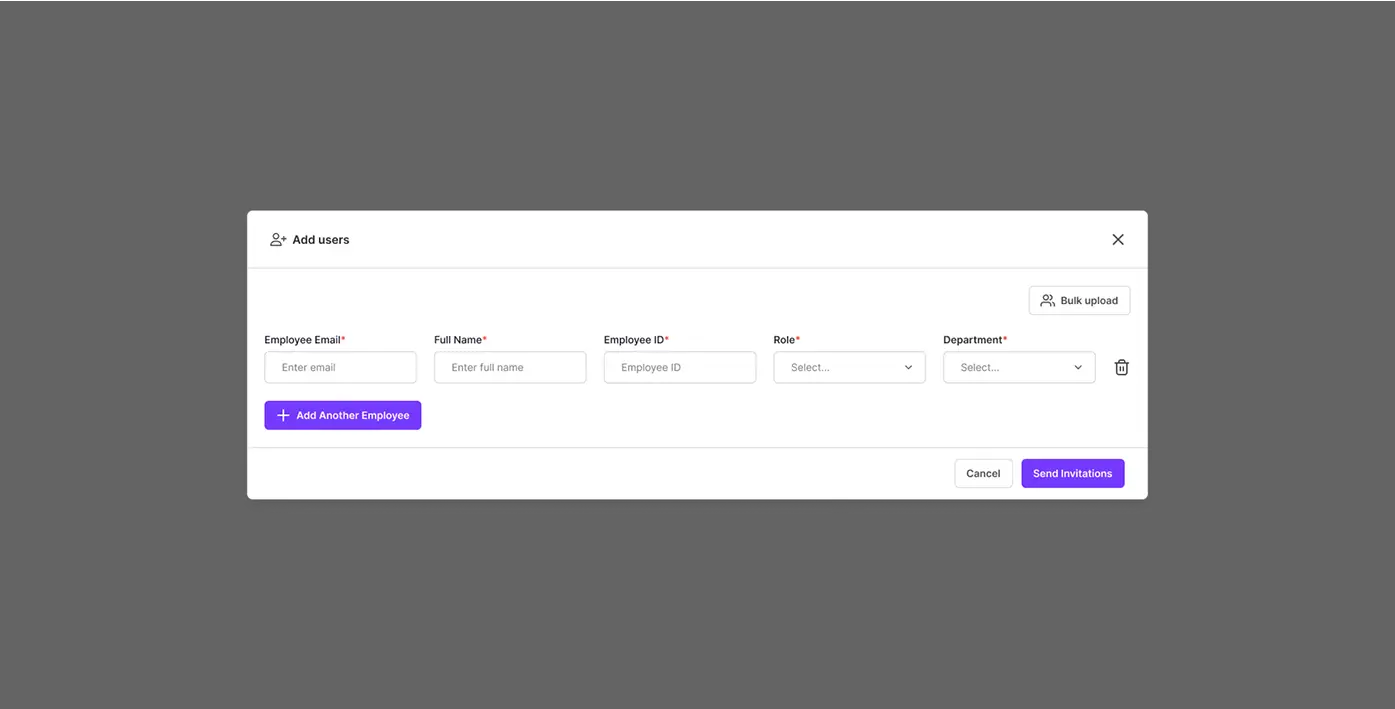
Add your organization details, like employee email, name, employee ID, department names, and roles.
Invite team members by entering their email addresses.
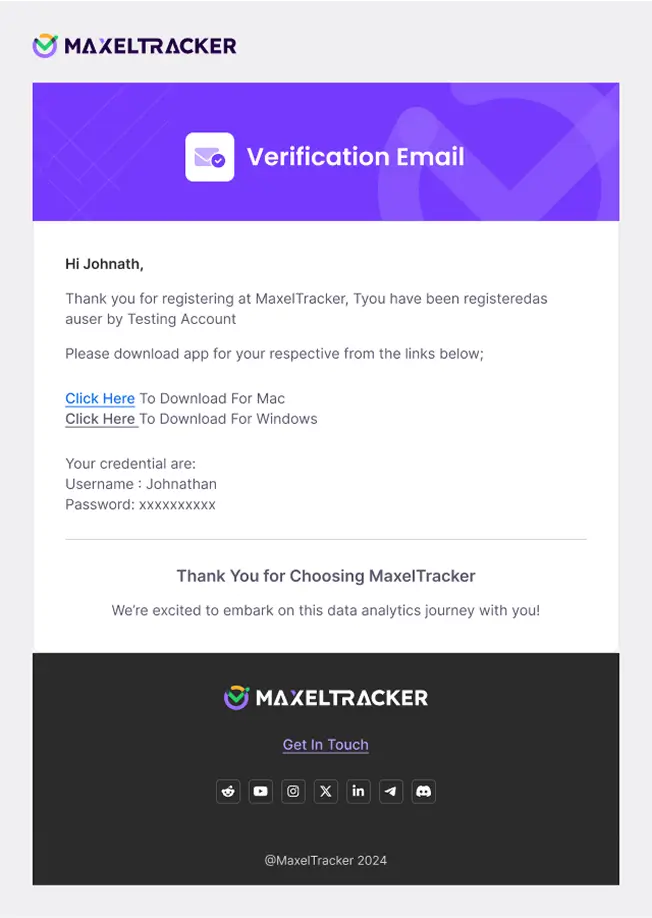
Your team will receive an invite via email as below.
This email will contain login details of the MaxelTracker app along with macOS, window and Linux download links from which employees can download the desktop app and log in to get started.
Note: After sending the invite to your employees, each individual will need to verify their email and install the MaxelTracker desktop app on their respective laptops or computers to initiate tracking.
Download the App:
To start monitoring productivity:
Download the MaxelTracker desktop app on each employee's system (Windows/Mac/Linux).
Install and log in using their credentials.
Note: If you’d prefer to install the app later, simply click on “I will install later” to proceed.
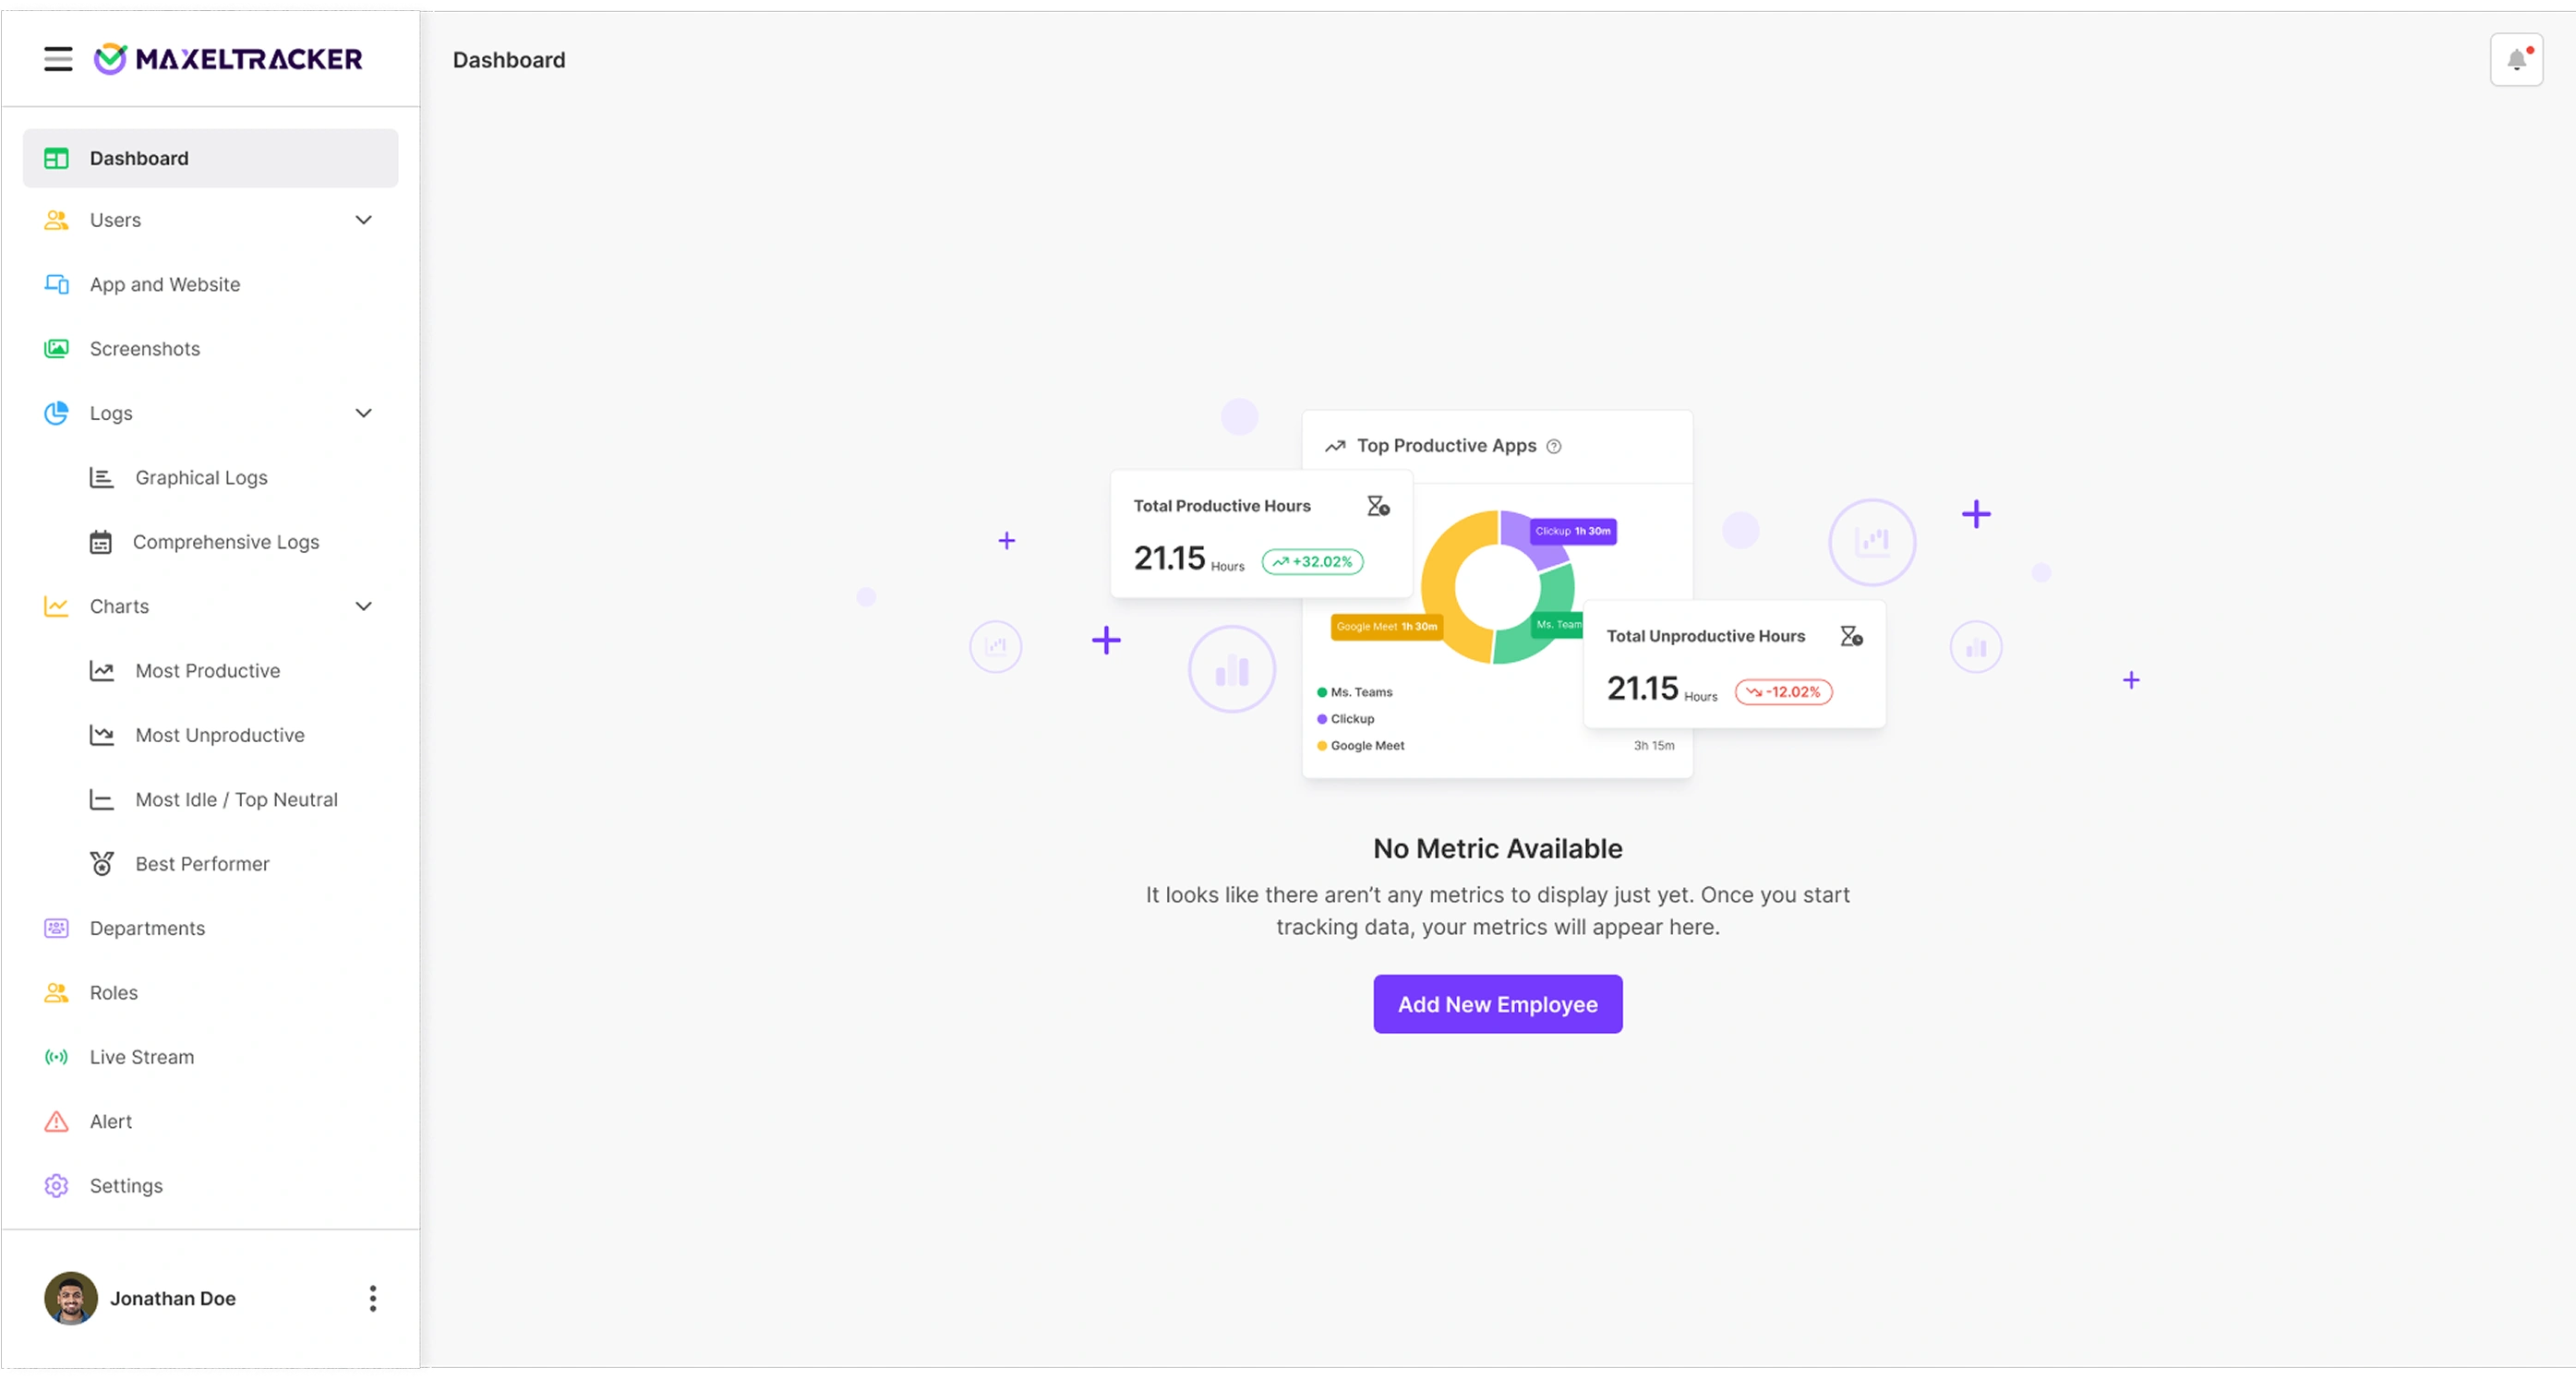
After completing your setup, you’ll land on the MaxelTracker Dashboard — the central hub where you can get detailed insights for your team’s productivity, activity, and overall performance.
You need to add employees to start tracking their complete productivity and performance insights in the dashboard. After adding employee you can start tracking.
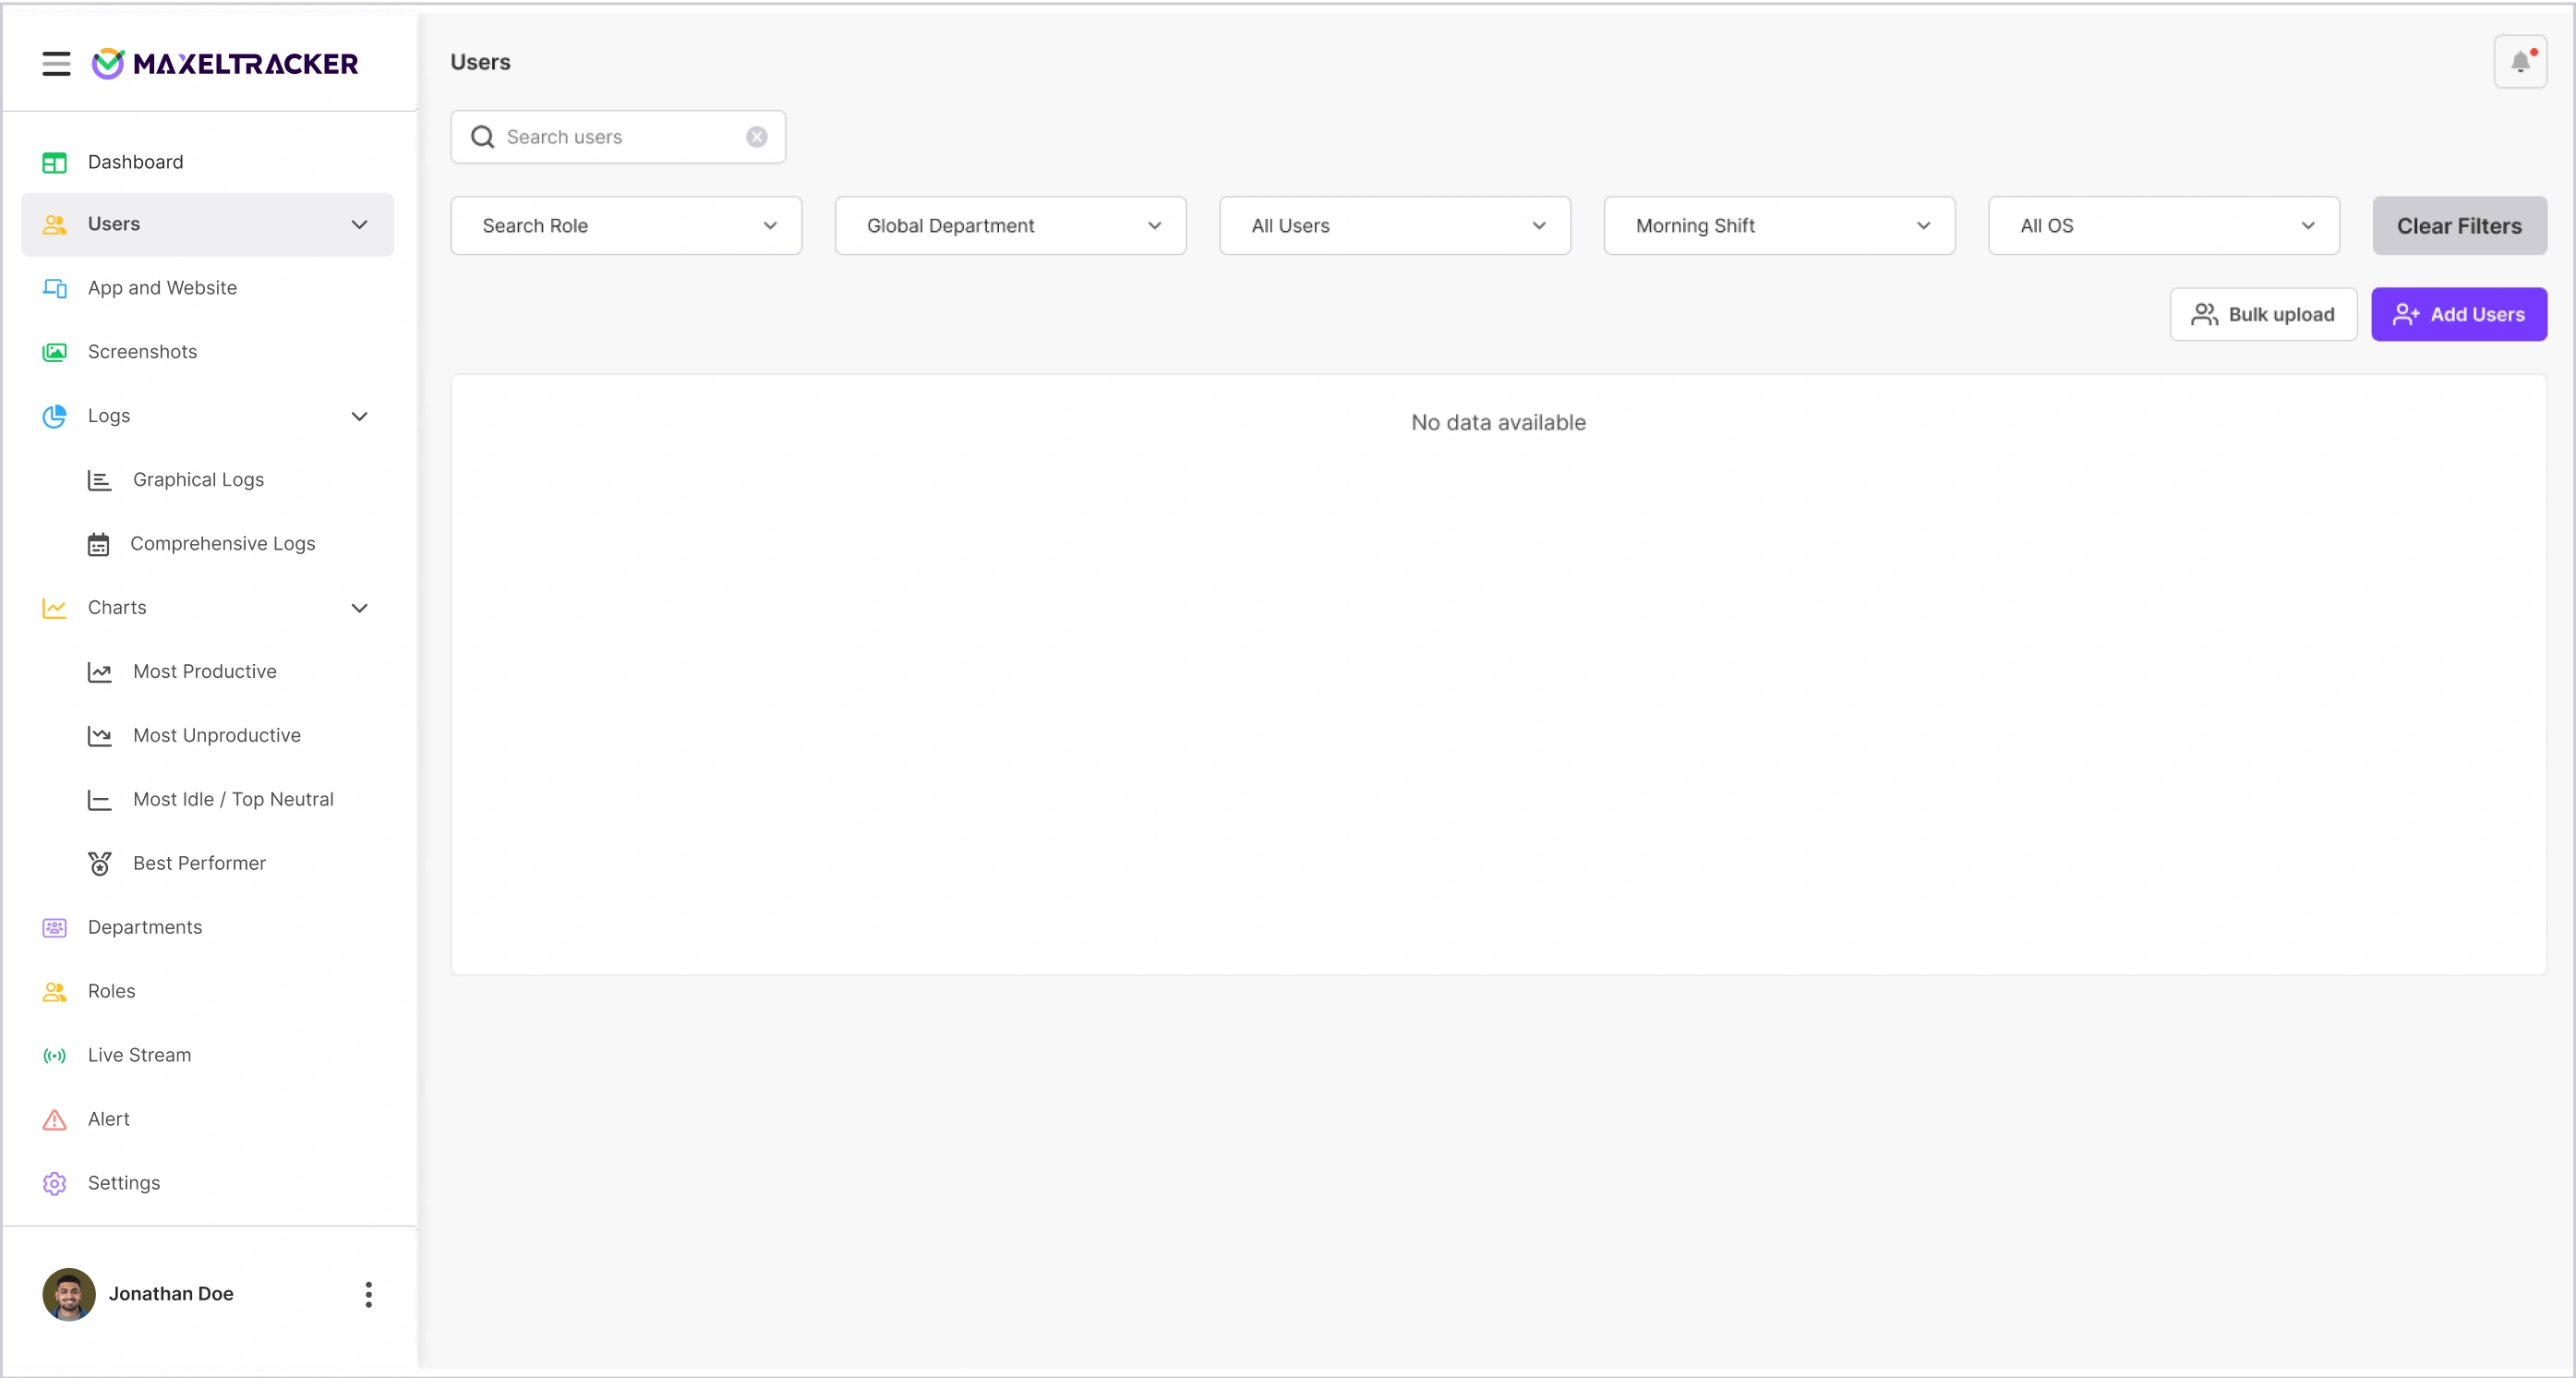
If you haven’t added employees in the initial step, you can add under the user section. Here, the admin of the organization can add new users and view a complete list of all team members along with their employee IDs and current tracking status (enabled or disabled). This section provides a clear overview of your workforce, making it easy to manage users and stay updated on who’s actively being tracked.
Add your organization details, like employee email, name, employee ID, department names, and roles.
Invite team members by entering their email addresses.
Your team will receive an invite via email as below.
Employee will receive a Login Credential
Each employee will receive an email containing “login credentials” of the MaxelTracker app along with macOS, window and Linux download links from which employees can download the desktop app and log in to get started.
Note: After sending the invite to your employees, each individual will need to verify their email address and install the MaxelTracker desktop app on their respective laptops or computers to initiate tracking.
To start monitoring productivity:
Download the MaxelTracker desktop app on each employee's system (Windows/Linux/Mac).
Install and log in using their credentials.
Note: If you’d prefer to install the app later, simply click on “I will install later” to proceed.
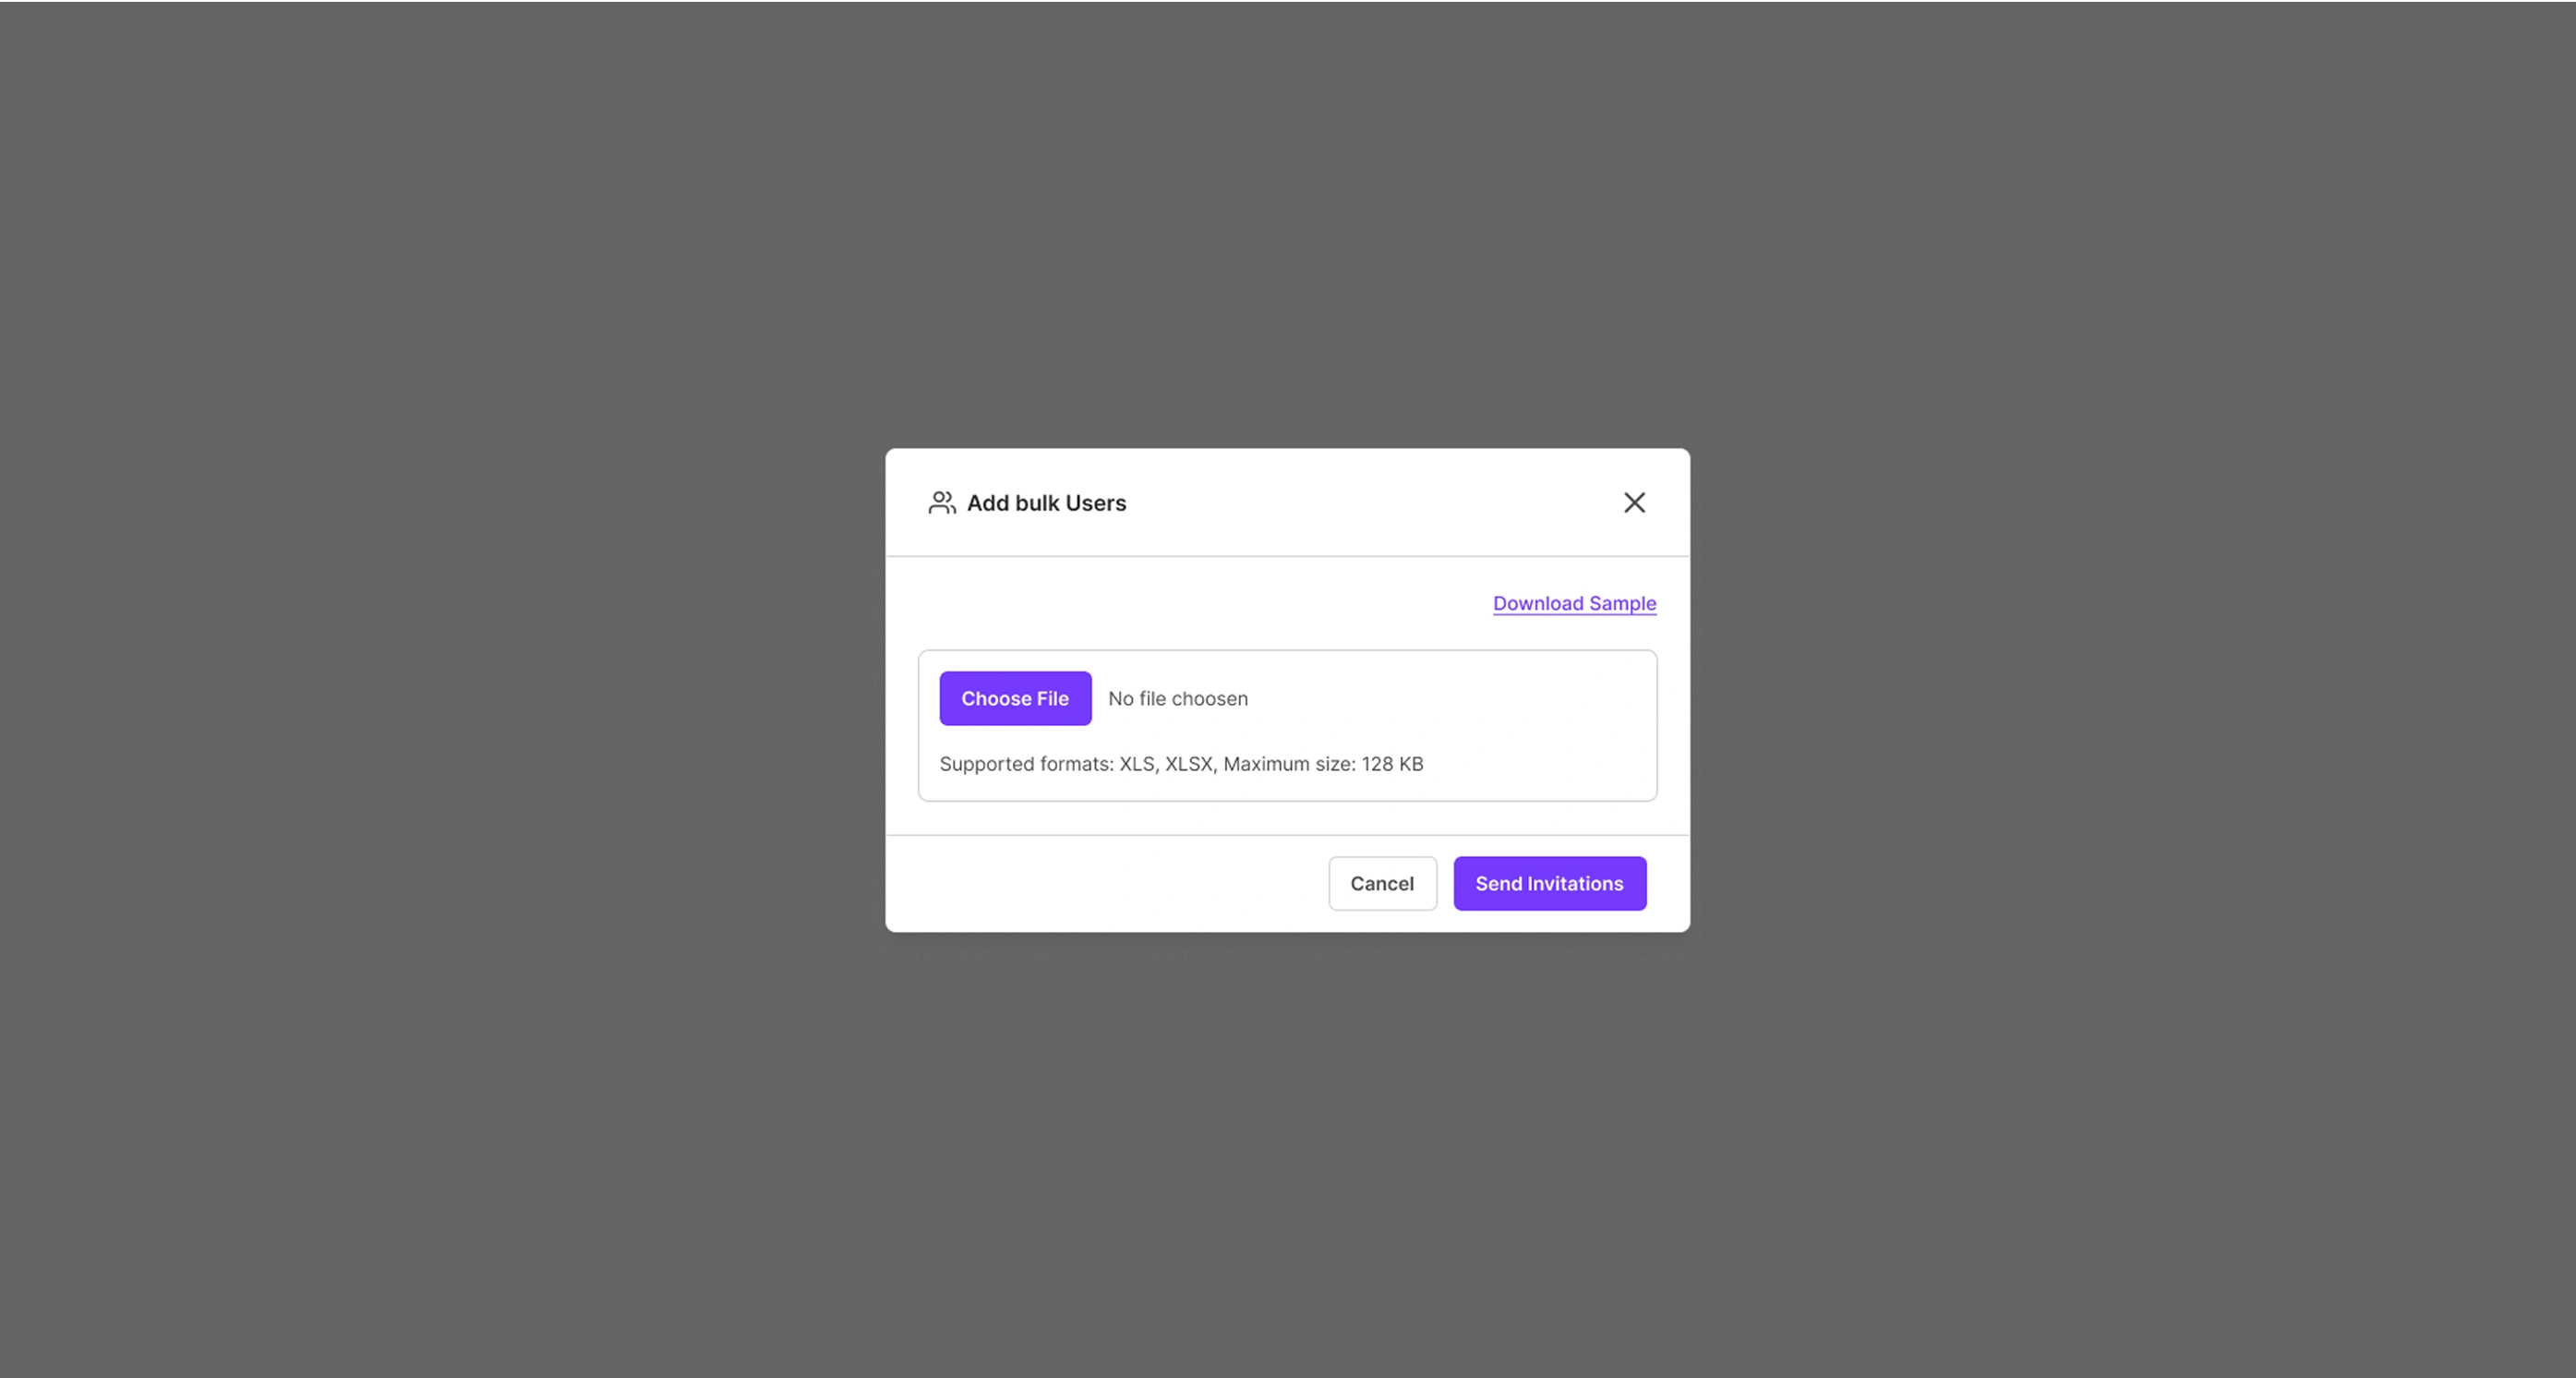
3. Bulk Upload:
Add multiple users by uploading a CSV file with their details. It’s a fast way to onboard your team, and each user will receive an email invite to log in to MaxelTracker.
Once you've completed your initial setup and reached the MaxelTracker dashboard, it's important to configure your settings to match your organization’s needs.
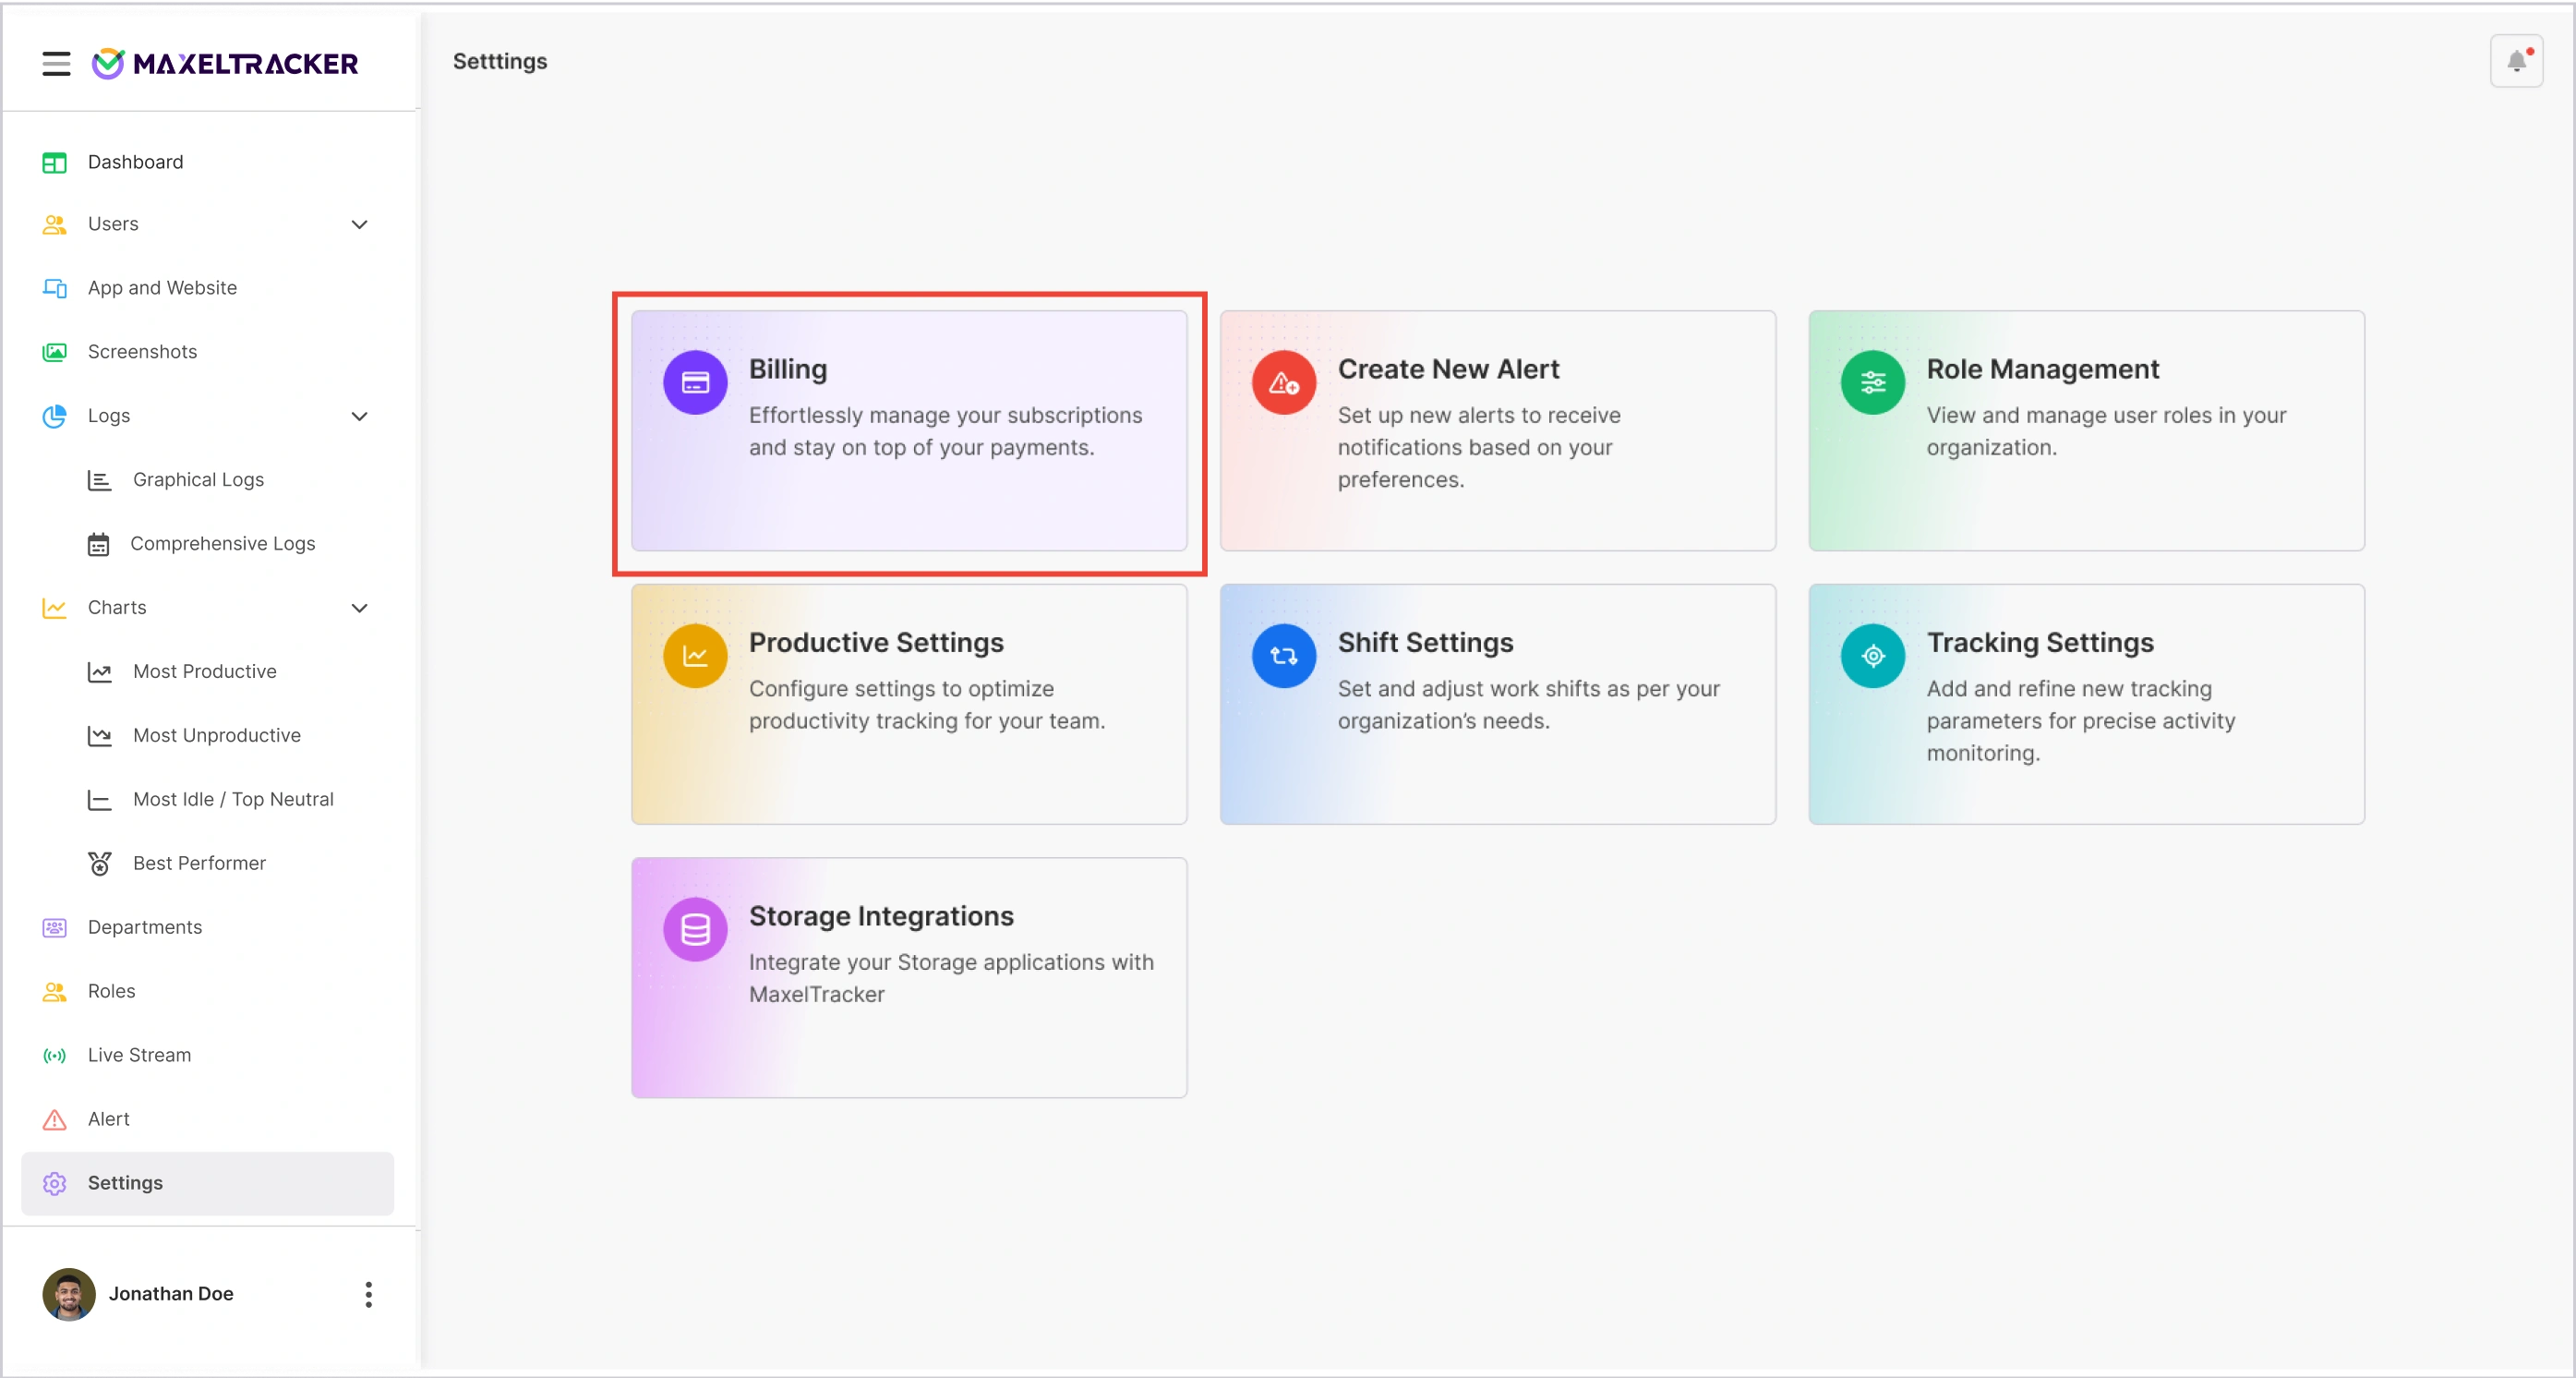
The billing section allows you to manage your subscription, check payment history on your profile page, and update your payment methods without any hassle.
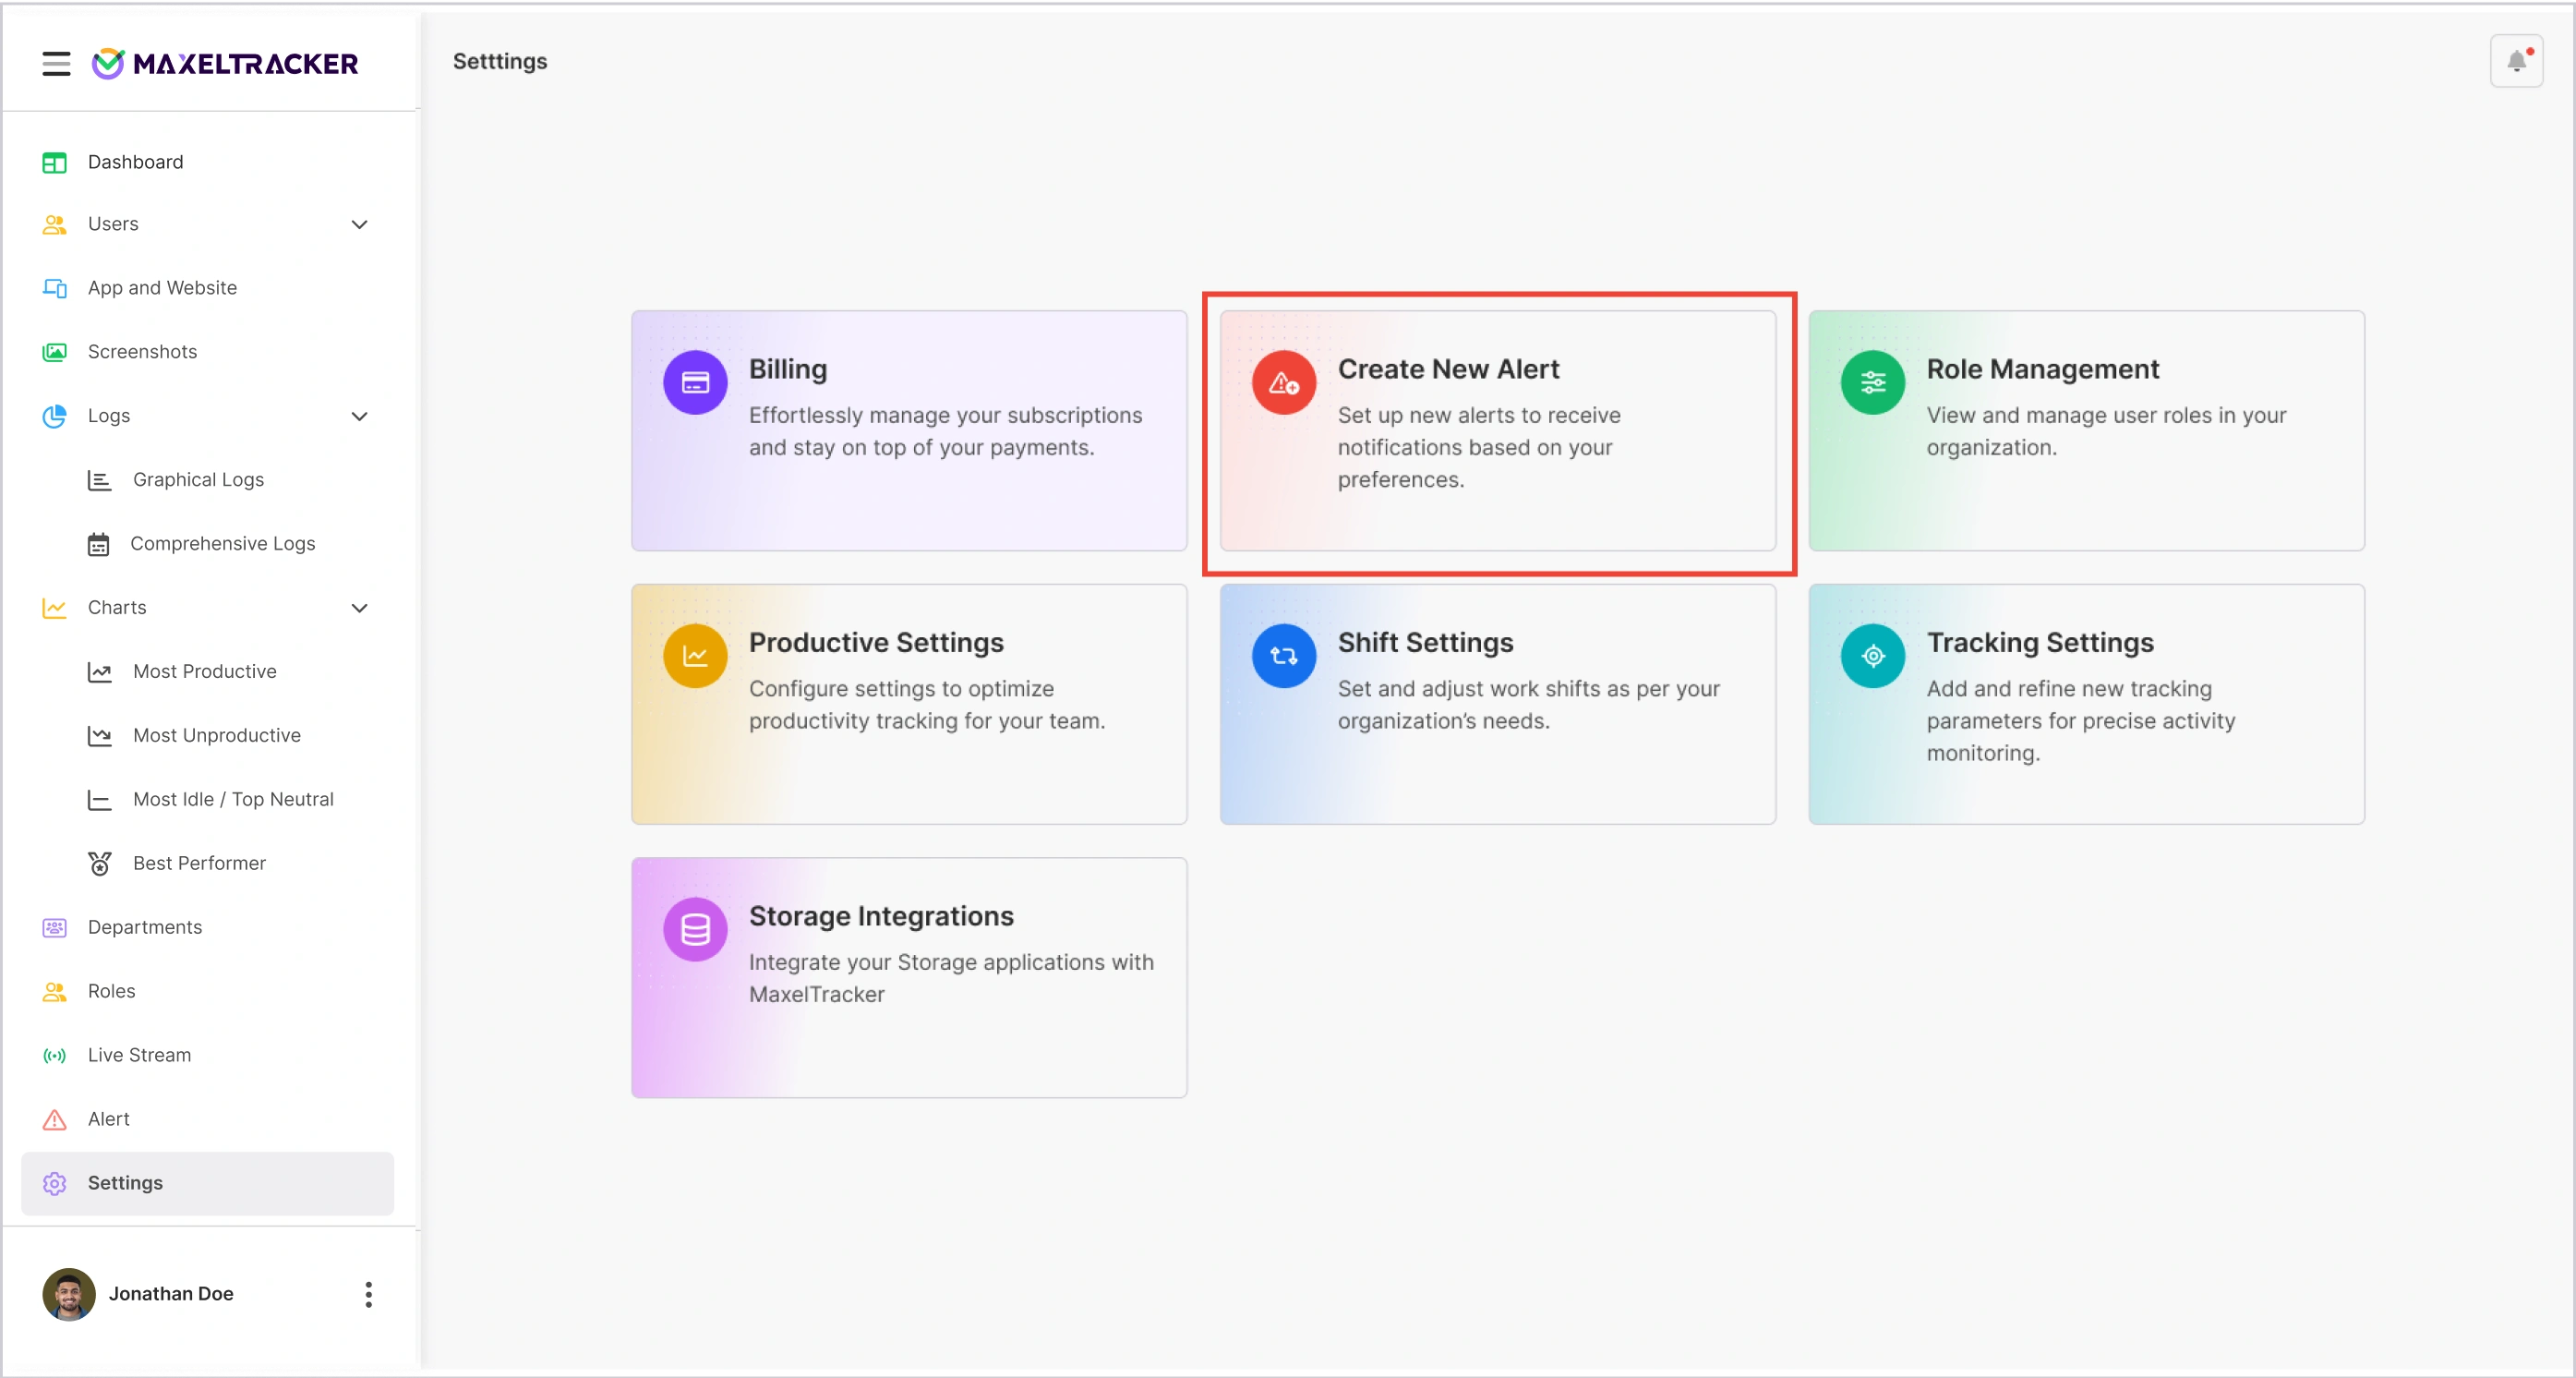
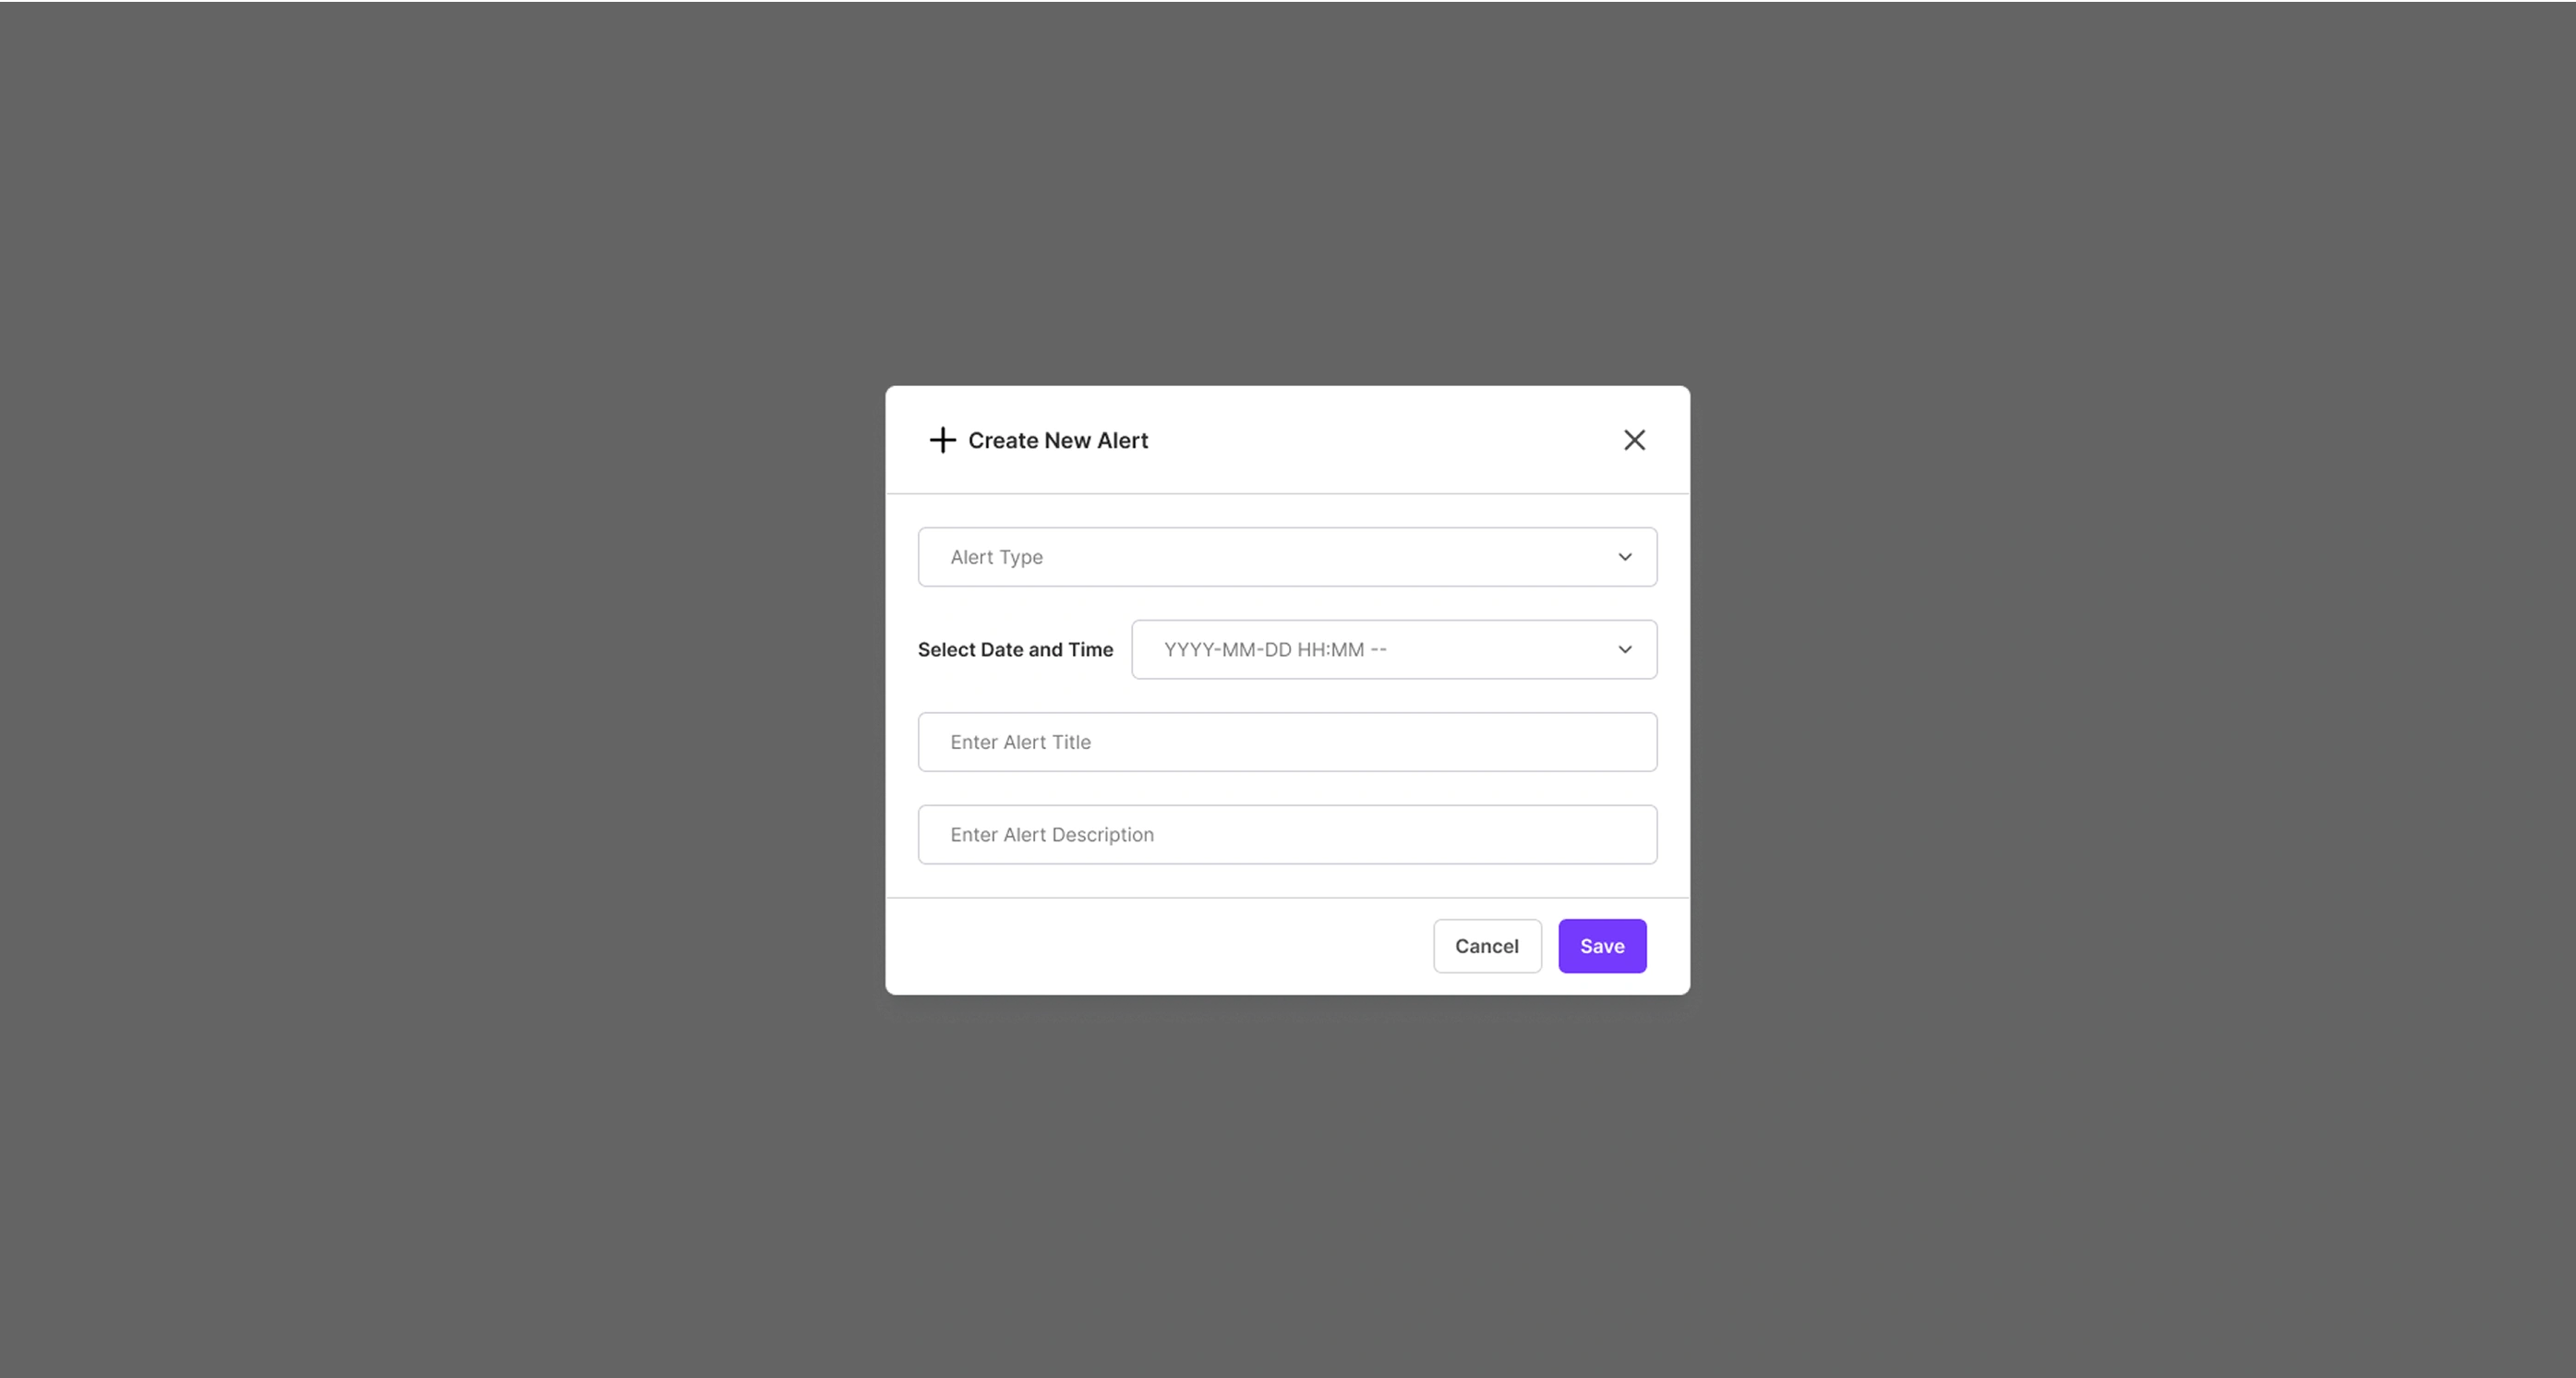
You can create a New Alert to set up custom notifications. You can choose to receive alerts for productivity drops, unusual app usage, or shift-related issues. These alerts notifications will keep all the users informed in real time.
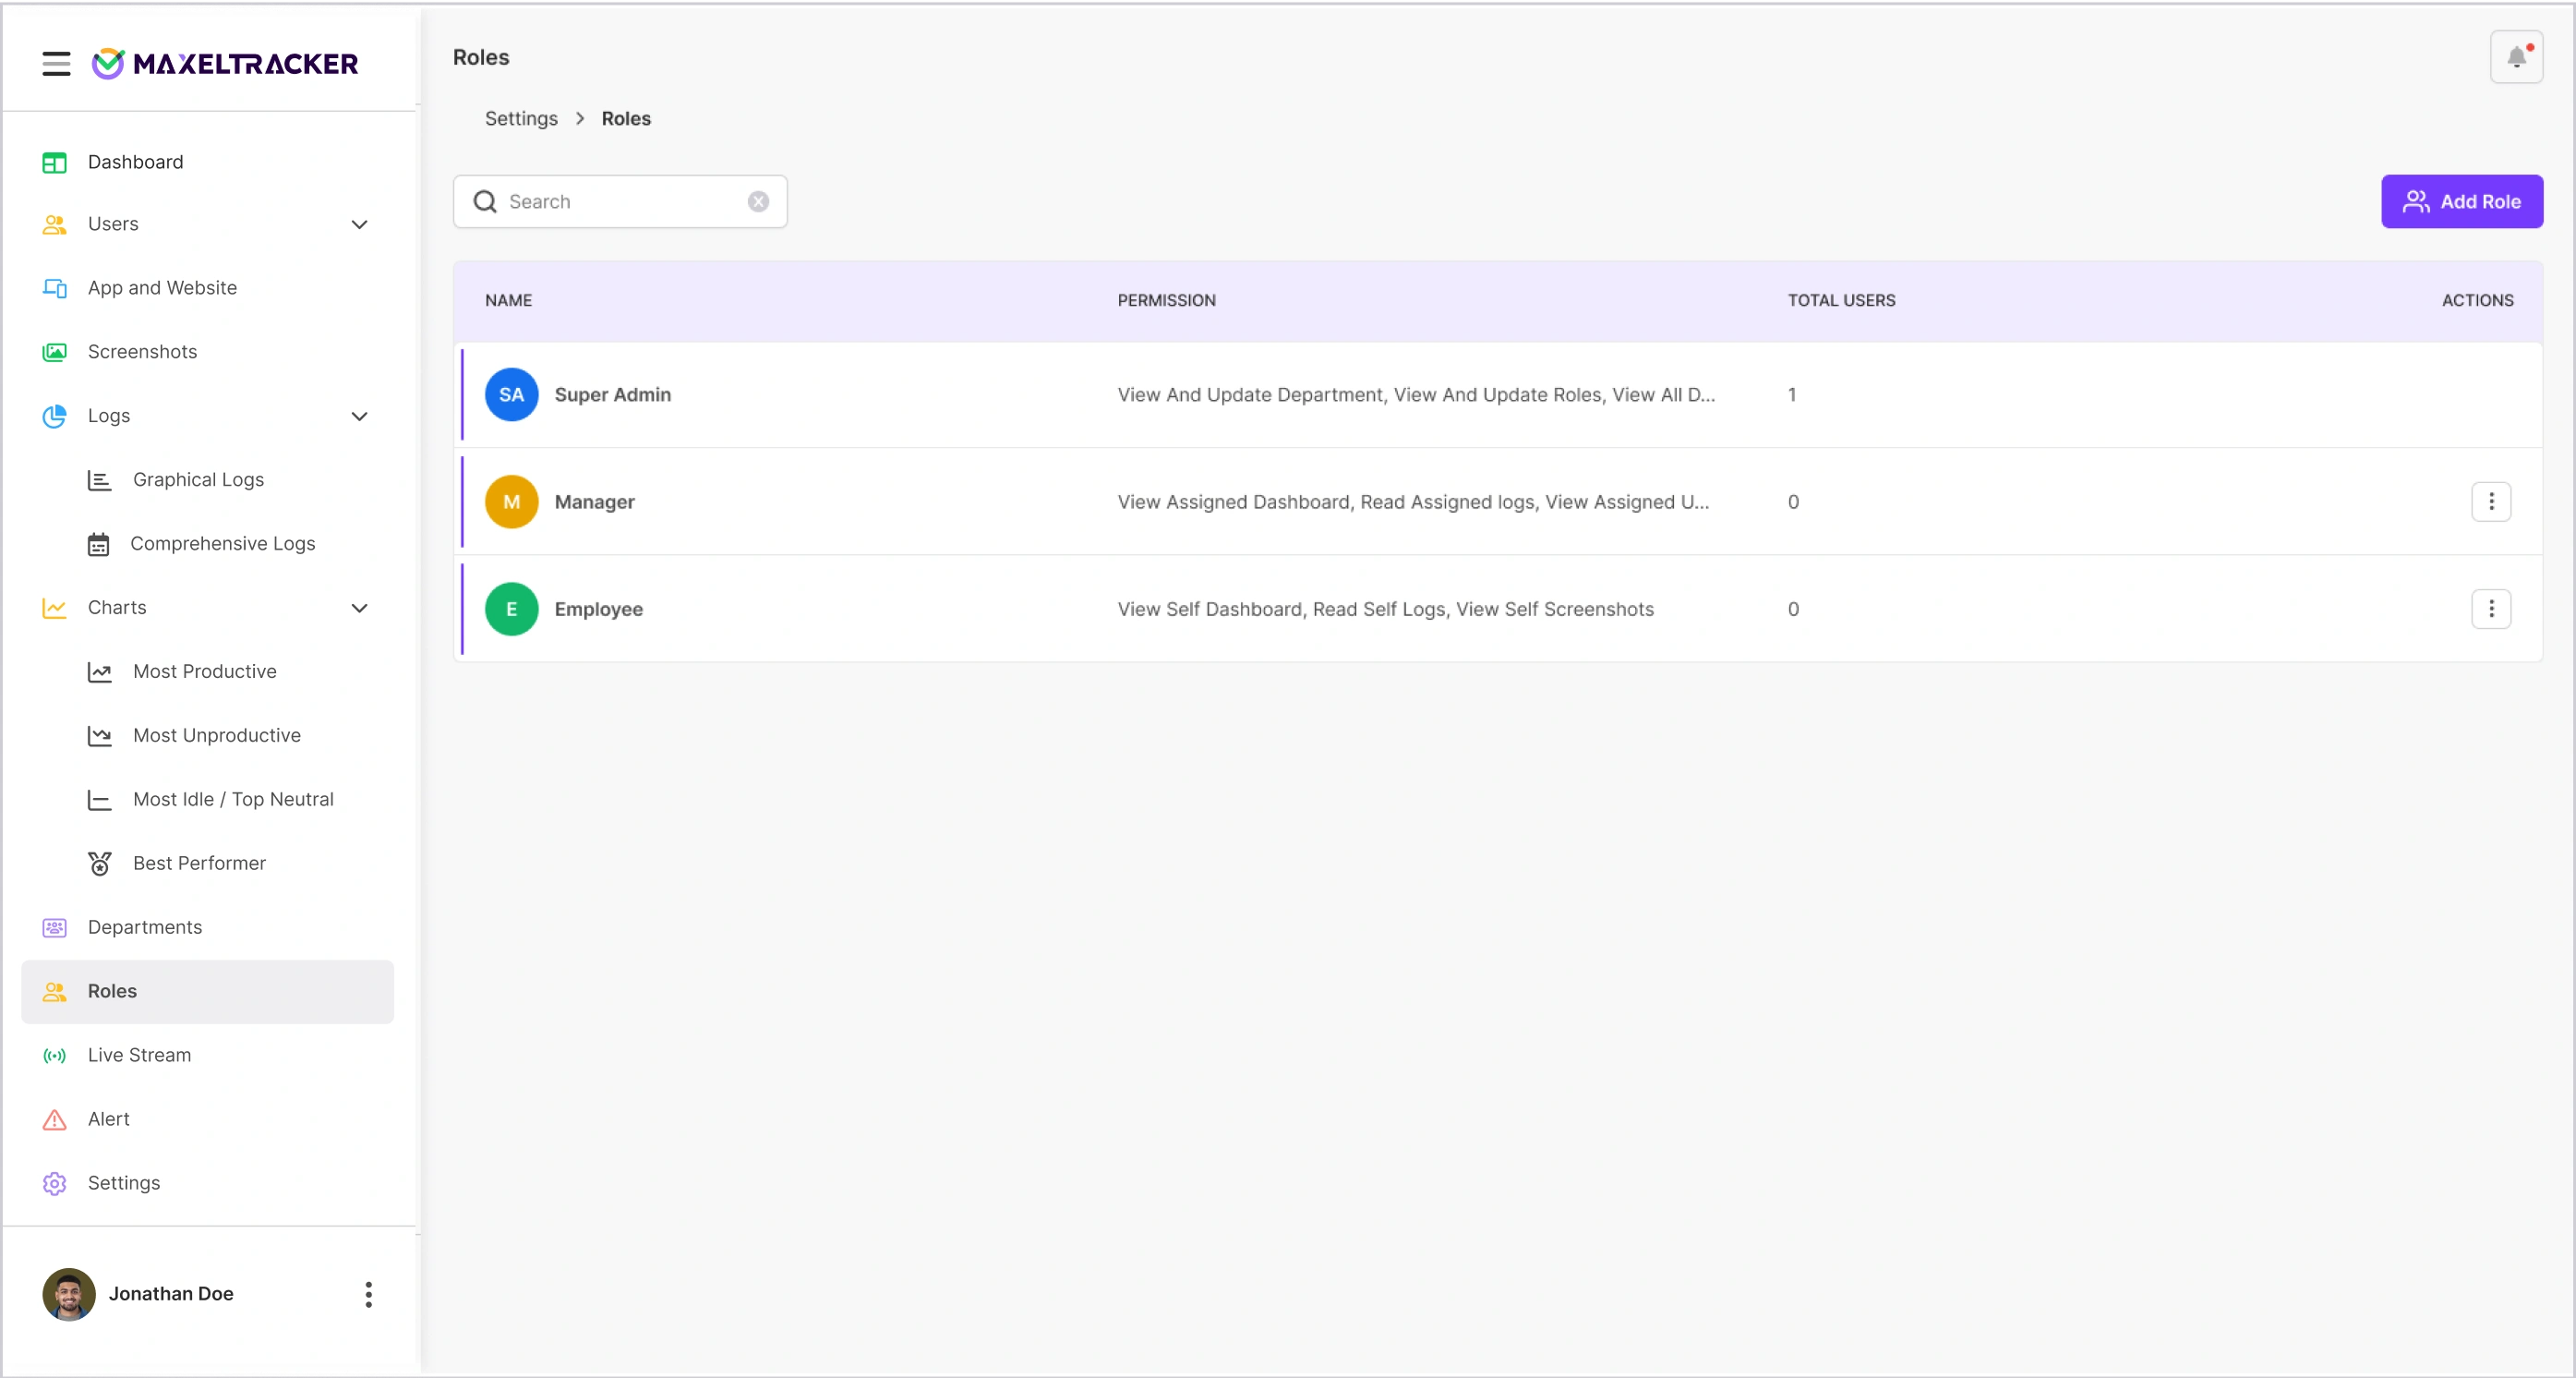
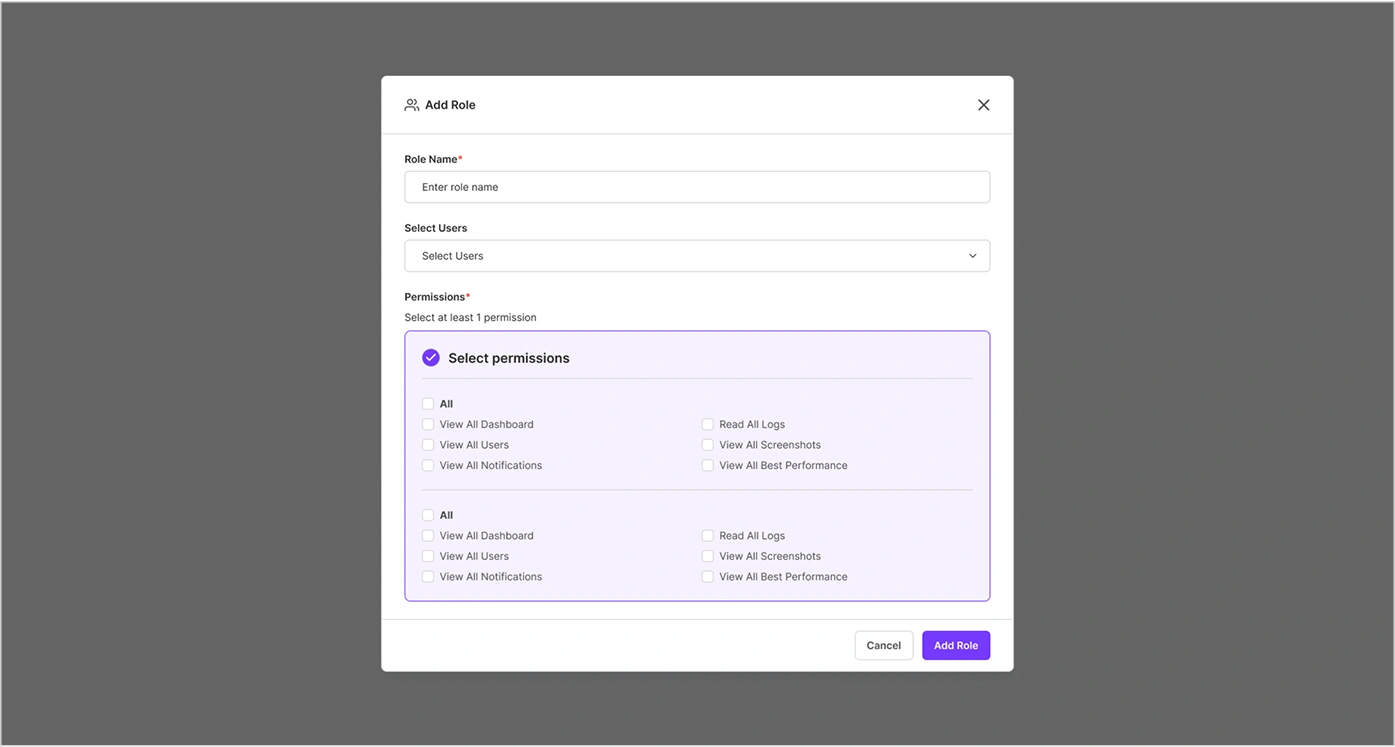
In the Role Management section, you can assign roles such as Admin, Manager, or Employee. Each role comes with its own set of permissions, allowing you to control who can access what within the platform. This helps maintain security and clarity across teams.

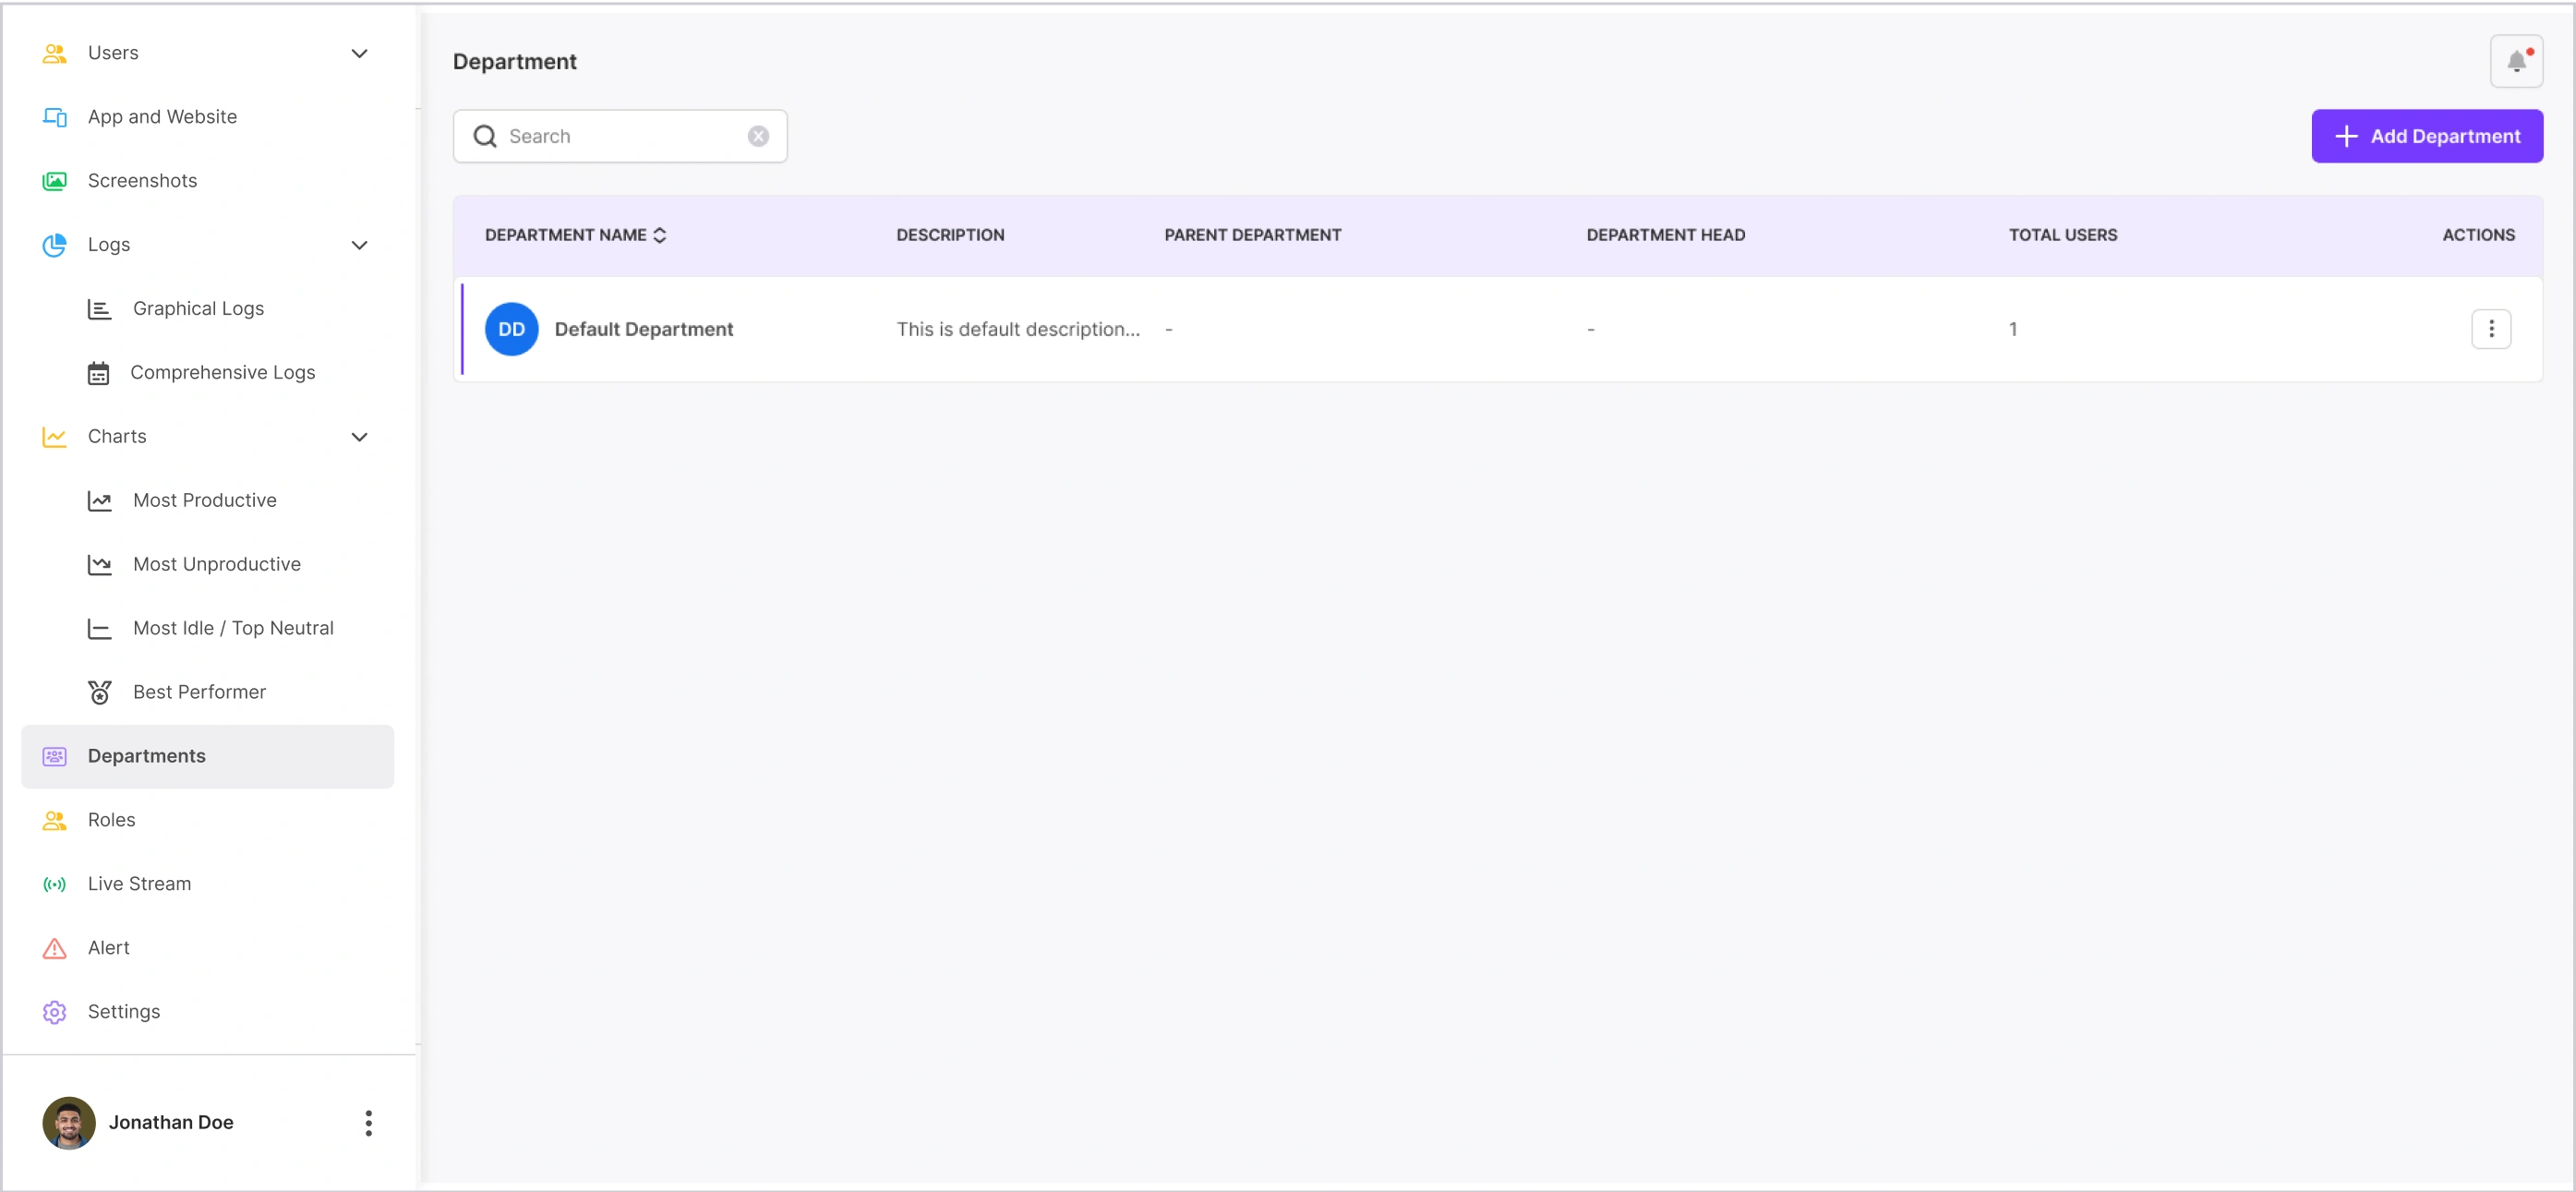
You can create different departments, such as Marketing, Development, or Sales, and assign users accordingly. This helps organize your teams and view productivity insights department-wise.
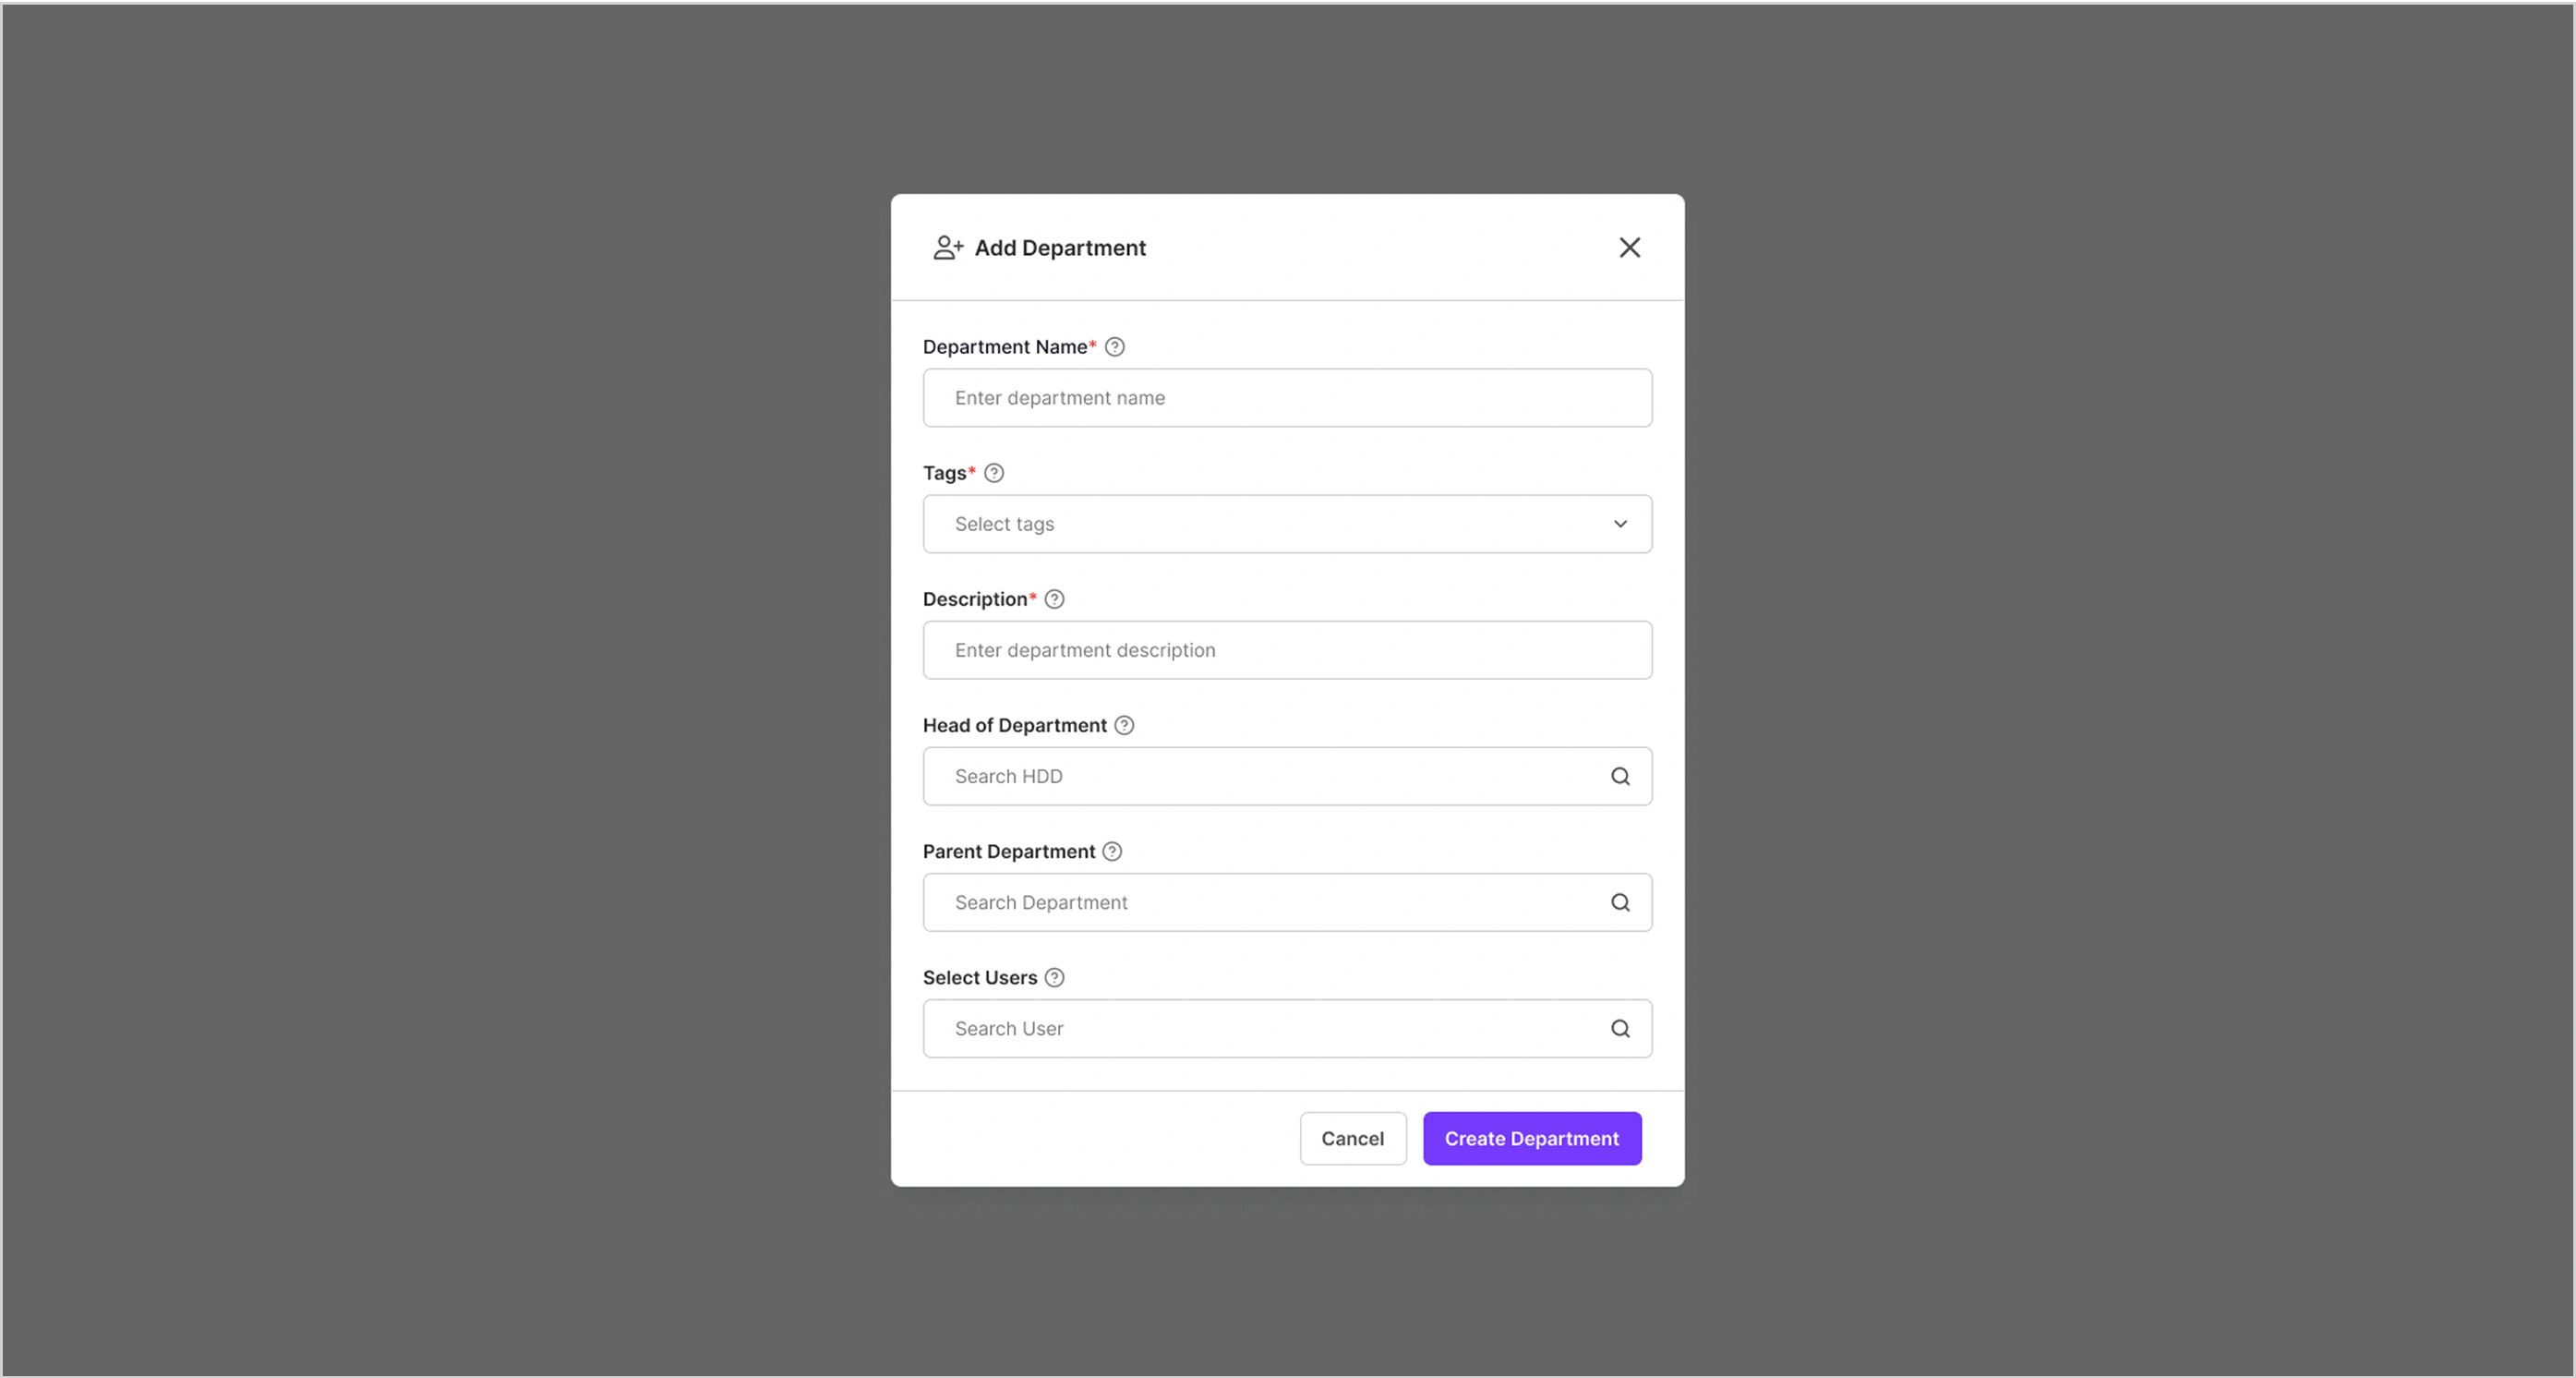
You’ll see a form with the following fields:
Department Name, Tags, Description, Head of Department, Parent Department, Select Users.
Click “Create Department” to finish the process.
To get started with productivity tracking:
Add employees to your organization.
Ask them to install the MaxelTracker desktop app on their systems.
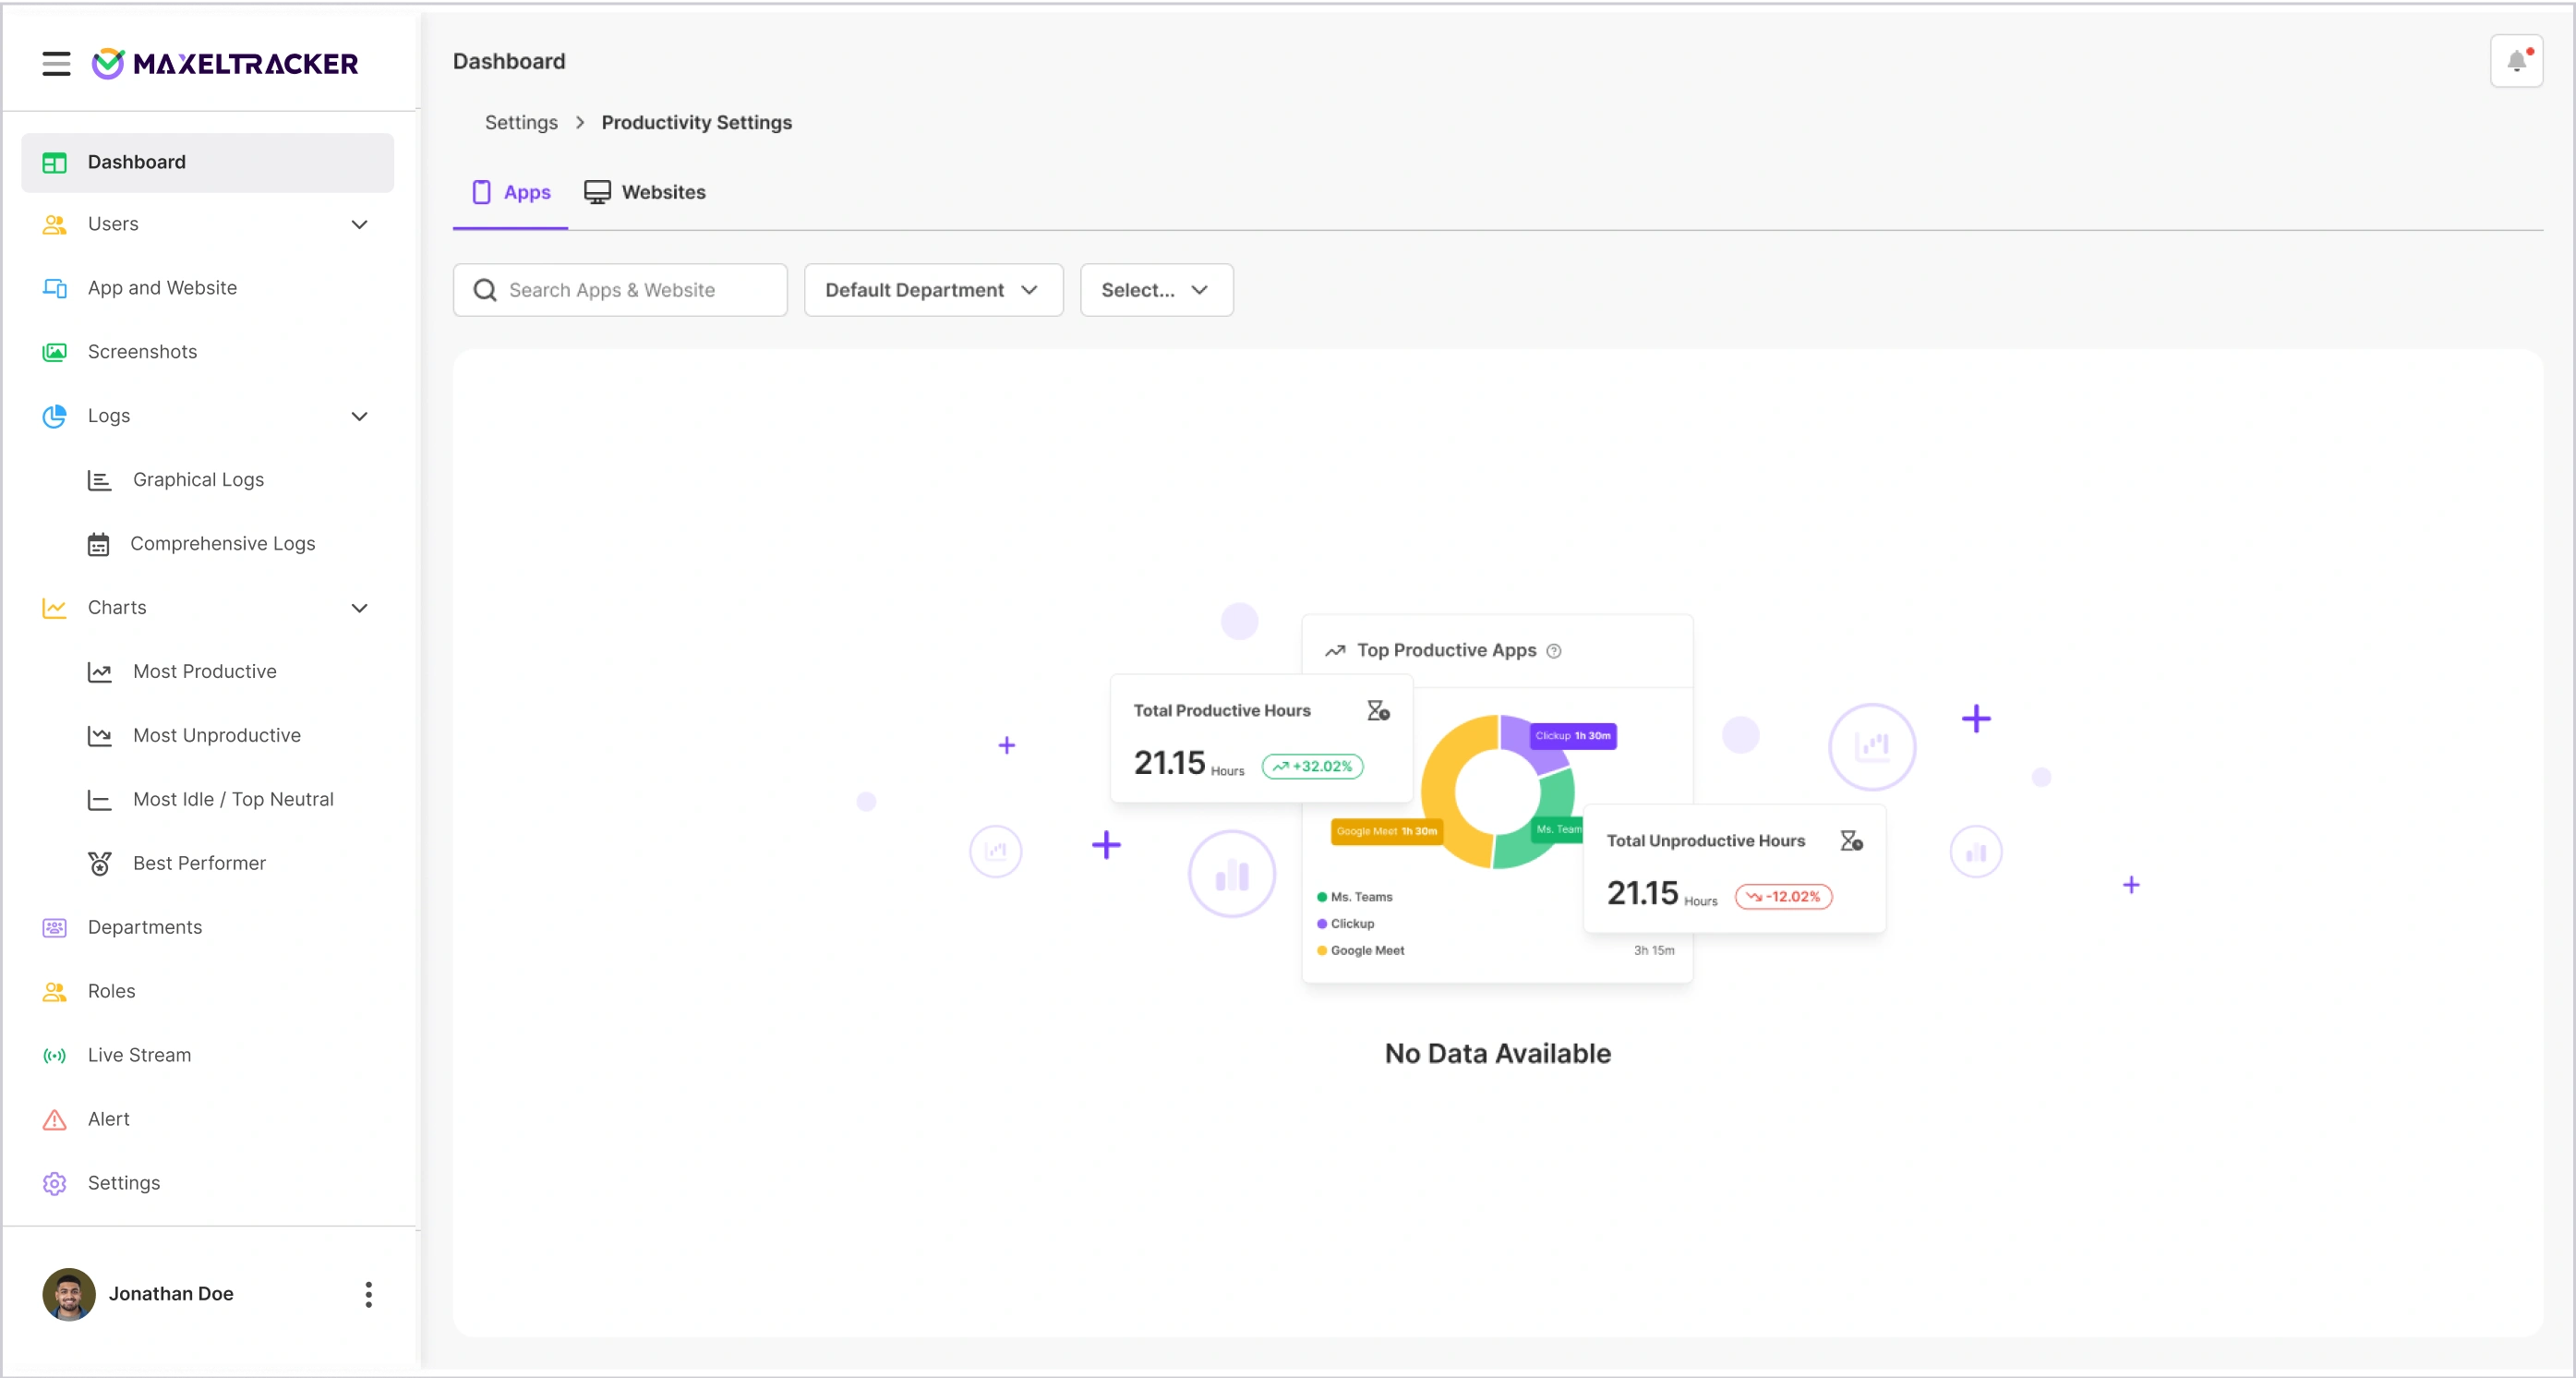
Once the app is installed, MaxelTracker will automatically detect apps and websites used. You can then view data and update productivity settings based on tracked activity.
Note: No data will appear until employees are added and actively tracked. If you don’t create a new department, all employees of the organization will be placed in the Default Department.
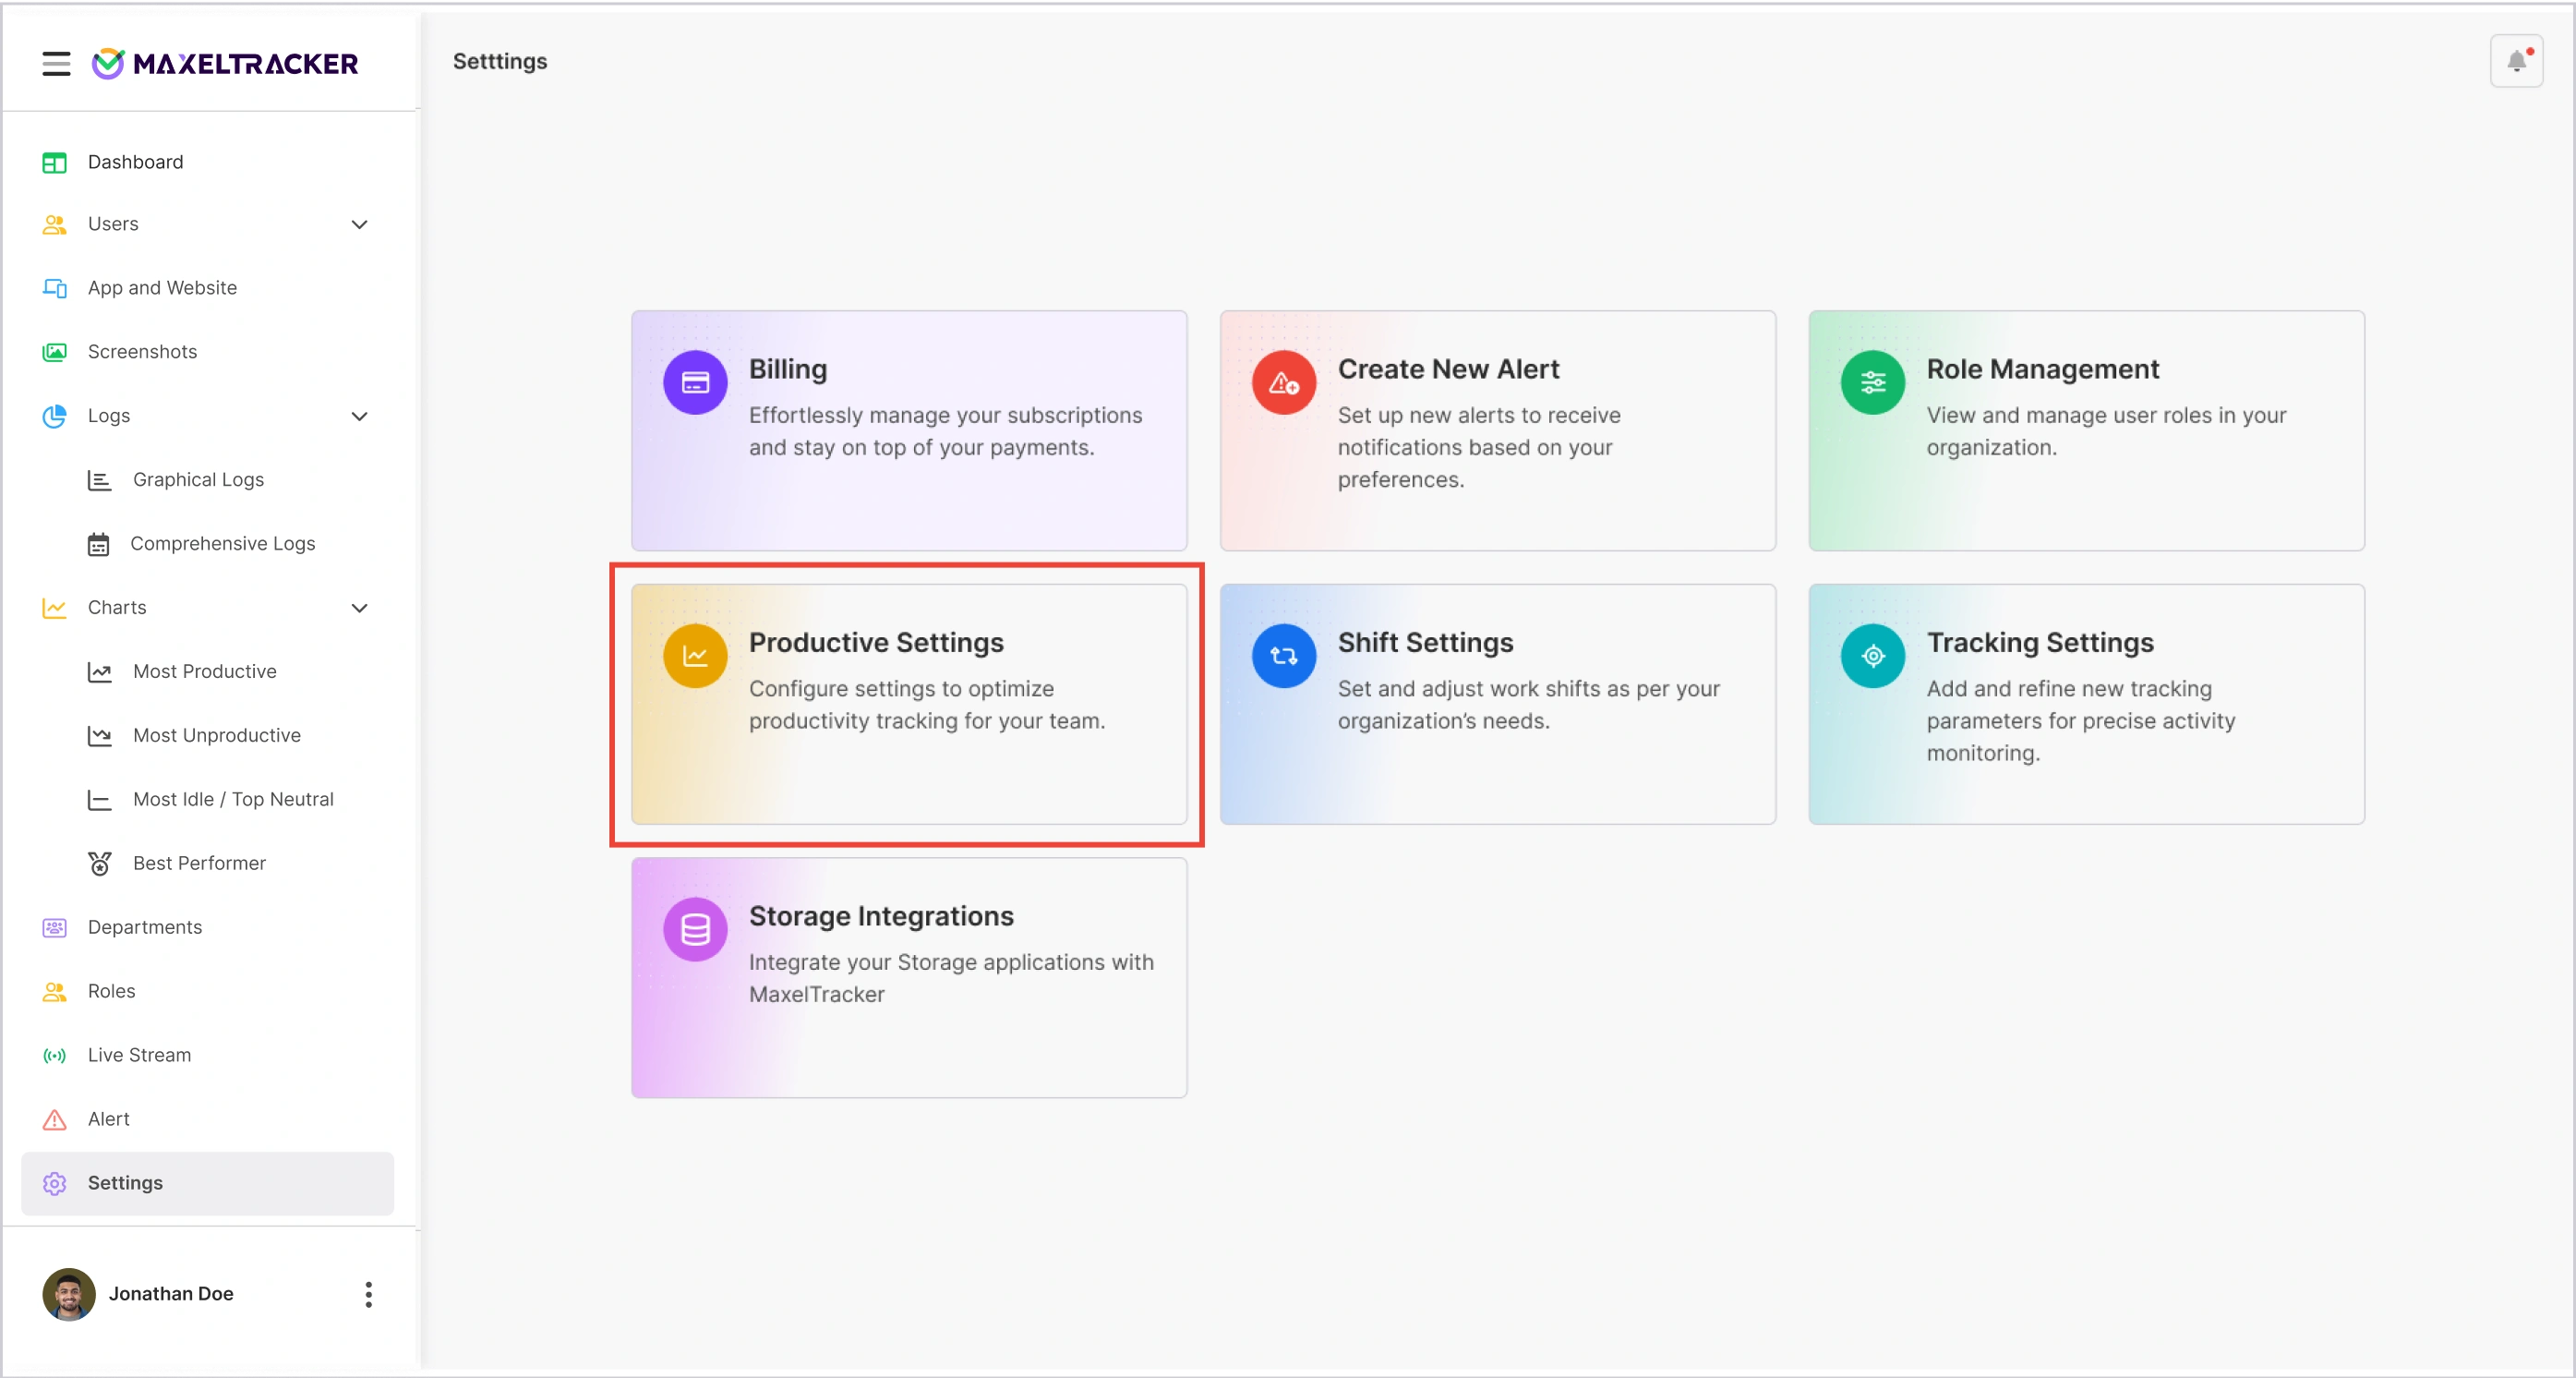
Once your departments are created and users are added, go to Productivity Settings
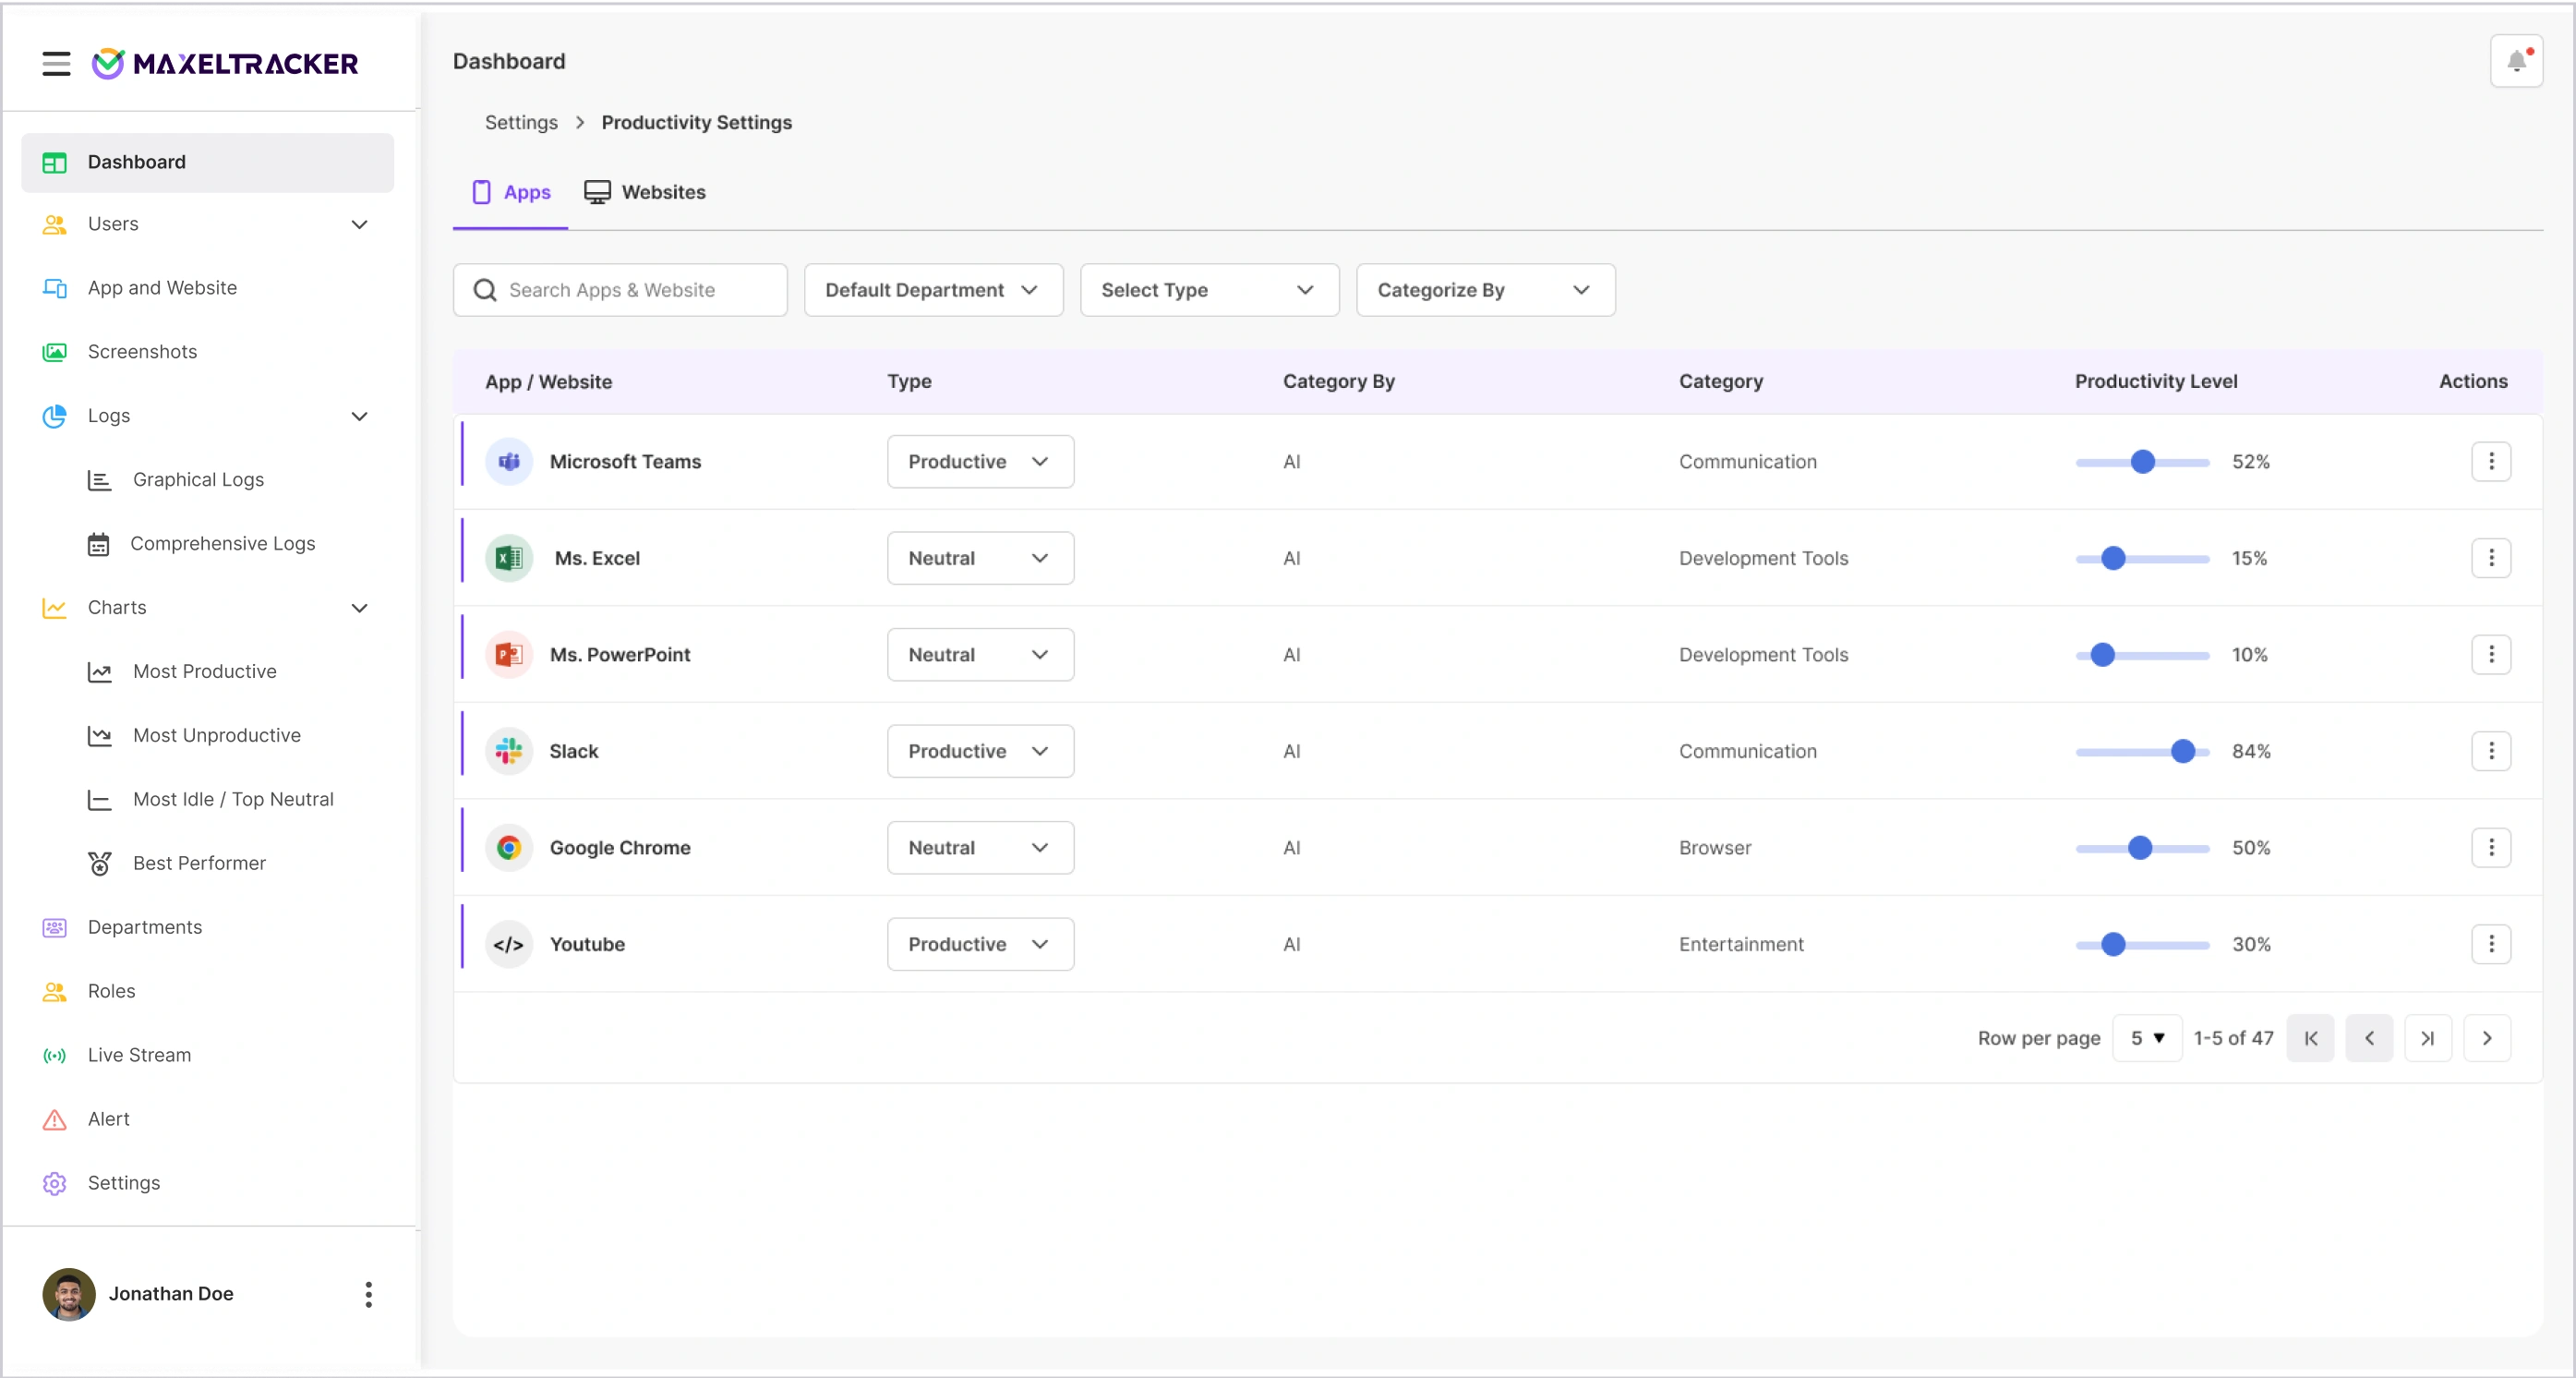
Choose the department for which you want to define productivity rules, such as Marketing, Sales, Development, etc.
For the selected department, mark which applications and websites are considered Productive, Unproductive, or Neutral. This allows you to tailor productivity tracking according to the team’s responsibilities. Example: Slack may be productive for Marketing but neutral for Development.
Once you’ve categorized tools for that department, click Save to apply changes.
Repeat the steps above to configure productivity rules for other departments as needed.
Note: These settings will directly influence how productivity scores are calculated and displayed in department-wise reports.
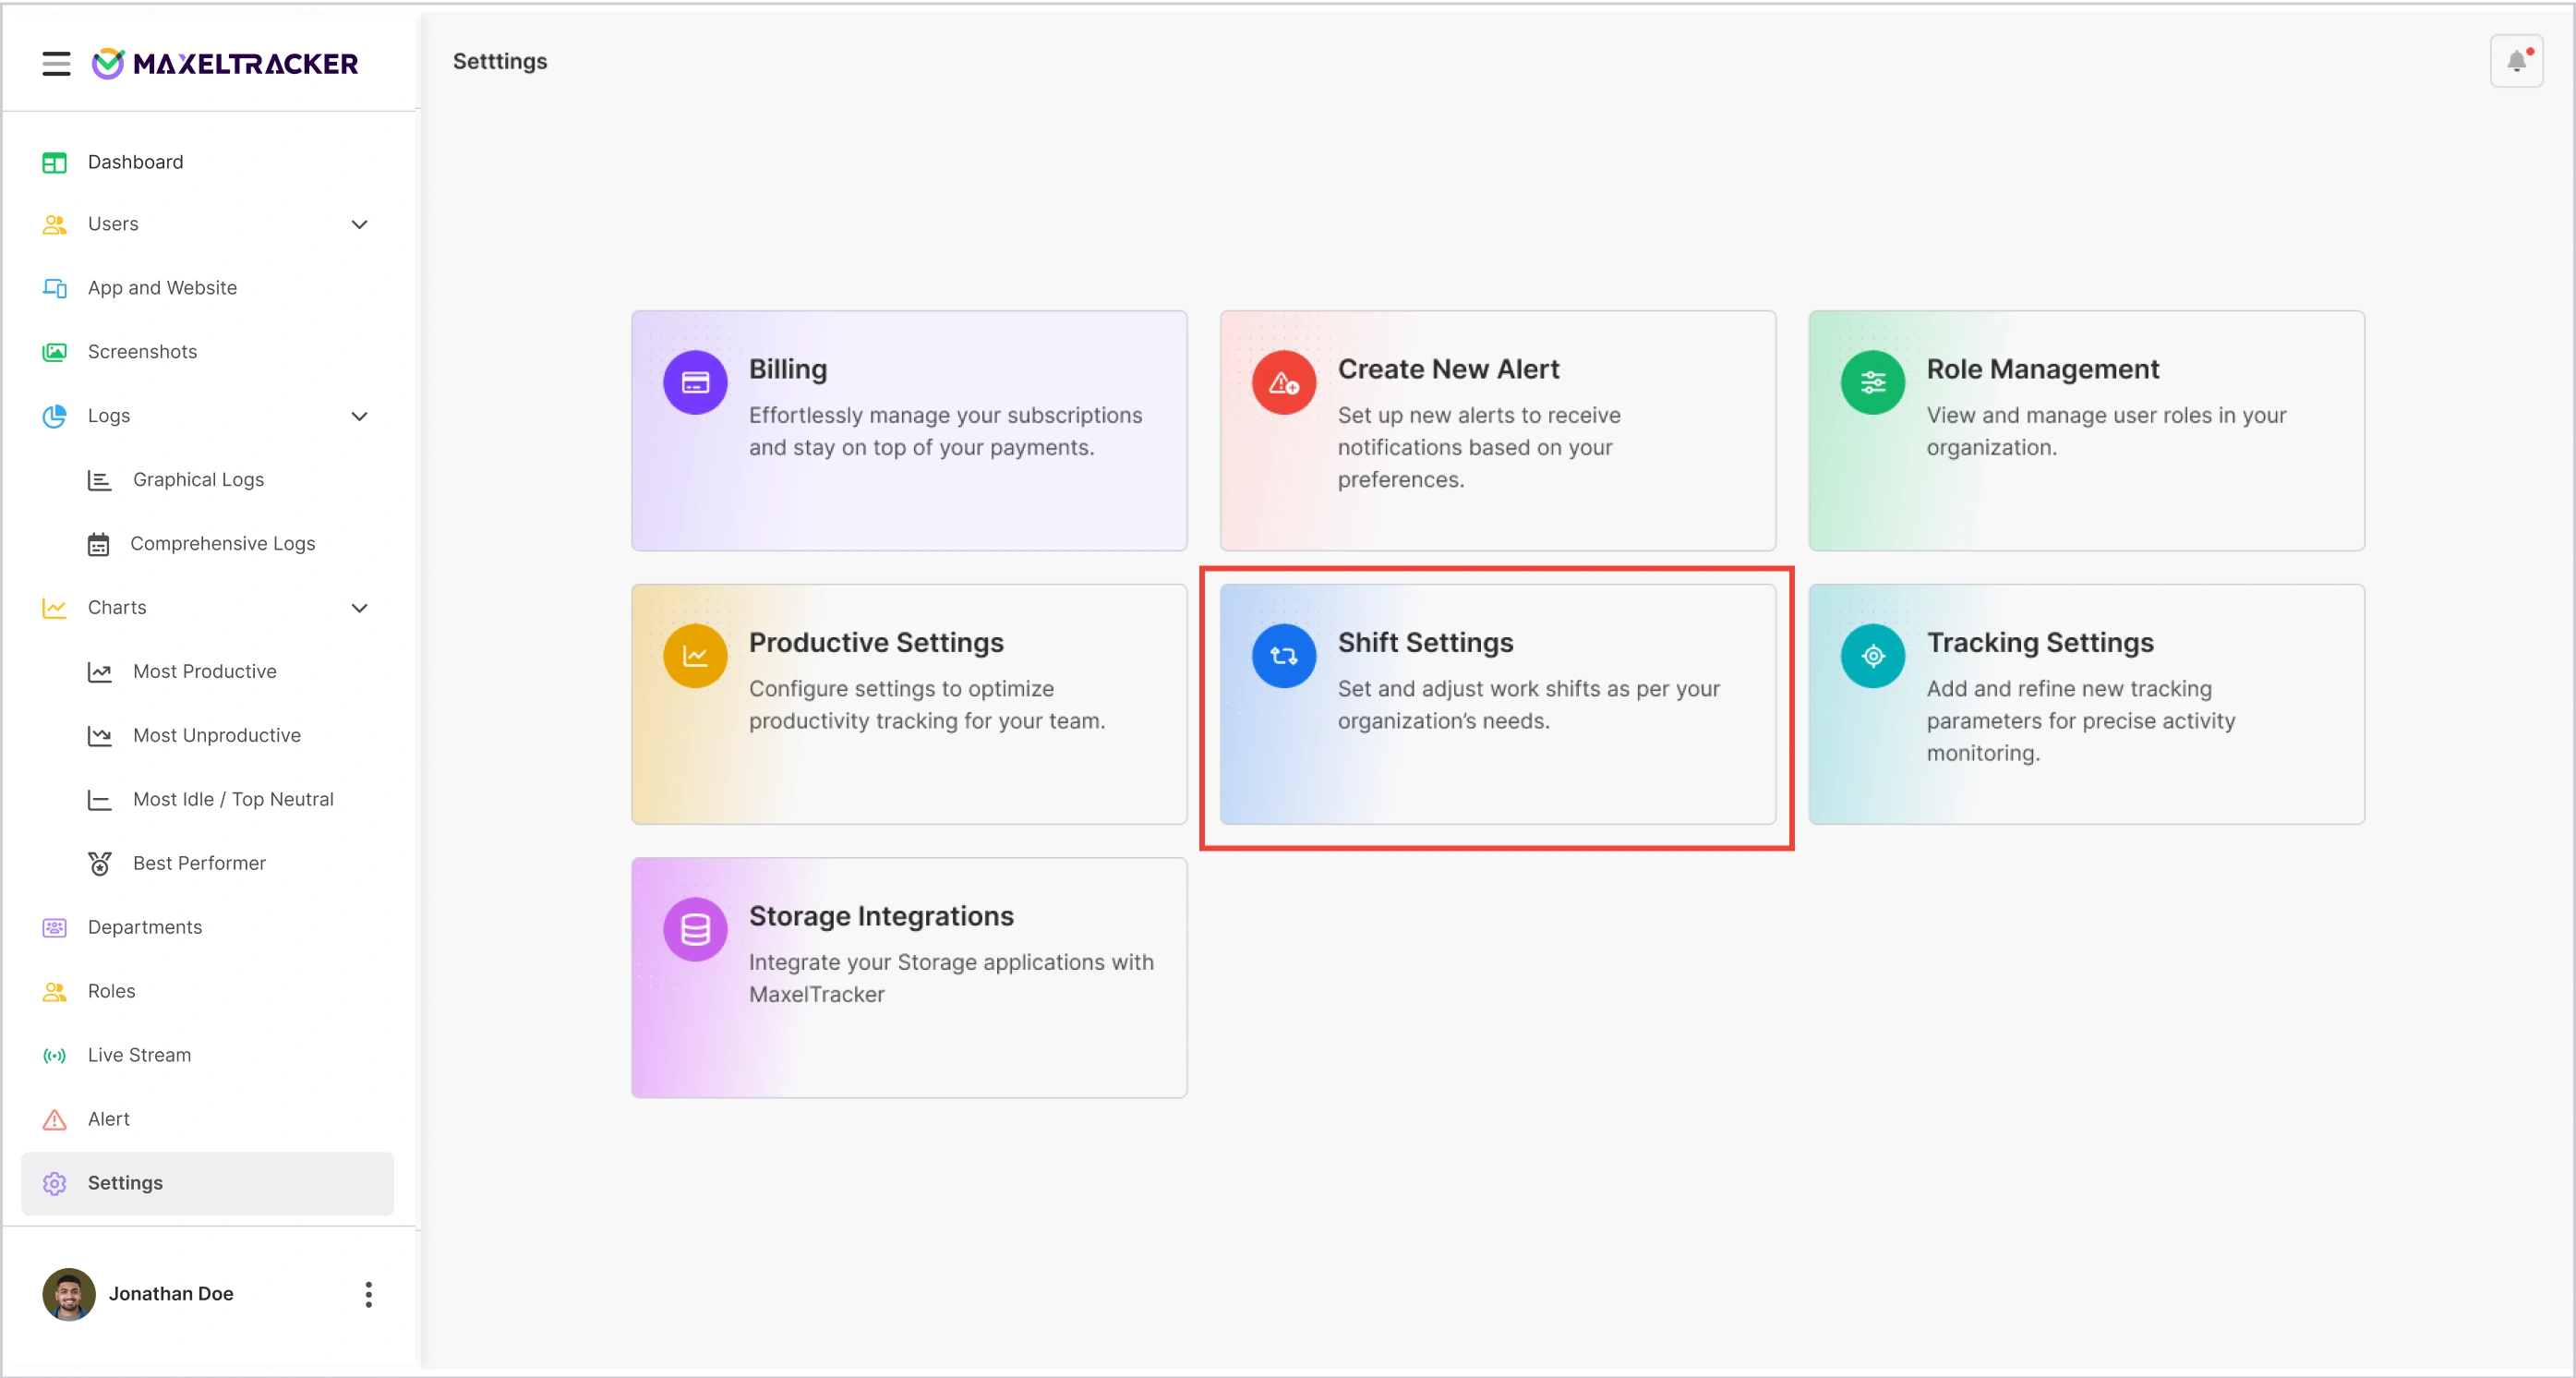
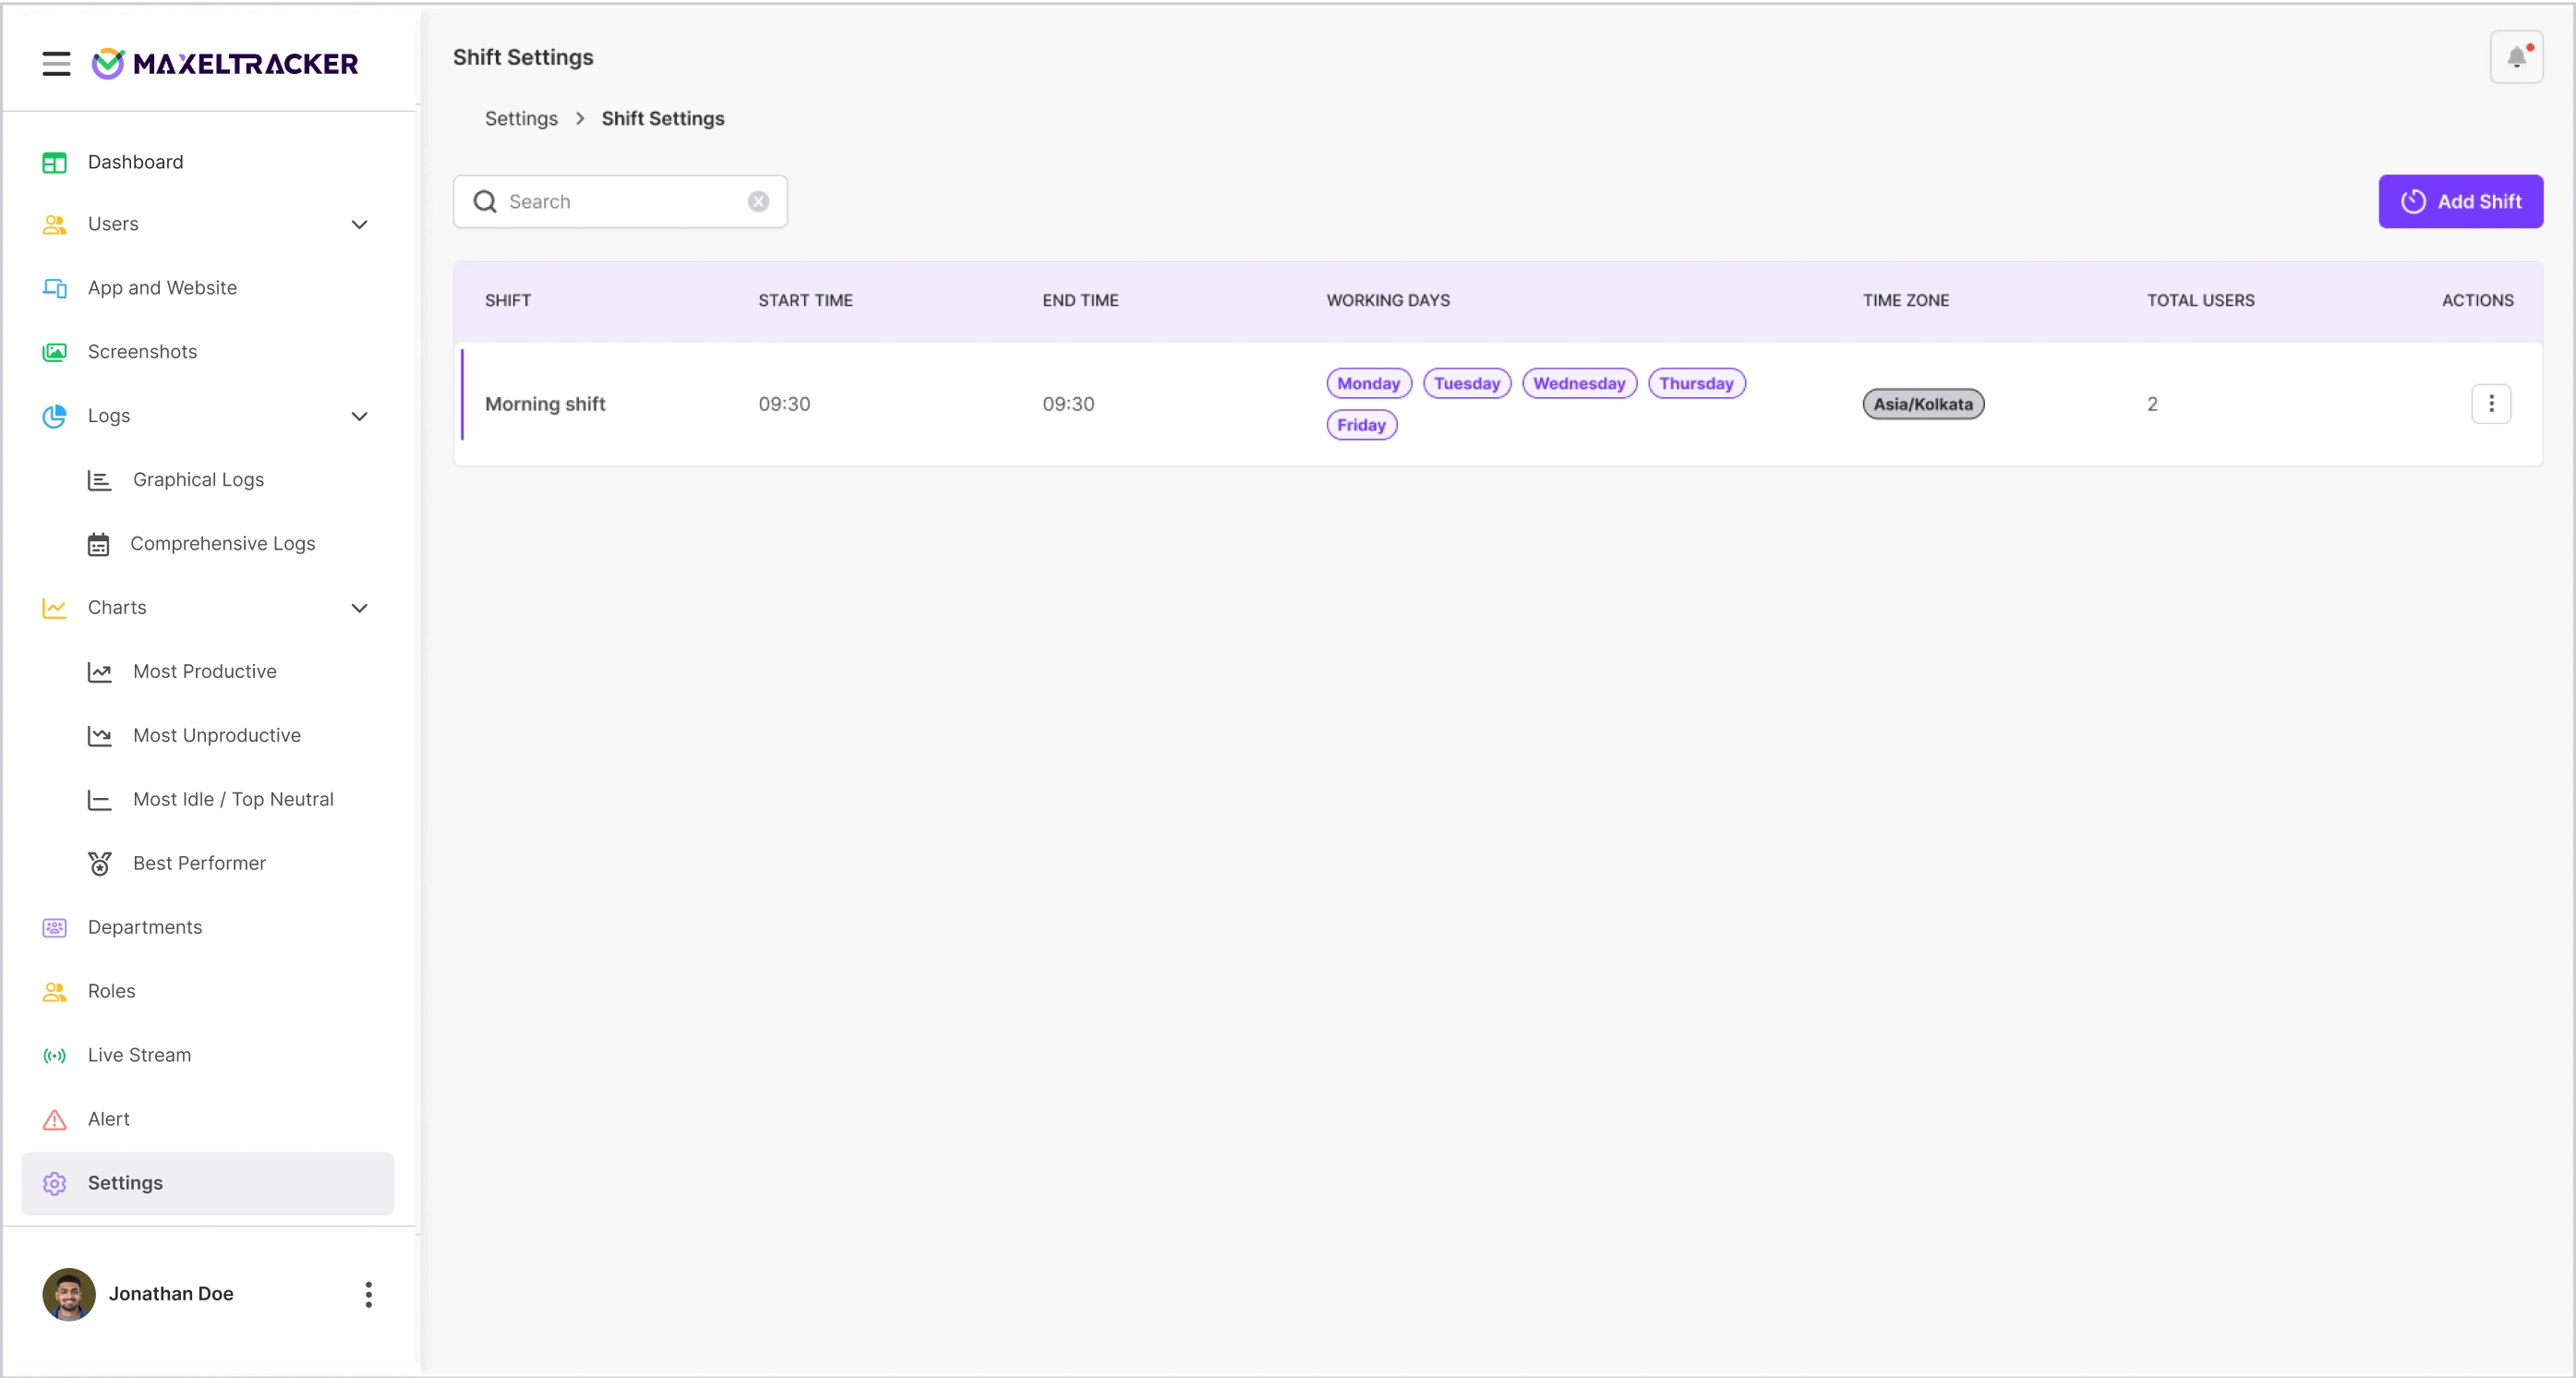
Under Shift Settings, you can set up working hours, break times, and shift schedules. This is especially helpful if you have remote, hybrid, or shift-based teams, ensuring that productivity is tracked according to actual work hours.
Under Tracking Settings, you can refine how MaxelTracker monitors activity. You can enable or disable features like screenshots, app logs, and geo-location tracking. These options can also be customized for different roles or departments to suit your organization’s preferences.
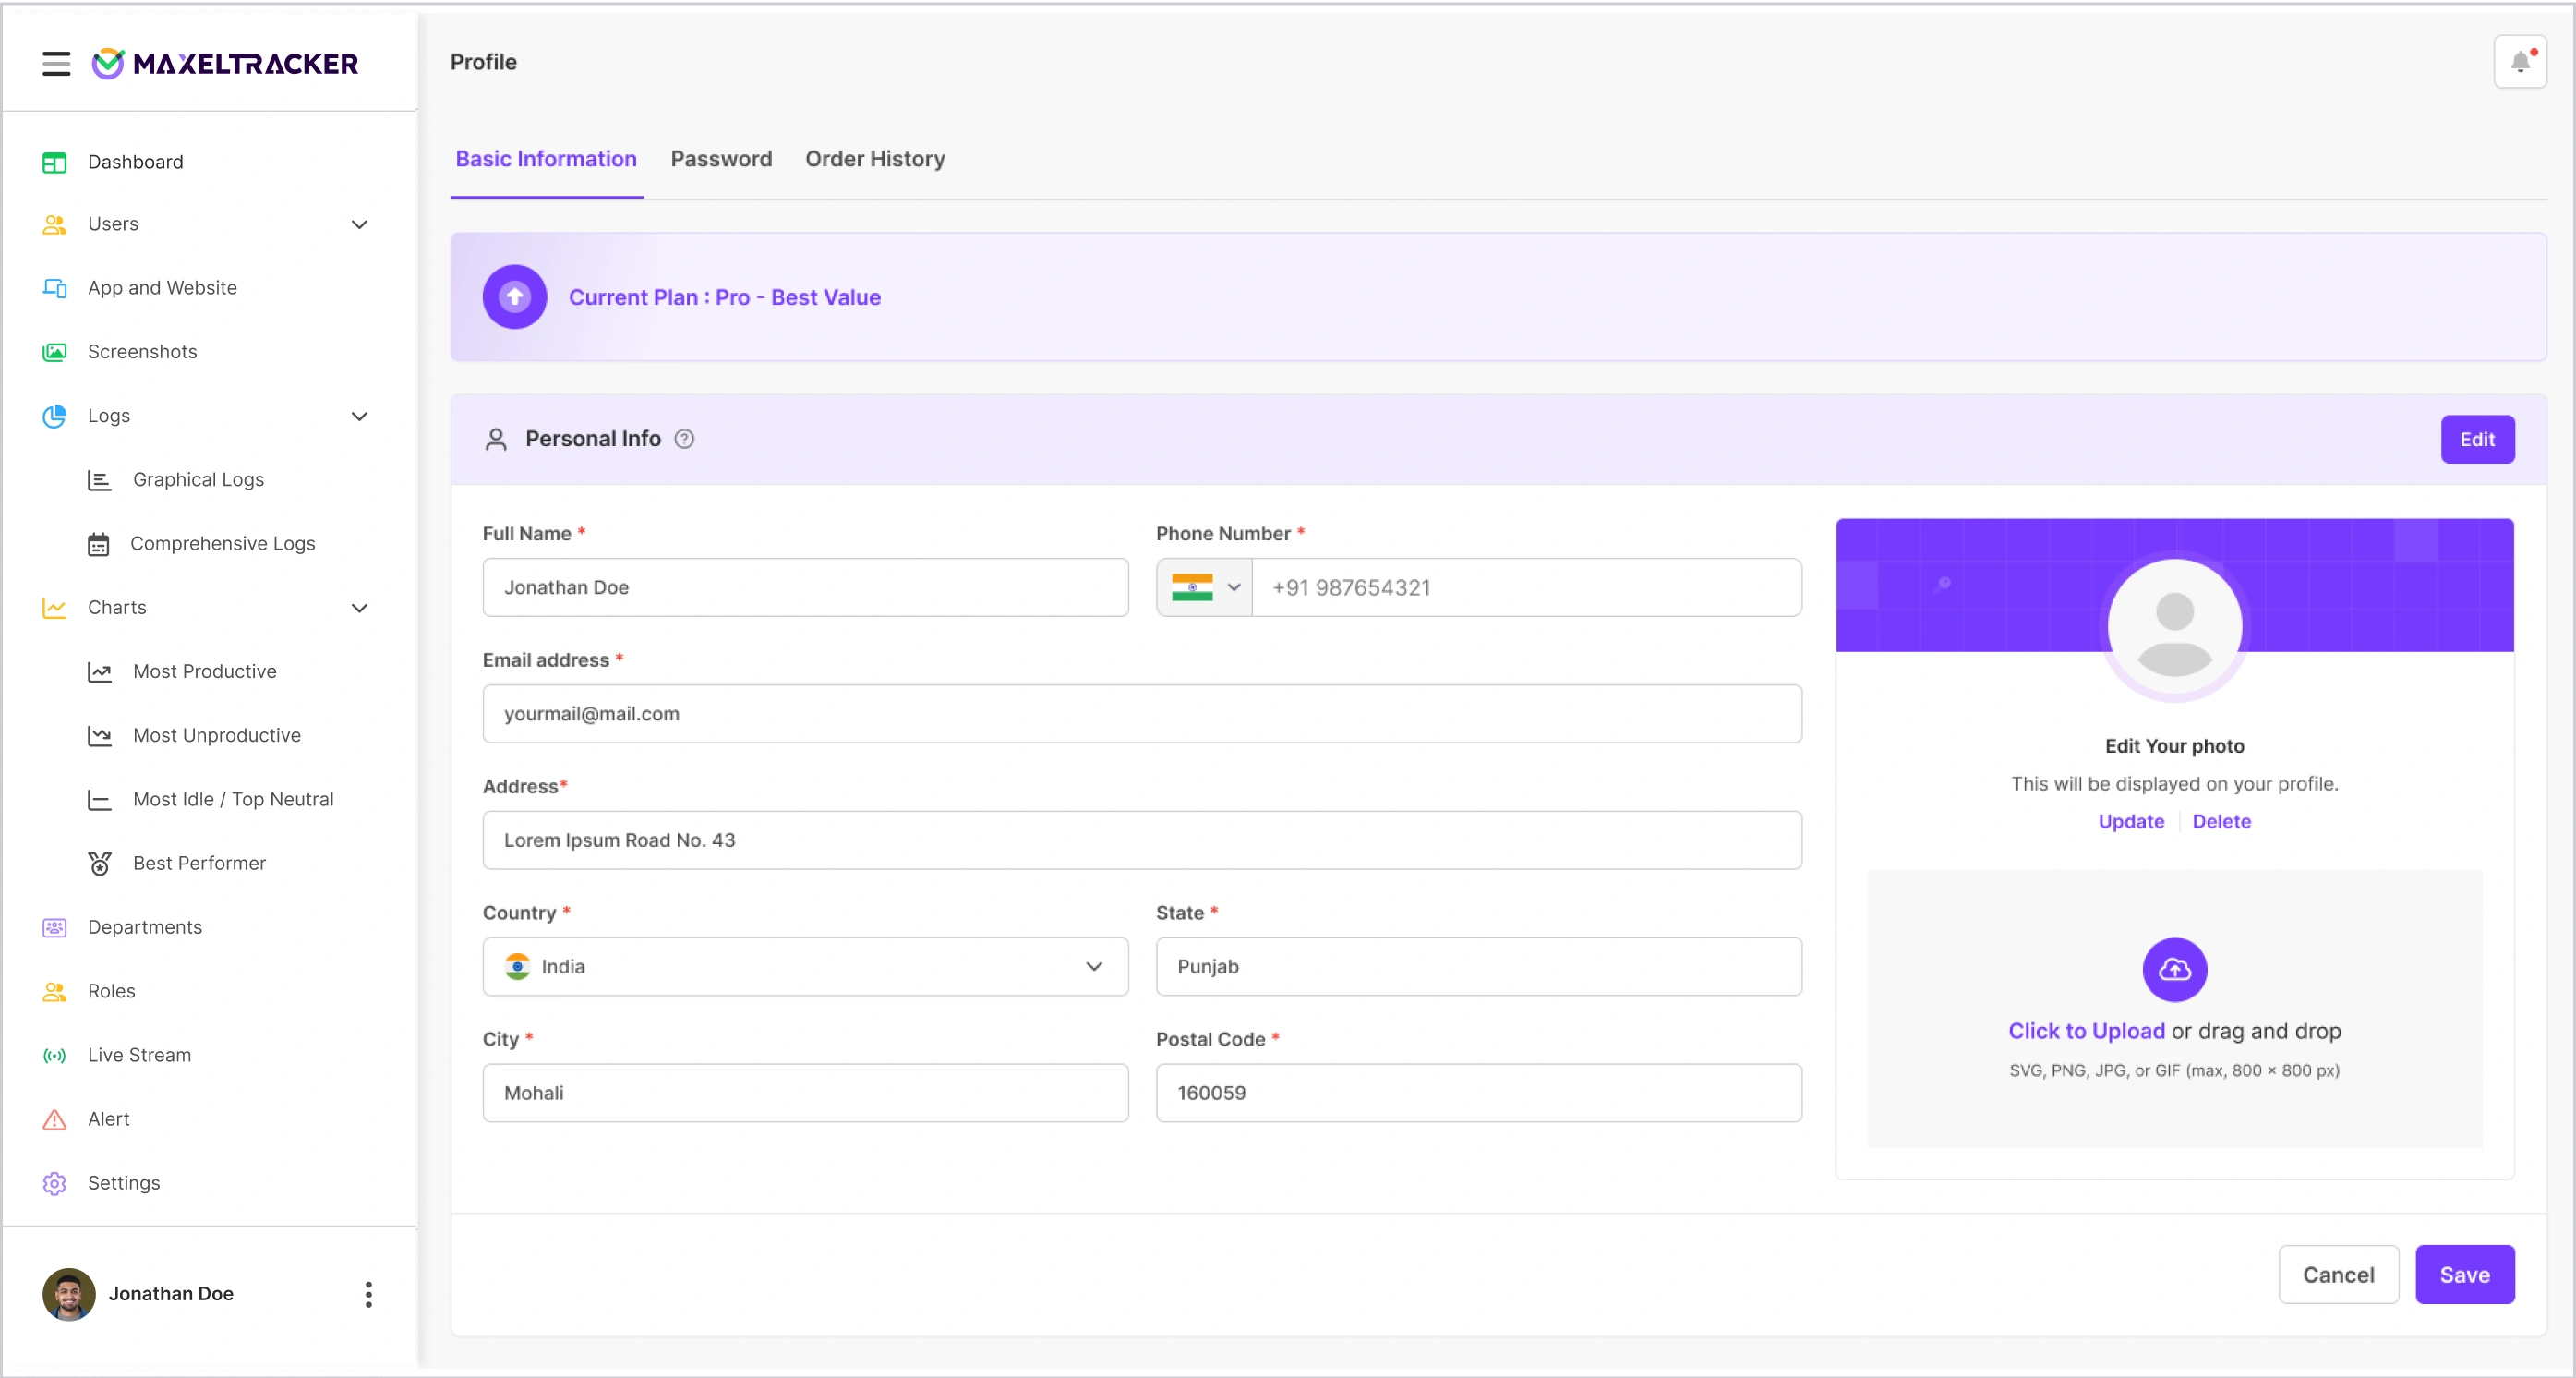
To update your personal details, click on your name at the bottom left and select Profile. From there, you can add or edit your name, phone number, address, and upload a profile picture. You can update your change organization password, view order history, and see deleted users.
MaxelTracker is Available for